
You likely have the free IrfanView already installed on your PC, but did you know that it has a very usable collage maker? I use it for such projects as making a collage of photos for my desktop background and for showing all the homemade birthday cakes that my 16-year-old grandson has received. Here is that example:

Let’s Give It A Try
1. Open IrfanView, click on “Image”, and then on “Merge images (Simple Panorama image)…” as shown below:

Don’t let the words “Simple Panorama image” fool you. I don’t consider the birthday cake collage above to be “simple”, but that’s just me.
2. Next, you will see this Window:
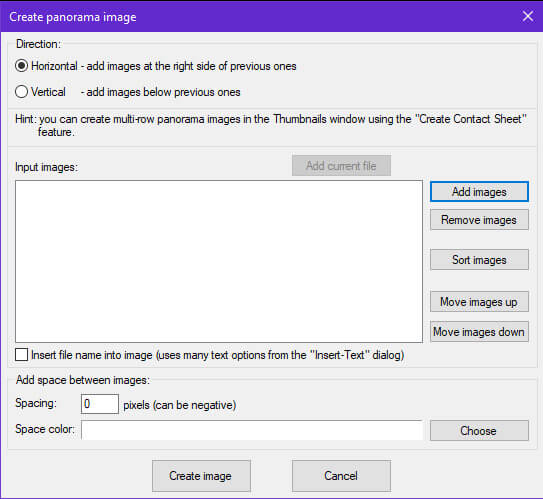
Choose whichever direction you want the collage – “Horizontal” or “Vertical”. You can read the “Hint” they give you, but you can also create multi-row collages using this page. In the above example, I chose horizontal because I plan to make each horizontal row collage separately and then put all the rows together in a vertical stack collage for the final product.
3. Next, click on the “Add images” button shown above and add the images that will make up the first row. Below is what mine looks like. If this row does not have them in the order desired, click on the ones you want to move and then click on “Move images up” or “Move images down” as appropriate.

4. Next, click on the “Create image” button at the bottom of the Window above and you will see a horizontal collage of the photos you just specified shown below. Save this first row of the collage we are building with a name you will know like “Collage Row 1.jpg”. If all you want is one horizontal row for your collage, you’re done. However, in this case, we need four rows of four images each. So I repeat the above process for rows two, three, and four, each one being saved with its appropriate name.

5. Now there is only one more step to put it all together into our collage of four photos per row stacked vertically four rows high. Go back up to Step 2 above but instead choose “Vertical”. This time, add the four rows created above in proper order and save it as your finished collage.
I told you it wasn’t a “Simple Panorama image”. However, after using this method a few times you will find it works just fine.
Your feedback on this article is welcome. Please use the Comments section below to respond.
—