 I don’t mind saying I’ve been backing up since day one. My first computer was a 486SLC. It only had a floppy drive and that’s what I originally used. They would only hold about 1.4 MB of data. At the time, you really didn’t need more than that. For files too large to fit on a floppy I used a program called Axeman (no longer available), and HJ-Split, which is still available.
These days, with DVD burners and flash/external hard drives, there isn’t much need for splitting files. For document backups I still use CDs and DVDs. For full system image backups, I have a Verbatim Store ‘n’ Go external hard drive. I also have a few laptop drives and two desktop SATA hard drives. It doesn’t hurt to have a few backups.
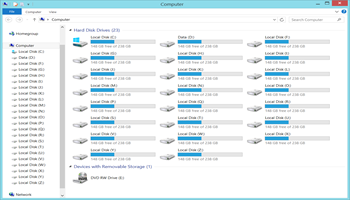
No Drive Letters
I use both Macrium Reflect and the Windows 7 built-in backup. Normally, I would just plug in my backup drive and run the backup program, but this time when I plugged it in, the drive did not show up in Windows Explorer. I tried the other hard drives and had the same problem. Flash drives worked perfectly.
So, I went to the Start Button and Right-clicked on Computer in the Start Menu, then clicked on Manage. Then I clicked on Disk Management in the Computer Management window. The drive(s) I plugged in were listed but, for some reason Windows did not automatically assign a drive letter.

AutoMount
So, online I went and found this simple solution:
Open up a Command Prompt (Run as Administrator) and type the following and press Enter after each line:
- diskpart
- automount enable
- exit

If done properly, you should get the message: Automatic mounting of new volumes enabled.
I don’t know why or how this happened, but luckily it was easy to fix. If your drives still don’t show a letter, then unplugging and re-plugging them in should work.
Note: Be certain the drives aren’t active when you unplug them. That’s a good way to lose data.
—
How to fix: Drive Not Listed?
Until I run Disk Management/ Rescan Drives an internal drive does not appear under Windows 10. G
I’ve come across this problem too, but my problem was caused by windows failing to get a free letter for the unit… Automount was on but I nedded to go to disk manager to “give” a letter to the drive.
I’ve solved it with Nirsoft DriveLetterView, I’ve cleaned a lot of devices that were not plugued anymore and the drive letter started to work.
I’ve changed to drive letter but with effect. 🙁 C
Thanks! Easy fix to a problem that had been bothering me for a while.
Dude, you are awesome!!!
Thank you, worked like a charm.
Thanks for the comments. Unfortunately, these procedures don’t work for everybody. Remember to “Run As Administrator”. If it’s not working try it in safe mode (to cut down on any other interference especially from security programs), otherwise as already suggested you might need some third party software.
I have two 3TB external drives. I plug one in and use Disk Management to specify it as G:. Then I plug the second one in: , doesn’t show up in Windows Explorer, click on “safely remove” and it shows up but does not have a drive letter associated with it.
Unplug the first drive, plug in the second one. Shows up normally as G:. I change its designation to H:. Then plug in the first drive. It behaves just as the first drive had — doesn’t show up with a drive letter.
I unplug the second drive (that I specified as H:) and plug in the first drive (that I specified as G:). It loads normally … except that it is now H:.
I would like to have both drives (1) remember their letter designations and (2) be able to be mounted at the same time.
Suggestions, please.
One of the first things I would try is running chkdsk on all of the drives. The second thing I would try is uninstalling the drivers in the Device Manager. You might have to plug in the drives first to see them. Make sure you set a system restore point first. If you are really desperate there is a utility here: https://www.cherubicsoft.com/en/projects/usboblivion
Read the info on the site. It’s designed to remove all traces of all drivers and when you plug your drives in again it will reinstall fresh new copies of the drivers. In theory. Again backup first.
It needs to check which “drive letter” has “dvd/cd” ROM.
He occasionally switches on and switches off and enters confusion