
I know I have covered several nuances regarding Bullets in Word 365, but I have saved the best for last! And the best is that you can create your own custom bullets. It really is kind of fun to do – just don’t get carried away with it. We always strive to make our work more professional looking after all.
Follow the steps below to learn how:
- On your Home tab, in the Paragraph group, select Bullets.
- In the Bullets list, click Define New Bullet to display the Define New Bullet dialog.

- In the Define New Bullet dialog, Symbol will open the Symbol dialog, and from there you can select a symbol for your custom bulleted list:
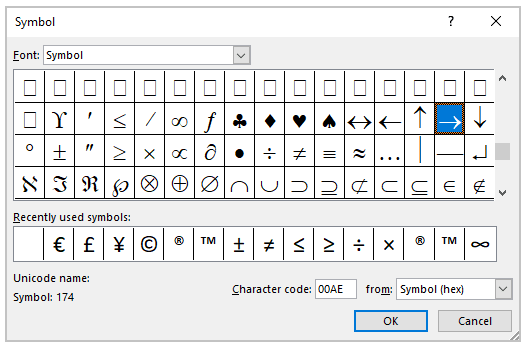
- You can select any other font in the Font list if you prefer to choose another symbol from that font, (i.e., Square).
- You can use the Picture to select a picture from a file or from the Internet and use it like a bullet.
- Font will open the Font dialog, where you can change the color or style of your bullet symbol, (i.e., bold, italic, strikethrough, etc.).
- The Alignment list can set the distance from the left, centered, or right margin where Word places the number.
- Word will show the chosen symbol as a bullet in the Preview zone.
- Click OK to implement your new bulleted list.
Go ahead and play around with it. I think you are going to have a lot of fun making new lists now eh?
—