Lately, I have been writing articles on Facebook and today is no different. You can find some of the articles I have written here.
- How To Turn On Facebook Profanity Filter (Updated)
- How To Add Payment Method To Facebook Ad Account
- How To Turn On Facebook Dark Mode
- How To Schedule Posts On Facebook Page
- How To Reschedule A Facebook Page Post
This time I wanted to share how you can get help increasing viewership to your posts from that Facebook page. It is very important in social media to get in front of as many potentional customers/fans as you can. I know many of us small business owners or even content creators don’t have massive budgets for running ads (yes, boosting your posts is considered an ad cost), but I have found that it doesn’t cost much to boost your posts on Facebook. I spend between $1.50 and $3.00 a post when I’m running one of these. If you want to spend more then that is your choice but these amounts are within my budget. In this article, I’m going to show you how you can set up a boost on one of your Facebook Page posts. Time to pull out those computers (which you are probably already on) and get this business lesson started.
How To Boost Facebook Page Posts
As you might have guessed, we are using my laptop and going to Facebook.com.
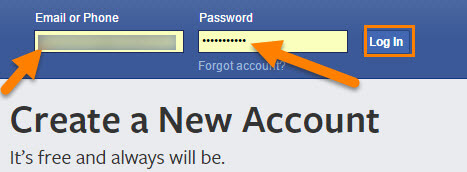
Step 1: Log in to your Facebook account that is connected to the Page you wish to work on.
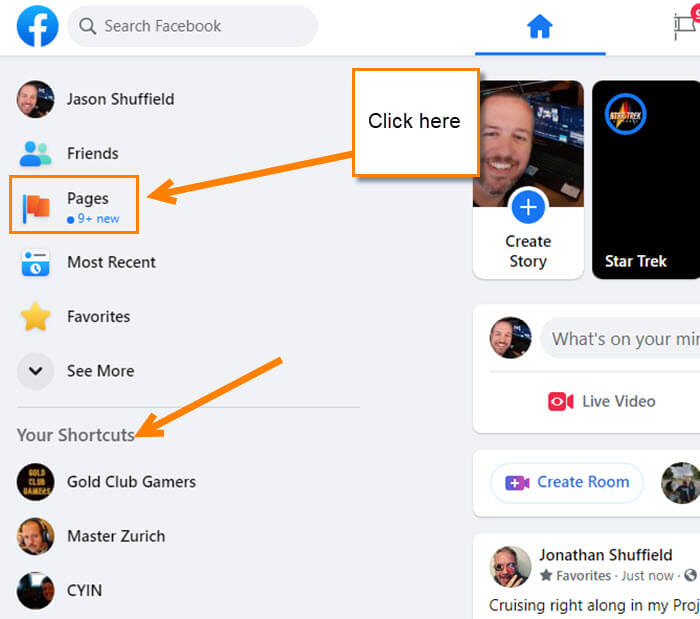
Step 2: Now that you are logged in, look to the left menu. You can get to your page two ways:
- Look under shortcuts and click your page
- Click the Pages options
Pick either one and click the Facebook Page you wish to boost a post on.
Step 3: Once on your Facebook Page, look for the post you wish to Boost. If you are able to boost that post, it will have the blue Boost Post button under it. Click it.

Step 5: Here is the Boost Post screen. You can adjust many settings to boost the post. At the top, you have your Goal. I leave this on Automatic but if you wish to change it click the Change button. For this article, we are leaving it alone. Next, you have the Button option. This lets you choose a button (Call to Action) to have it appear on your Boosted Post:
- Book Now
- Learn More
- Shop now
You get the idea. When choosing one, you might need to give some information to have the button work right (phone number or website address). Choose one and move on.

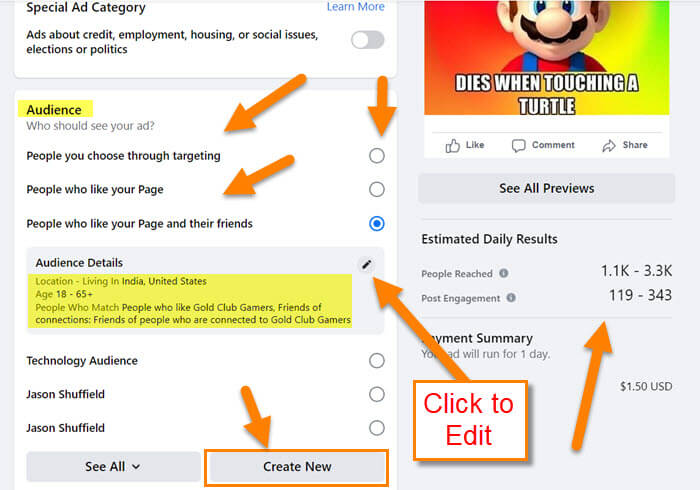
Step 6: Time to choose the audience for your Post. You might have some set up already. Here are a few:
- People you choose through targeting
- People who like your page
- People who like your page and their friends
You will notice that you can even Create a New Audience if you wish. To do that, click Create New button. If you choose an audience that is already here, you can edit it. Click the pencil icon on the one you selected.
Click the circle to the right of the Audience to select.
Edit Audience Option
Step 1: The first option they give you on the edit screen is to Select Gender and Age. Choose men, women, or both. Next, adjust the age by moving the dot on the age bar to your preferred range.

Step 2: Next you need to choose a location like the United States or even your local area. To do this, type in the location and it will give you choices. Select the ones you want.

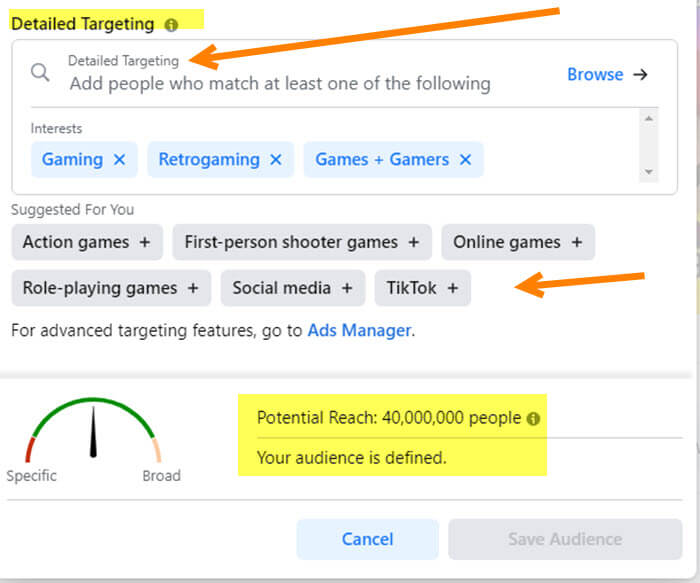
Step 3: Now they will ask about the Detailed Targeting. This pinpoints the audience’s interests like Gaming or Computers. Search here and select all that apply. Once that is done, click the Save Audience button at the bottom. Done!
Back On Track
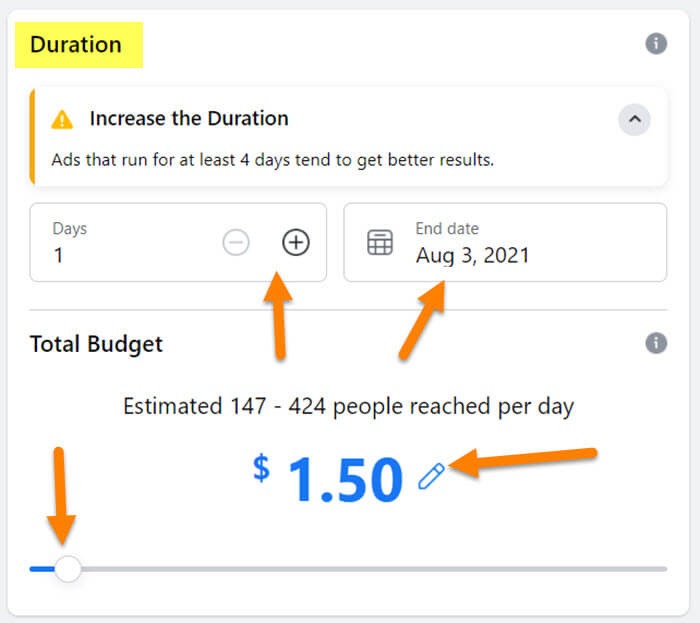
Step 7: Now that we figured out the Audience part, it is time for the Duration and Cost part. Here you can choose how long the Boost runs and how much you are willing to spend. Change days by clicking the plus or negative sign and change the date by clicking in the date box. Below that, you can change the Total budget by clicking the pencil icon or moving the dot on the line. I prefer to adjust it with the edit pencil since it lets me key in the amount.
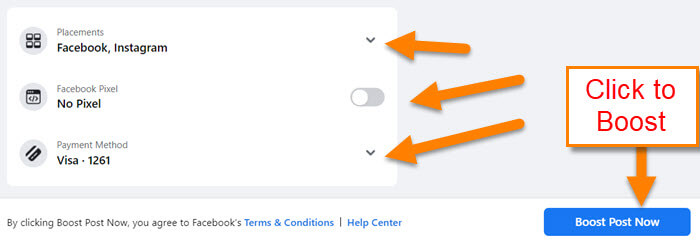
Step 8: This is the last step in boosting the post. Here, you can change the Payment method and placement. (Not sure about the Facebook Pixel but that is an option I never touch.) Once you have this as you want it, then click the blue Boost Post Now button at the bottom right. Done!
Side Note: They show you on the right an estimate of what you will get from your boost with the settings you have entered. Nice to be able to see that.

Now you know how to get more people seeing those awesome posts. Sometimes you need to spend a little to get a lot (not sure if that is a saying but it works for me). Remember to share your new knowledge.
—