Microsoft is adding more and more functionality to the Snipping Tool app in Windows 11 and the most recent additions include OCR and a “Redact text” feature.
NOTE: These new features are currently available only in Windows 11 Insider builds but will be rolled out to all users soon.
OCR (Optical Character Recognition) allows users to copy text from within images and paste it anywhere. Here’s how:
Extract Text From Images
For a new screenshot, press the key combination Win + Shift + S and then take your screenshot.
To import an existing screenshot/image, launch Snipping Tool via the tool Start > All Apps, click the three little horizontal dots at the top right, and select Open file (or press Ctrl + O). Then navigate to and select the image:

With the screenshot/image open in the Snipping Tool, click the Text Action button. Highlight the text you want to extract, right-click the highlighted text, and select Copy (or press Ctrl + C).

From there you can now paste the selected text anywhere you want.
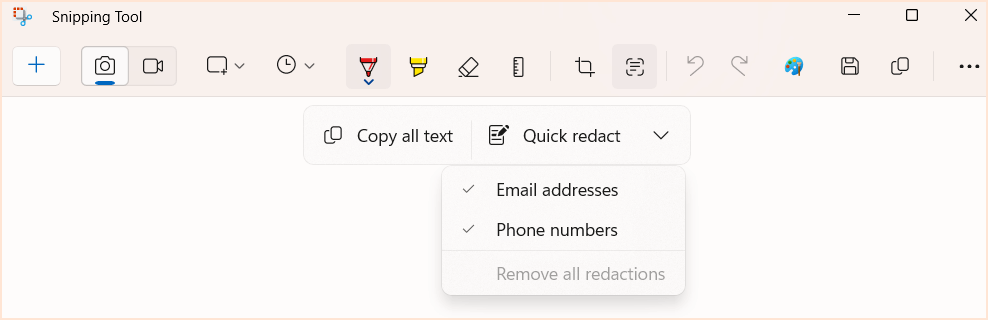
Redact Text
Snipping Tool’s redaction feature is designed to protect sensitive information that might be included within a screenshot. Right now, redaction options cover email addresses and phone numbers only. Expand the dropdown menu associated with Quick redact and choose whichever option is applicable:
With its ongoing development, Snipping Tool in Windows 11 is becoming more and more useful. However, in my opinion, it won’t compete with free 3rd-party alternatives until it includes its own comprehensive editor.
—
I get the same snipping tool with Print Screen and it’s easier to press one key than wrap my fingers around three. I look forward to seeing the OCR function soon. When it shows up, I’ll now recognize it right away.
Hey GG,
That’s fine provided the PrintSreen key is not being used by another program. On my systems, for example, Snagit rules the PrintScreen key. The key combination provided in the article will work for everyone, regardless.
That’s a fact Jim. For some reason that didn’t work as the default with PikPic when I went in to customize those hotkey settings. One day not long ago I forgot to press Ctrl when I pressed Print Screen and discovered the Windows clipping tool. That must have been the reason I couldn’t set Print Screen as the Hot Key for Capture Region in PicPik.
Yep, that would have been the reason alright. Most screenshot capture tools like to use the PrintScreen key but only one can. 🙂
Too bad the Snipping tool doesn’t work on my machine without having to go into ‘Services’ and start and restart a few items there. I don’t need any amateurs telling me kindergarten junk on how to fix it. M$ can’t even figure out why it keeps losing its settings.
Tried it. Had limited success. If the text is too small, I get “This image is too small to scan for text”. Now, if I include some dead areas with my clip, the OCR works OK. So, the limit is actually on the size of the area clipped, not the text size.
Could be handy. Time will tell.