
With just about everyone carrying a smartphone these days traditional cameras have become pretty much a thing of the past. The traditional camera is still in vogue with the professionals but for us causal happy snappers our smartphones will do the job. I am often asked how to transfer photos from a smartphone or tablet to a PC so here is a simple step-by-step guide.
Note: This guide relates to iPhones and iPads only, although the process is pretty similar for Android devices.
Transferring Photos From iPhone/iPad To PC
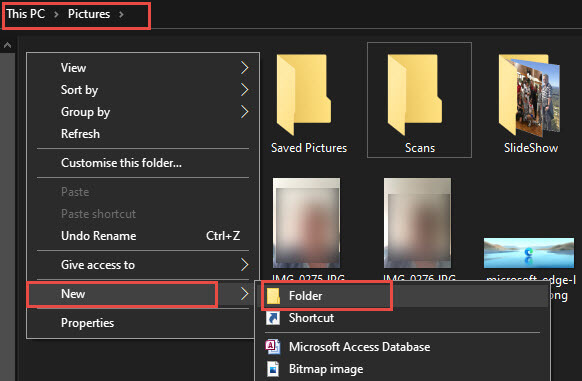
First off, I suggest you create a new folder on the PC in which to store the photos. Open the Pictures folder on your PC and create a new folder– right-click any blank space inside the Pictures folder, select New and then Folder:
Give the new folder an appropriate name such as ”Transferred from iPhone” or similar. Now we’re ready to connect the device.
Every iPad and iPhone comes with a charging cable and adapter. On one end of that cable is a Lightning connection which connects to the device and at the other end is a USB connection which connects either to the adapter for charging or to a USB port on a PC.

When connected to a PC via USB port, Windows will identify the device as external storage media. So, the first step is to connect the device to the computer using that cable. If this is the first time of connecting, Windows will install a device driver which should only take seconds to complete. Keep an eye on your iPhone/iPad screen and a message should pop up asking if you want to allow the connection.

Tap Allow and the connection will be completed. Now, on your computer, you will see the device listed under This PC.

Double click that entry and keep double-clicking until the photos open up. On my iPhone and iPad I have to double-click through Internal Storage, DCIM, and finally 100APPLE to get to the photos. You should then have all the photos contained on your device open on your PC. From there, it’s just a simple matter of dragging and dropping the photos from that folder into the new folder you created earlier.
NOTE:
- Holding down the left mouse button while dragging and dropping will copy the photos from the device to the folder on the PC. The photos will then be stored on both the device and the PC
- Holding down the right mouse button while dragging and dropping will present you with options to either Copy here or Move here. Selecting the Move here option will delete all photos from the iPhone/iPad and leave you with them stored on the PC only. This would be the preferred option if you are looking to free up storage space on the iPhone/iPad
Further Reading:
—