
Crazy I know, but Track Changes means exactly what it says. It will allow you to track any changes that have been made to a document. And these changes can be tracked if they have been made by you or someone else that the document has been shared with. It is able to show you the changes that have been made in different colors and those colors can be based on the author of the changes! Your Reviewing pane will show you a list of all changes and the name of the person who made that change. You can accept or reject specific changes. The caveat here is that you must have Track Changes turned on in order for this to happen.
Follow the steps below to learn how:
- On your Ribbon, go to the Review tab.
- Close to the center, you will see the Tracking group. To the left is Track Changes.
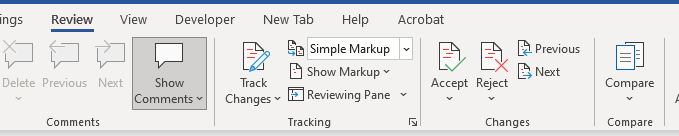
- As you can see in the screenshot above, Track Changes is not selected.
- Now the Track Changes button is divided into two separate parts – upper and lower parts. If you click the upper part it will turn on Track Changes and will from that point forward record all changes made to your document until you turn it off.
- Now the lower part! If you click the lower part of Track Changes, it will give you two options: one is to turn on Track Changes and the second is the option to Lock Tracking.
- Should you select this option, you will be prompted to create a password, which will prevent others from turning off Track Changes.
- Once you turn on Track Changes, it is, by default, turned on. All Markup is selected and you will start to see any changes that have been made to the document in different colors. Different changes will be shown in different colors and some will actually be a specific color for a particular editor. You will also see on your right-hand side a pane that shows formatting changes and the name of the editor. In your left-hand margin, you will see marks indicating where there have been insertions and deletions.
- To change which markup you see, you will simply need to select the drop-down to the right of All Markup. You will then see three additional selections: Simple Markup, No Markup, and Original.

- Simple Markup closes the panel on the right-hand side and will show only the changes in your document, as well as the insertion and deletion marks in the left-hand margin.
- No Markup shows the document in its current state, with all changes and no markup shown.
- Original shows your document in its original state prior to any changes being made.
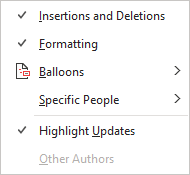
- Below the markup selection area is the Show Markup menu. Once you click it, you will see a list of options that you can utilize to customize exactly which markups you see.
Keep your eyes peeled for more on this subject, which will be coming up soon!
—