

If you were here last week, then you learned how to Auto-Clean Windows 11 Storage. You can find that article here:
How To Auto-Clean Windows 11 Storage
We are sticking with Windows 11 and teaching another useful tip. This time we are going to show you how to keep your eyes safe. That display could be hurting your eyes, and I want to show you how to tone down the color. Yes, there is a setting called Screen Tint that can reduce eye strain if you use it. With the time we spend on our computers, it is important to protect those eyes. Before we get into this lesson, make sure to check out these other article/lessons I have written for you:
- How To Check Performance Score Of Your PC
- How To Stop Edge From Slowing Your PC
- How To Quickly Find Your Mouse Pointer
- How To Clean Up Your Desktop
- How To Get Better Performance From Windows
It’s time to start the class and learn something new.
How To Turn On Screen Tint In Windows
This will be shown on my Windows 11 laptop.
Step 1: Log in to your Windows computer.

Step 2: Once on your Home Screen, click the Start Menu link (the one that looks like the Windows logo). After clicking that, find the Settings option and click it.
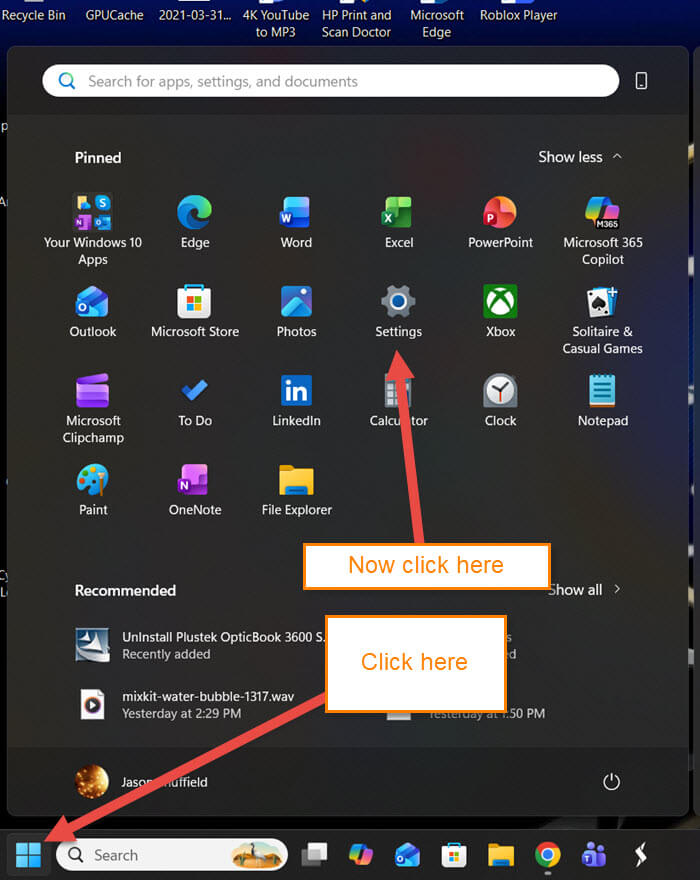
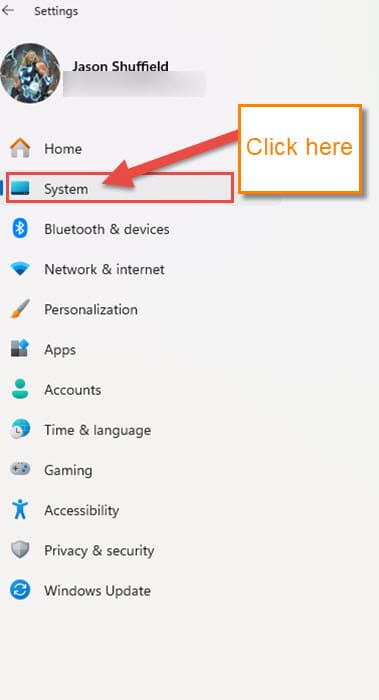
Step 3: On the next window, look at the left menu and find System. Click it.
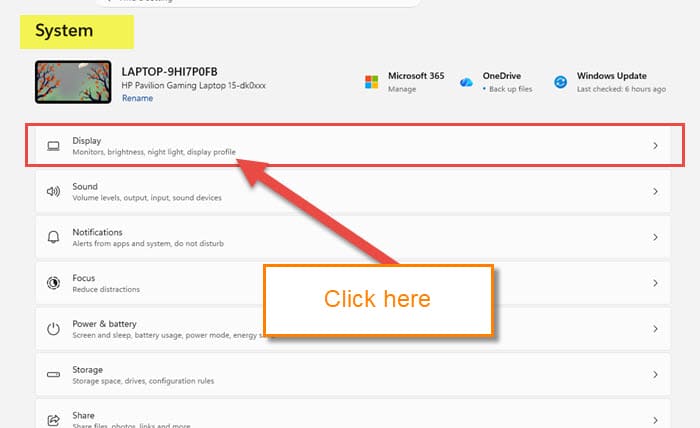
Step 4: Now we are on the System menu, and at the top you will see Display. If not, look down the list to find it. Click it.
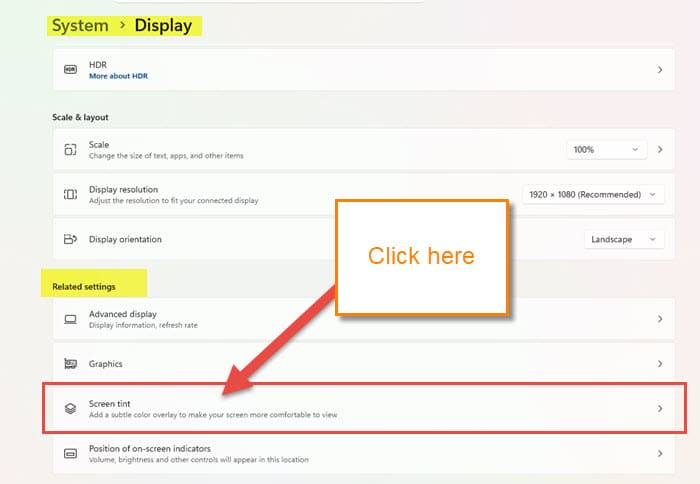
Step 5: Here on the Display Settings screen, look under the section called Related Settings. Under this, you will see Screen Tint.
Add a subtle color overlay to make your screen more comfortable to view
Click on the option.
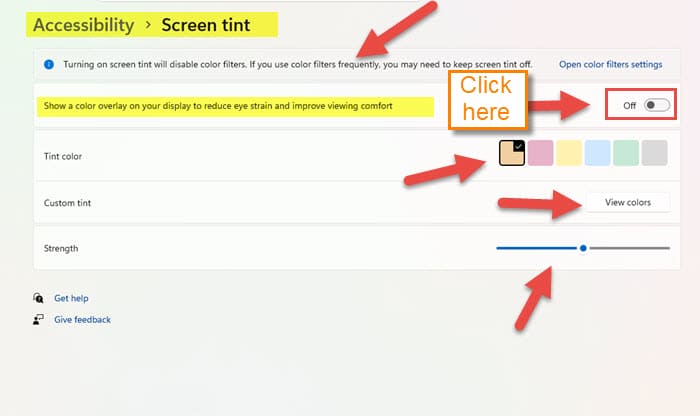
Step 6: We are now on the Screen Tint Settings. They give you a few choices here:
- Show a color overlay on your display to reduce eye strain and improve viewing comfort. (Next to this is the enable switch to the right)
- Tint color (They give you some preset tints to choose from). Click on the one you like.
- Custom Tint (This one lets you choose whatever tint you like)
- Strength (Here you can control the intensity of the tint)
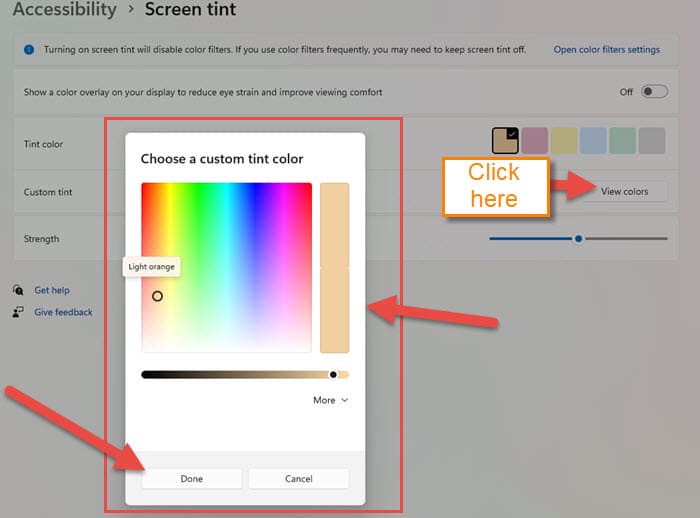
Once you enable it, you can adjust it how you want. Let us click on the custom option by clicking View Colors to the right.
Step 7: As you can see, you are given the power to make your own tint. After you are done, click the Done button.
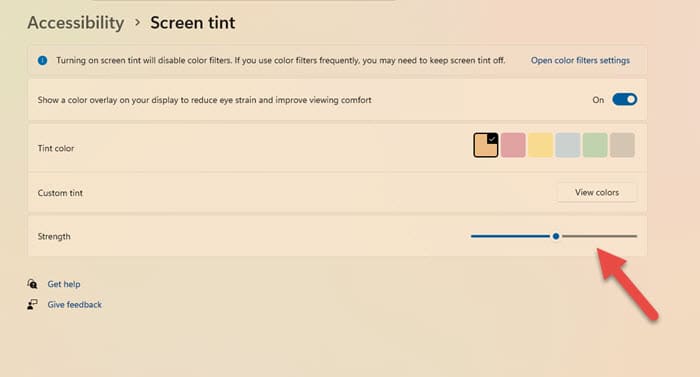
Step 8: As you can see, the screen tint is in effect. Adjust it however you like. There is a warning at the top of the screen that I should mention.
Turning on screen tint will disable color filters. If you use color filters frequently, you may need to keep screen tint off.
You are all DONE.
You now know how to enable Screen Tint on your Windows computer. Time to share your knowledge with the world.
—
