In this three-part series, I will explain how I set up my new router to strike a balance between security and performance in my particular circumstances. While individual circumstances and settings may vary by manufacturer and router, the basic principles should remain the same.
Upgraded Firmware
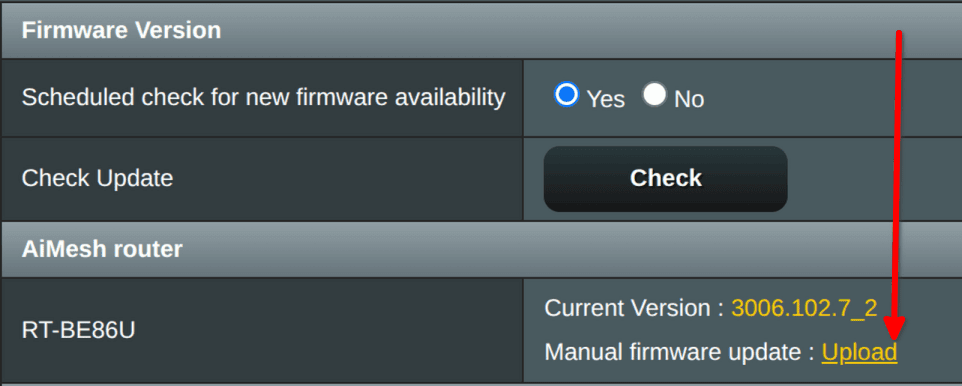
The first thing I did was update the router’s firmware. It is essential to update router firmware to patch critical security vulnerabilities, fix bugs, and optimize performance. Even new devices require firmware updates. I upgraded my router’s firmware to the latest version. Although I bought an Asus router, I actually run an alternative, customized version of the Asuswrt firmware – Asuswrt-Merlin on my router.
Changed Router Credentials
I changed the name and password of my router from the defaults. Common ones that I have seen are ‘admin/blank’, ‘admin/admin’, and ‘admin/password’. Many users keep the default settings when they set up their routers. If you do this, hackers could easily access your network.

Restrict Remote Access & SSH
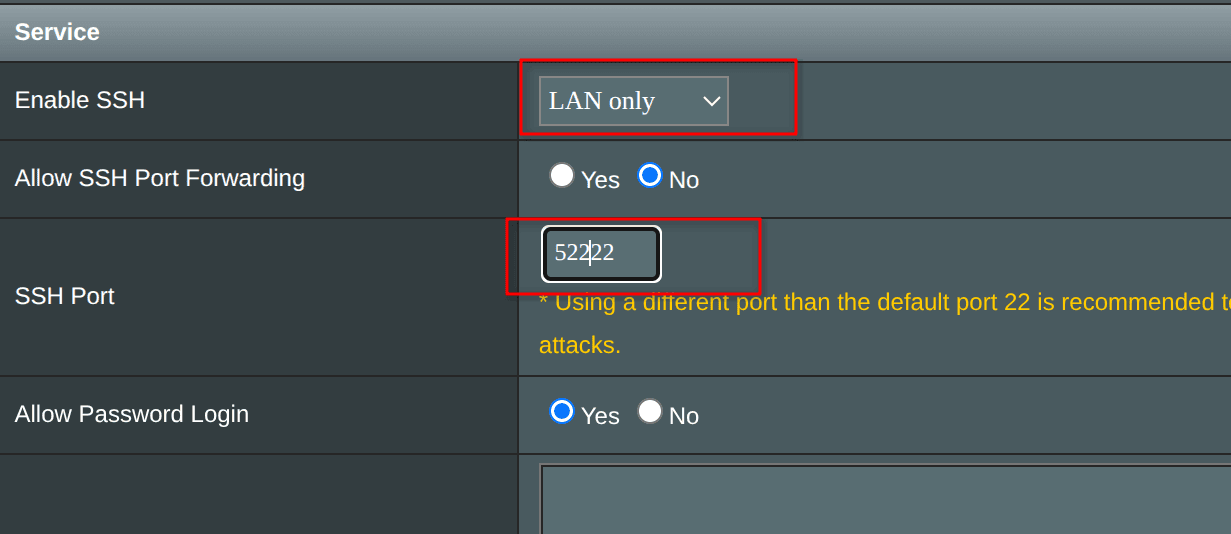
Enabling remote access exposes the router’s administrative interface to the internet, creating a significant attack surface for hackers. To protect my network, I have therefore disabled remote access.

In addition, I have changed the router’s Secure Shell (SSH) port from the default setting of 22. This means that an intranet logger (i.e., me) would be unable to access my router without knowing the non-default port.
Enable Firewall & Disable WAN Ping
I have enabled the firewall on my router. This is essential for blocking unsolicited inbound connections from the internet. Without a firewall, devices on the local network are vulnerable to direct access attempts by hackers, malware, and unauthorized users.
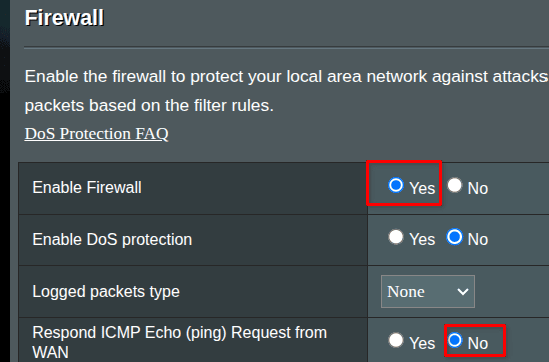
Additionally, to make my router less visible to external scanners, I disabled ping (ICMP echo) from the WAN (Internet).
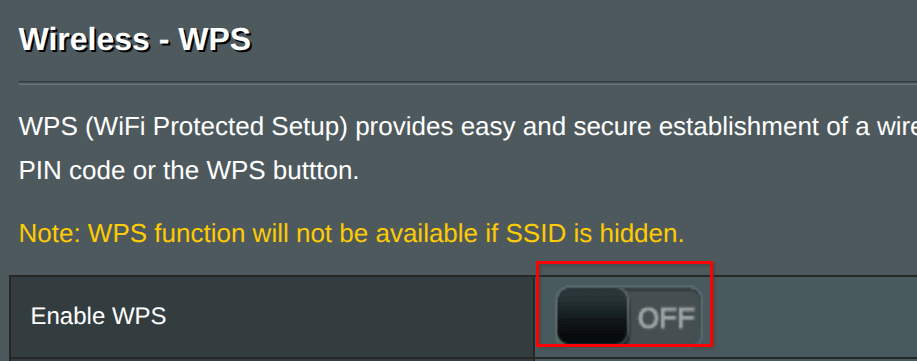
UPnP & WPS
I have disabled Universal Plug and Play (UPnP), a protocol which enables devices on a local network to discover each other. When enabled, UPnP requires no configuration. Connections are automatically established. Clearly, this poses a security risk!

For similar reasons, I have also disabled WiFi Protected Setup (WPS). WPS allows devices to connect to a wireless network without the need to enter a password manually. PINs are very easy to ‘brute force’ by guessing different combinations. In fact, a WPS PIN can be brute-forced in less than a day.
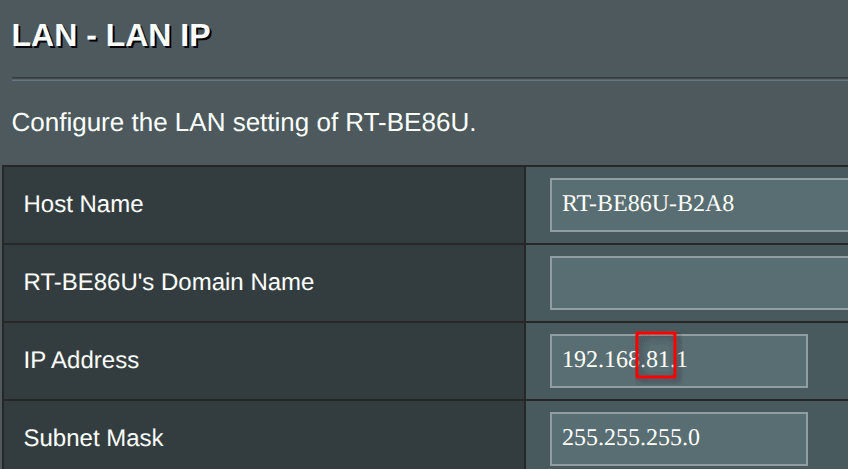
Change LAN IP
I changed the Internet Protocol (IP) of my local area network (LAN) from its default setting. This makes it harder for an attacker to scan for my network, providing a little more security.
Bottom Line
This is the first of a three-part series that discusses the decisions I made when setting up my new home network router. Be sure to view parts two and three.
Please feel free to ask in the comments why I did something a certain way. Alternatively, let me know how I could improve the setup.
- How To Set Up Router – The Right Way – Part 1 ⬅ You are here
- How To Set Up Router – The Right Way – Part 2 (Pending)
- How To Set Up Router – The Right Way – Part 3 (Pending)
—