When we get a new computer we think about what to do with the old one. In my county here in Florida, we have a club dedicated to refurbishing discarded computers for school children and veterans.
We see on these crime shows how forensic experts can look at hard drives and recover deleted files. So even if we delete all the files on our old computer somebody might be able to find them.
Some computer users take drastic steps to keep their data safe by smashing their hard drive (internal drive, not the whole computer) with a sledgehammer. Then they dispose of the box. No need to do that.
Perhaps you want to give the old computer to one of your friends or relatives. You want them to have whatever software is loaded already but not your “stuff”.
Here’s How
Create a new user as an administrator. Then sign back in with that new user name. Delete your old account and say “yes” to the question about removing all data related to that user.
When you are done, there is no visible evidence of you or your data. However, using the right software, the deleted files can be recovered.
Using Glary Utilities
In the Advanced area of Glary Utilities, there is a utility to wipe out all areas that have been deleted. It takes a while but when finished, the data is truly gone. Let’s look at how to use it.
If you do not have Glary, click the link above for an article I had written on installing it and how to use it daily.

Open Glary Utilities

Click the Advanced Tools tab
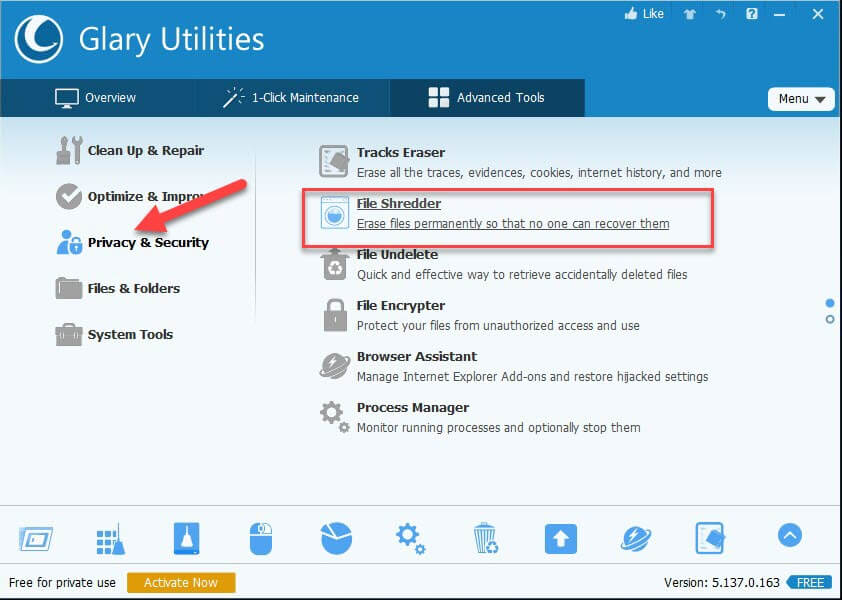
Under Privacy & Security, Click File Shredder
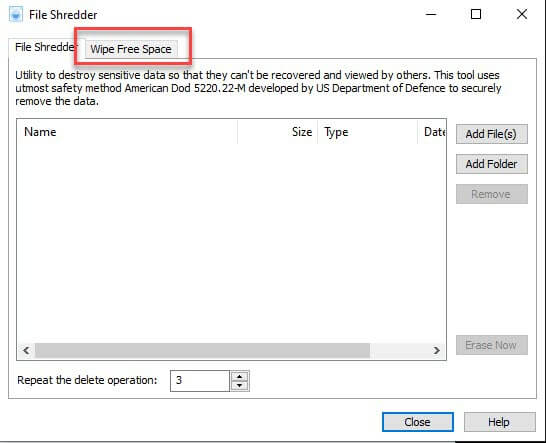
Click the Wipe Free Space tab
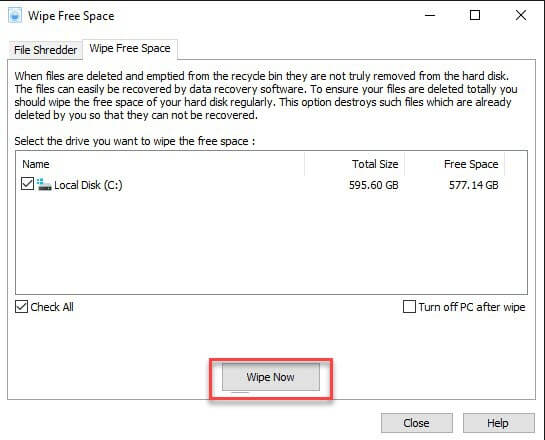
Click the box to the left of the drive you wish to wipe so a checkmark appears in the box. Then click Wipe Now.
Note: If you start this late at night, you might check the Turn off PC… box so the system shuts down when it finishes. My wipe took about eight hours.
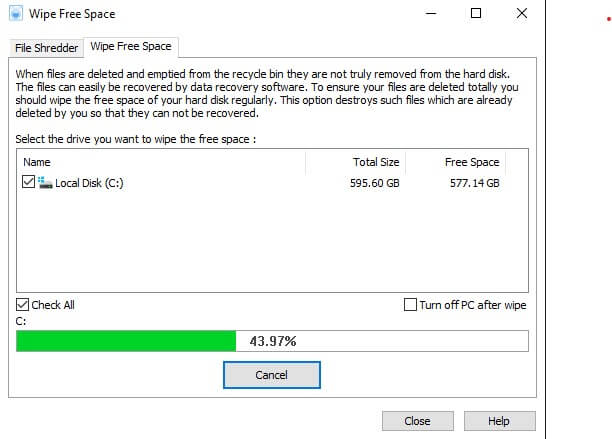
A progress screen shows how far the operation has progressed.
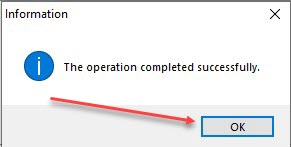
If you did not choose to have the PC shut down when finished, you should see a completed successfully message. Click OK.
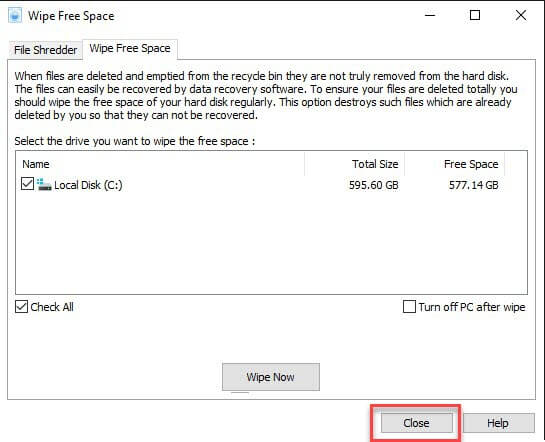
You will be returned to the Wipe Free Space screen. Click Close to end the process.
Now you can safely pack up that computer and ship it off to your grandchild, or whomever.
I hope you found this another useful tool.
Dick
—
The procedure here will only remove traces of files which have been saved to standard windows areas such as “MyDocuments”, “Desktop”, “Pictures”. A user may well have saved files manually to other areas of a hard drive – eg “C:\special folder” or even to a second hard drive. It will also not delete software added to the computer which the new owner might not be licensed to use (especially if you have installed the same licensed software to your new PC)
My solution would be to perform a clean installation of windows including reformat of the hard drive. When that has been done then install Glary utilities to securely wipe free space. With additional drives I would delete existing partitions, create a new partition then again securely wipe the drive’s free space using glary utilities. I am not totally sure that this would 100% clear but good enough to prevent a normal user finding any traces.
Forgot to add this – if you are re-using your copy of Windows on a new PC (eg a barebones model without an operating system. Then you should really uninstall windows (or install a new windows license) for the next user
Download a Live Gparted ISO, burn a CD-R or DVD, boot the PC with the CD and one can delete and format any drive on the PC. I have one I burned 4yrs ago and it is still working.