
With any job, you probably have to work in Microsoft Word. That is no different for me and sometimes I need to convert that Word doc into a PDF. I have written a few articles on working with PDFs. Here are a few you can check out:
- How To Insert Pages Into A PDF File
- How To Sign PDF File In Adobe Acrobat
- How To Move Pages In PDF File
- How To Compress/Optimize a PDF File
For this article, I was wanting to show you how easy it is to have Office 365 convert your Word doc into a PDF. It will make your life so much easier by not having to use another program or having to go online to do it. Using Word 365 to convert, keeps the layout, formatting, fonts, and image, so it is helpful when my documents have images in them. Let’s get started on how you can save that Word document as a PDF.
Save Word Doc As PDF In Office 365
Office 365 Word Web App
I want to show you how you can do this in the Office 365 Web app and your desktop app. First, we will start with the Online web app:
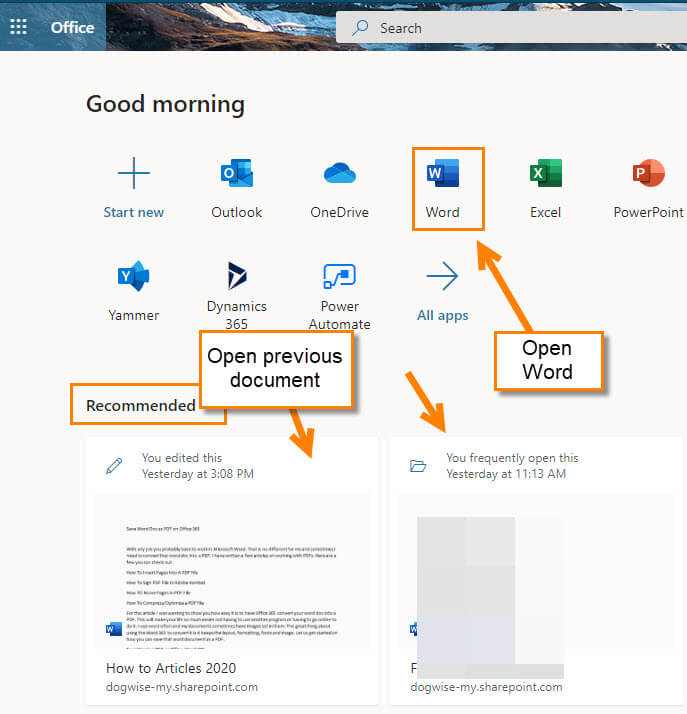
Step 1: Open up the Word document you are wanting to save as a PDF.
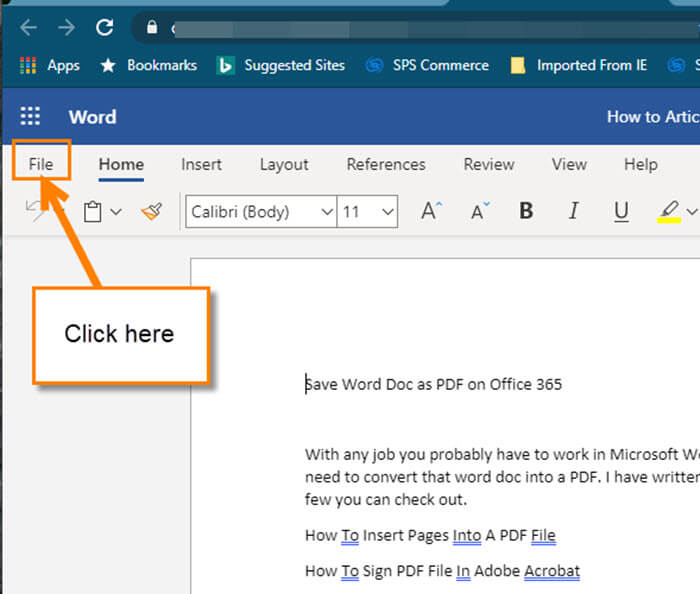
Step 2: Once in your document that is ready to be converted, look up to the top left and click on File.
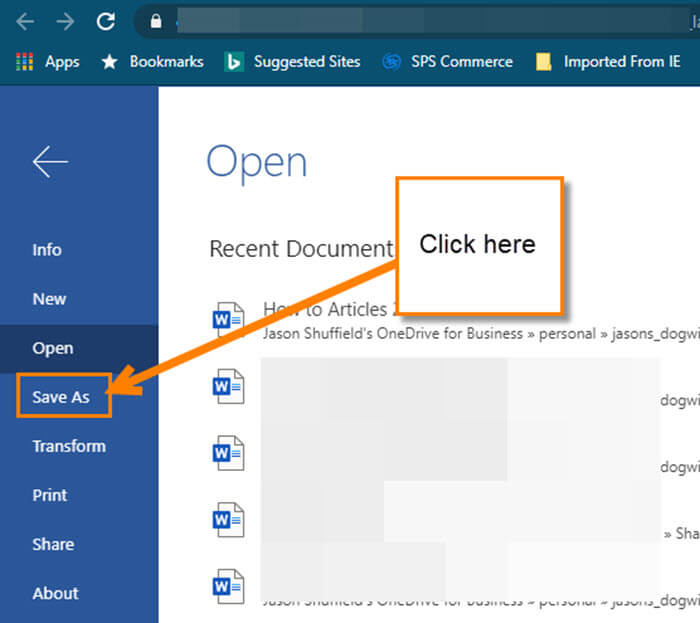
Step 3: On this screen, click on the option Save As from the left menu.
Step 4: Here they make it easy. In the middle menu click on Download as PDF.

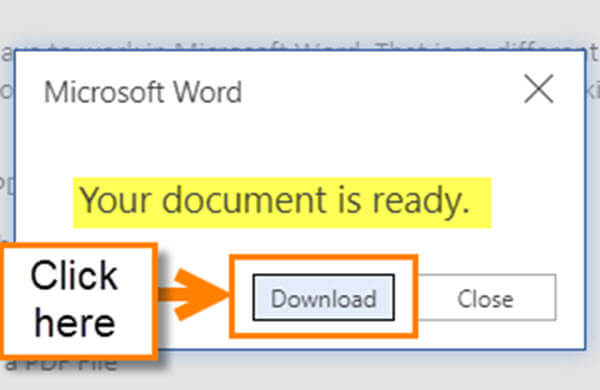
Step 5: Now you should see this little window pop up. All you have to do is click the Download button. Done!
That is how you do this in your Web App. Now it is time to show you how to do this in your Word desktop app.
Office 365 Word Desktop App
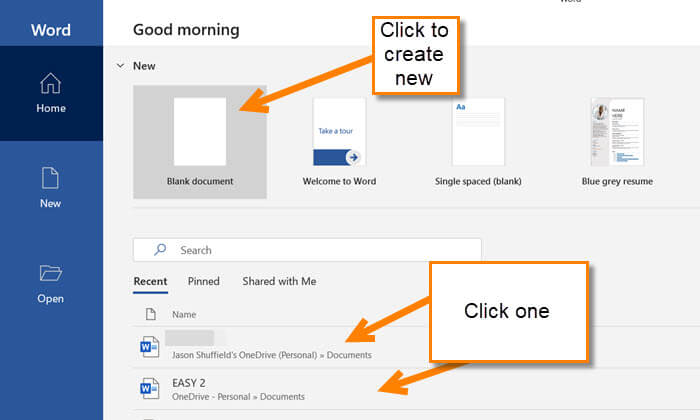
Step 1: Here you are going to want to open the document up in your Office Word 365 desktop app. I like to open the program first myself. To do that, head down to the Windows icon at the bottom left. Click it and then click Word.
![]()
Step 2: From here, either open a new document or open the recent document you want to convert to PDF.
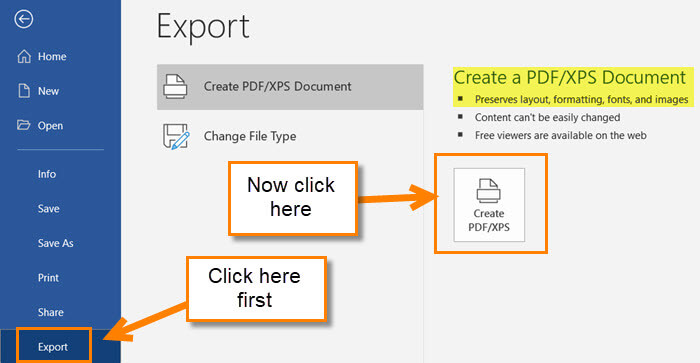
Step 3: Once in your Word document look to the top left and click File.

Step 4: Instead of having to click save as like in the first steps, we will want to click on Export in the left menu. After that, look over to the right and click on the button Create PDF.
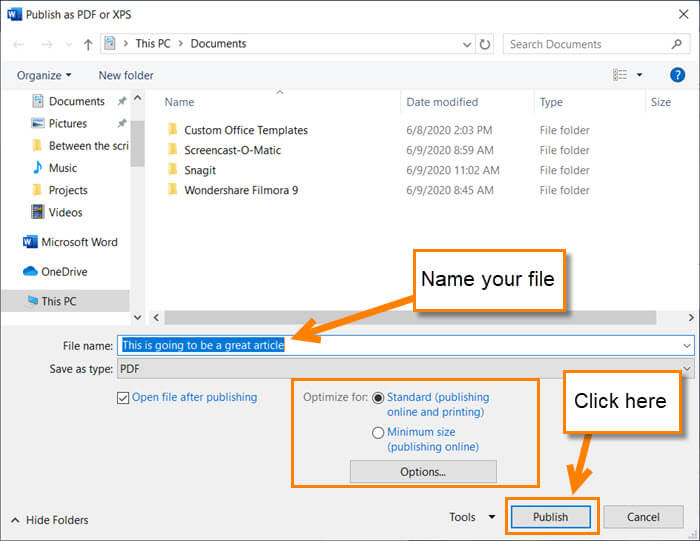
Step 5: A new window will appear and ask where you want to have it Saved/Published. Now name the file and then click the Publish button. You will notice they give some Optimize options. For this article, I’m sticking with Standard.
Now you know how to do this in the web app and your desktop app. Time to share this knowledge and teach others.
—