Many of the projects I work on require video editing and teamwork. Since videos are so large, I needed a way to share the videos (and their edits) online without trying to crash my email. Rather than using Dropbox or OneDrive, I like to use Google Drive. Since the majority of people I work with have a Google account, this file-sharing program works well for me. Google Drive makes it easy to share folders and files and they give you 15 GB of free space to use. Recently, I was getting close to my 15 GB limit on the drive and it prompted me to purchase more space. Since I’m a cheapskate, I didn’t want to, so, I decided to delete some unneeded files. That is where I bumped into a problem that I wanted to share with you. After I deleted the files my drive was still full– the available space never moved. What I found out is that I was missing an important step. Now I want to make sure you know how to be sure you can free that space up and continue using this free drive without needing to pay for an upgrade. Pull out that computer and let me show you how you can free up that space.
Free Up Space On Google Drive
Warning: If you are the owner of the file or folder, then when you remove a file from a shared folder it could be removed from everyone. Before removing the file you might want to make someone an owner of the file too. That way, they will still have access to these files. Or I would recommend you save the files to a flash drive and then delete it from Google Drive.
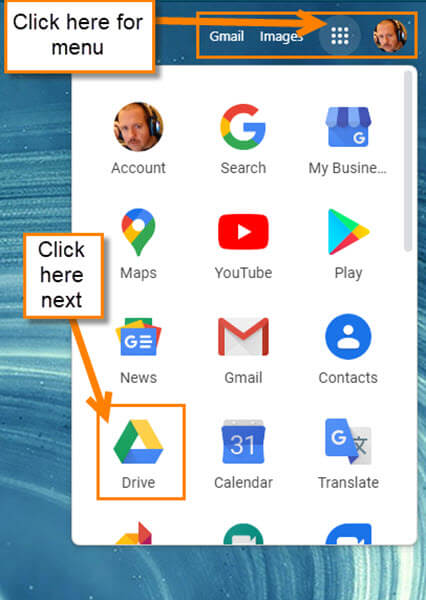
Step 1: Open up your Browser. Then log into the Gmail account that you have Google Drive on. That would be the one you want to delete items from. Now, go to the top right and click on the boxes to the left of your profile image. This will open the Google App menu. Once here, click on Drive.
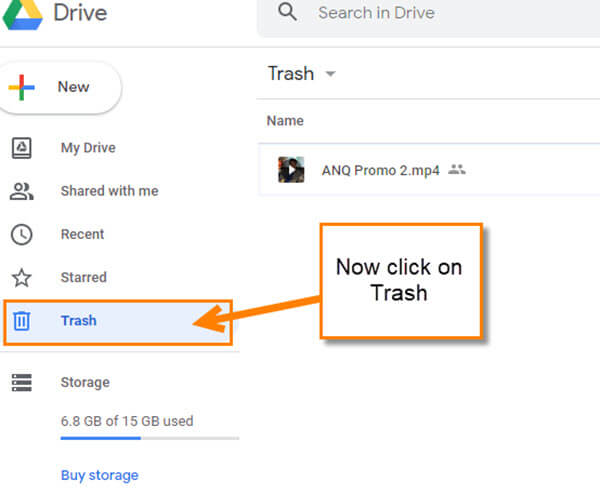
Step 2: Once on Google Drive, make sure to select My Drive on the left menu. To see the storage usage you have on this drive, look to the bottom left. I have used 6.8 GB of the 15 GB they gave me.
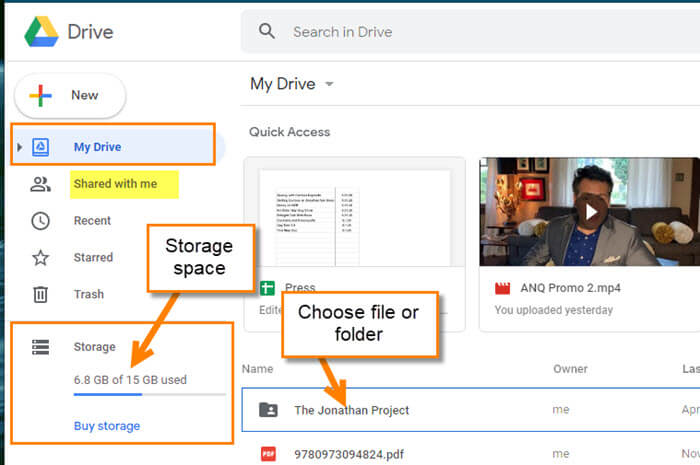
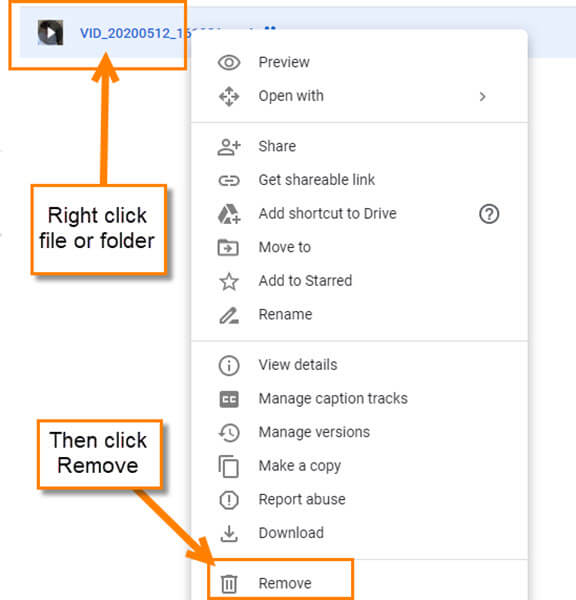
Step 3: Time to look for the file/folder you want to remove. Click on this file once and you will see a trash can icon appear at the top. Click on the icon if you wish to delete that file or folder.
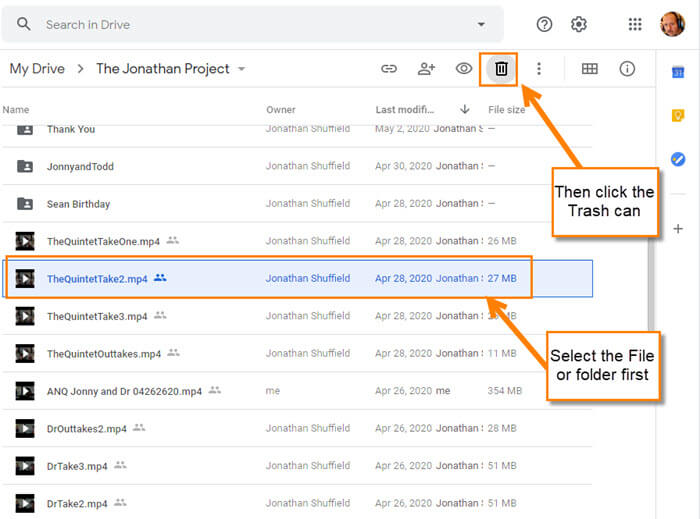
Step 4: You can even right-click on it and choose Remove from the bottom of the menu that appears. Once you are done deleting/removing these files and folders, you will notice that the drive has not changed size yet.
Step 5: What we want to do is look to the left menu and click on Trash. That is right, we need to remove the files from the trash to finish the deletion process.
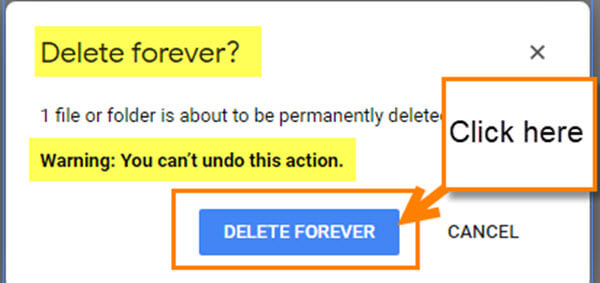
Step 6: Once the file is in the Trash you can delete it a couple of ways: The first way is to right-click on the file and click on the Delete forever option from the menu. Click it.

Now you will get this warning screen saying “You can’t undo this action.” Click on Delete Forever if you are ready.
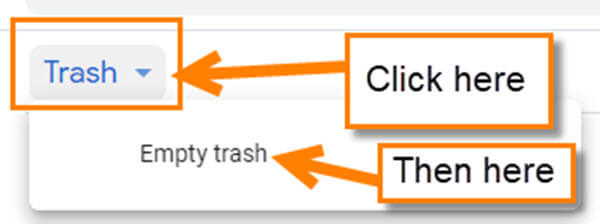
Step 7: The second, easier way to delete the files and folders from your Trash is to click the down arrow next to Trash at the top. This will bring up one option, “Empty trash,” click it. It will give you the same warning as you got before. DONE!
That is how easy it is to free up that space on your Google Drive. Now do some cleaning.
—
Sorry if I’m out of order here but I am desperate to fix this glitch. Many have tried without success.
I’m trying to activate the Clipboard History to work the Win key+V in my new Win 10 Home laptop.
I’ve tried everything, the toggle in Clipboard – all greyed out and now even that has disappeared and now a simple Clipboard app buttons are greyed out. The Clipboard reg. settings value is at 0x 00000001 (1) which is correct.
I’ve just done an update via Creation Tool to 2004 19041.264 as someone suggested to no avail.
No problems with DISM and scannow….
I’ve also managed to install the Group Policy Editor in my Home edition. With the massive list of tweaks one can do in the gpe settings in which I was informed Clipboard would be there to enable but it is not mentioned. I even checked the same list in my other laptop having Win 10 Pro but CB is not there either or are my eyes deceiving me?
Can you enlighten me please where I can find CB in GPE or better still how to turn on Clipboard History!
Thanks you.
Win 10 Home
This might help: https://davescomputertips.com/best-free-clipboard-managers/