Usually one would add borders around a cell or range of cells in their worksheet by selecting the cell or range and using the Border tab of the Format Cells dialog box.
BUT, there is a nice little shortcut that saves you time and keystrokes and who wouldn’t want to do that??
Follow the steps below to learn how:
- First, display the Home tab or your Ribbon.
- In the Font group, click the down arrow at the right-hand side of the Border tool to display options.
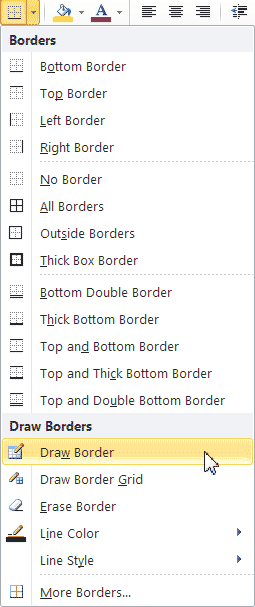
- Select Draw Borders and you will notice that your cursor has not become a small pencil.
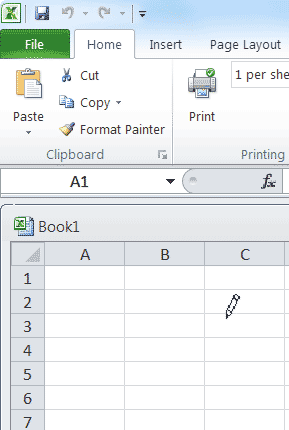
- You can now click and draw borders wherever you like.
- You can utilize the options by clicking the drop-down arrow on the right hand side of the Border tool to specify the type of line and color.
- Once you are finished creating borders, you can simply click the Esc key and your cursor will again return to normal.
Pretty cool huh?