Well, Apple has released iTunes 12. Many will say that it has a sleeker, cleaner look to it. But some of us like how the ‘old’ iTunes (version 10 and earlier) looked. While you can’t get exactly the classic look and feel, you can get pretty close.
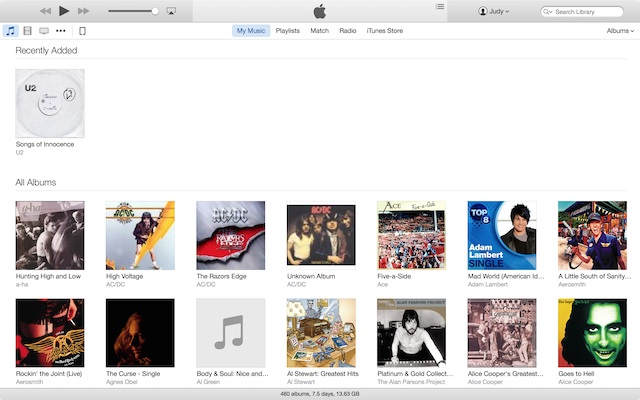
When you update iTunes to version 12, your default view will look like this:
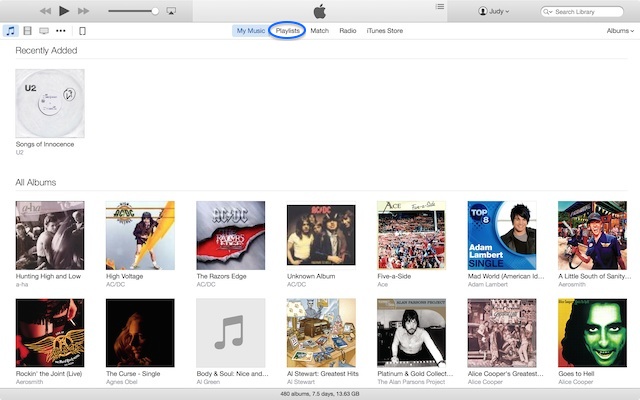
STEP 1: Select ‘Playlist’. This will give you the sidebar on the left.
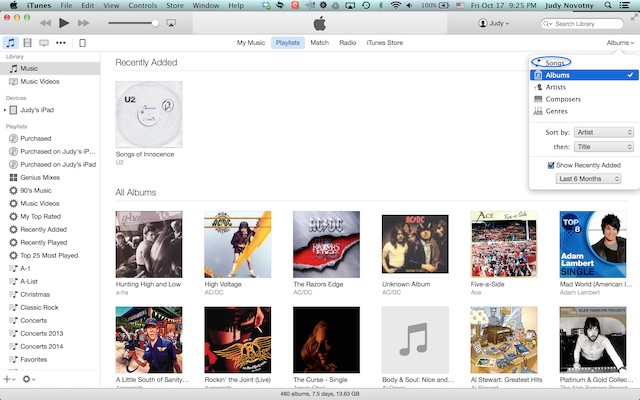
STEP 2: Click on ‘Albums’ on the far right and select ‘Songs’.
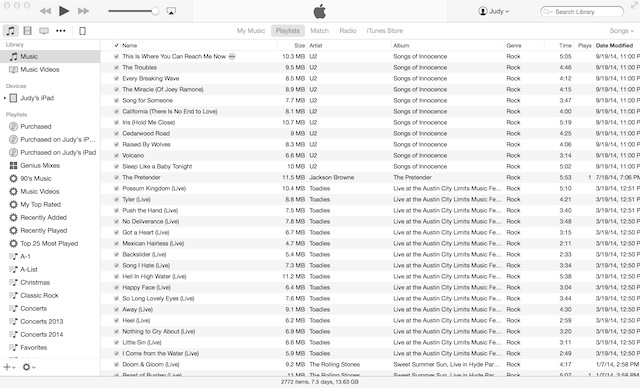
This will get you the closest to the classic look as you can get in iTunes 12.
These instructions are Mac-based. Windows-based instructions may be different (but I would hope not by much).
Thank you! Saved me hours of frustration trying to figure it out. Why must they keep fixing what isn’t broken?
Because Apple knows whats good for you and you’re supposed to just play along.
Glad to get a sort-of classic look back.
Thanks!
Thank you so much!!! This helped me tons. I was going crazy!!
Thank you, thank you, thank you.
Thanks! Exactly what I was looking for!
Thank you!
Thank so much!
The first time I was confronted with this new look I almost had a complete mental meltdown because I just suddenly couldn’t find my stuff. Another thing that kills me about Apple iTunes is that after the thing installs on Windows it tells you that to complete the installation you need to restart your computer. Why? I mean I’ve always ignored this ‘instruction’ and iTunes works just fine. I mean why would I want to restart my windows laptop, I never restart it. To me it looks like a cheap ploy by Apple to try and convince people that Windows always needs to be restarted – it doesn’t. It’s just your stupid piece of software that tells people to restart their machines when they really don’t need to.
hey, thanks for posting this info!!! i was so frustrated with the new look.