YouTube Video Quality Can Be Disappointing
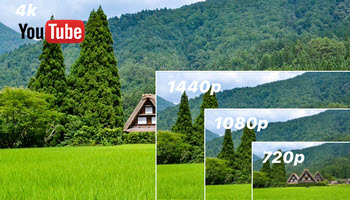
I’ve been uploading videos to YouTube since 2007 and whilst it’s true that any video uploaded will only be as good as the original source, with the advance of technology in the last twelve years everything has changed. In other words, you would expect games and home movies recorded in 1080p or higher to look stunning and pixel-free on YouTube but this is often not the case. There are, however, numerous variables to take into consideration, not least the recording software and the hardware used in the first place. By the way, I’m assuming most people know how to adjust the quality of videos they watch on YouTube as per the image below.

Simply hover your mouse over the cog shown by the arrow and click on the highest available resolution. The above screenshot is important because it serves as a useful reference in terms of quality. But that simple tip is not what I’m trying to convey today– it’s a little more involved than that.
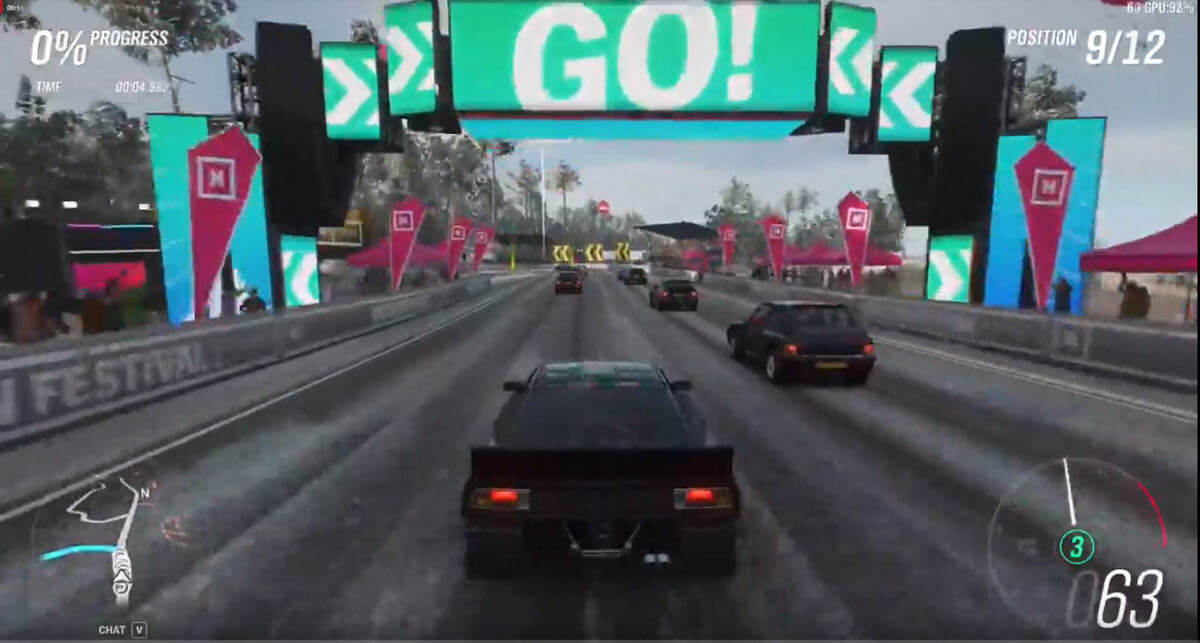
I frequently upload game videos recorded in 1080p and when I play them back on my PC using VLC or similar software, they always look great, with sharp resolution and are generally pixel-free. The end result is always down to the settings used in the chosen recording software, which in my case can be Mirillis Action!, Radeon ReLive, Nvidia ShadowPlay or Windows 10’s own Game DVR. However, after uploading a video to YouTube the results are often very disappointing, with the video appearing washed out and pixelated as if it had been recorded on an old Pentium II, using a potato as an encoder. Take a look at this screenshot of a Forza Horizon 4 video after being uploaded to YouTube.
I’ve also included a link (above) to the video to highlight the disappointing quality following YouTube’s encoding, and the screenshot below shows the same video played back with VLC on my PC.
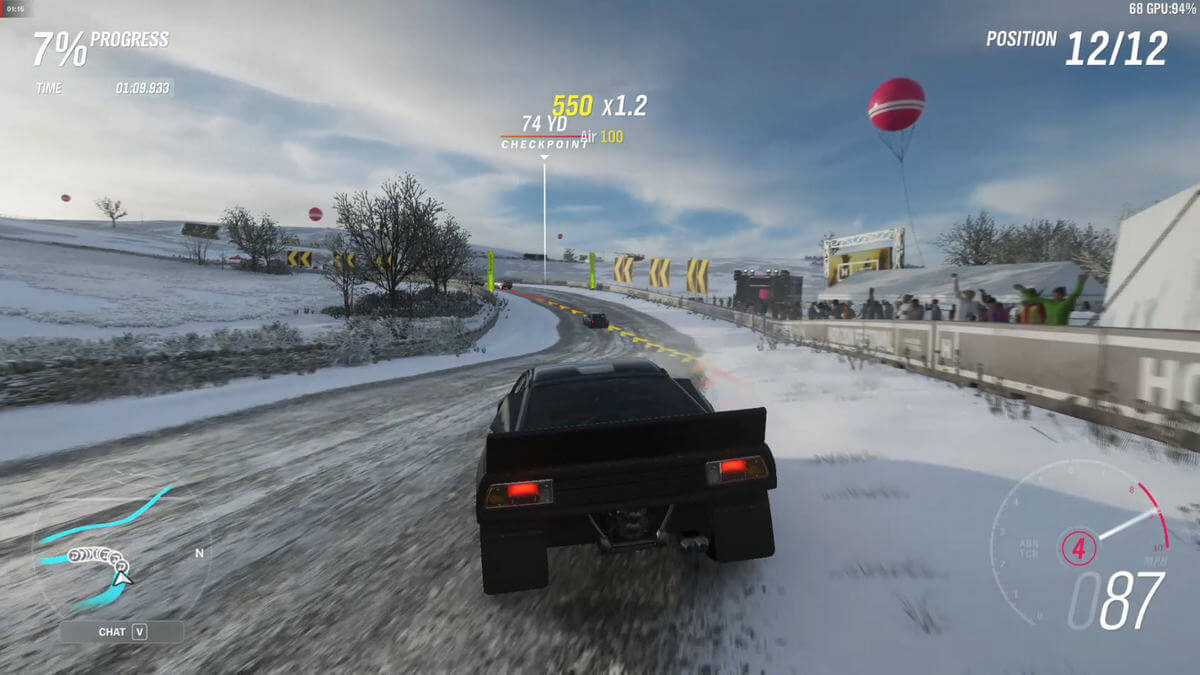
From where I’m sitting, the second image is much sharper. In fact, the original is sharper still, but since we apply image size limitations on our DCT articles so people with slower Internet connections don’t have to wait for the image to load, it’s significantly smaller here but still looks good.
Desktop Recorder Settings
For both Action! and Radeon ReLive, I try to squeeze as much as I possibly can from the software and set them both at the highest possible settings. I set the FPS to 60, the recording bitrate to 50,000Kbps and the encoder to GPU hardware encode.
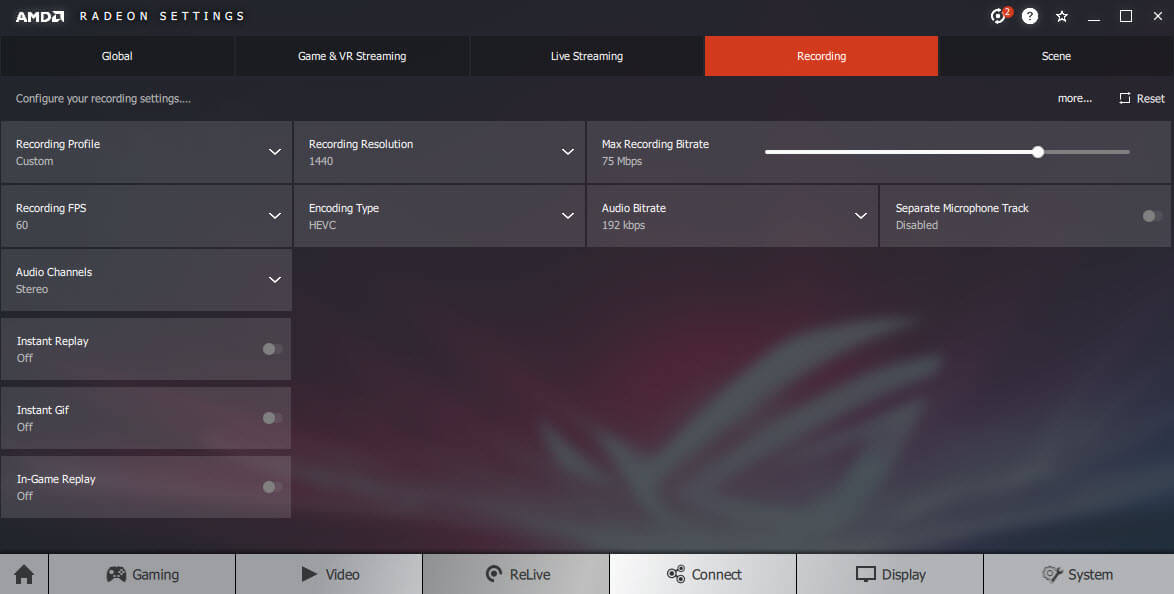
In the case of Action!, the choice is AMF (Advanced Media Framework) and ReLive recording to HEVC (High-Efficiency Decoding h.265), both of which will use the GPU for encoding the game clip.

Game DVR’s settings are limited to high quality and 60 FPS, but still achieves the desired effect and in all three scenarios the end result is always excellent when played back on my PC. However, when uploaded to YouTube, the quality degrades quite considerably. Why is this?
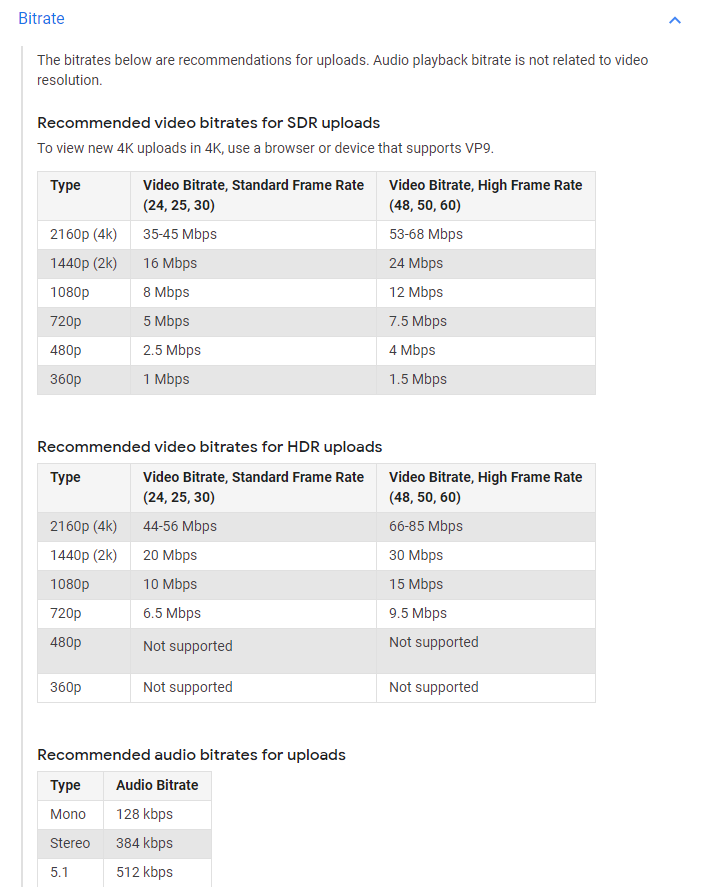
YouTube needs to transcode every video that’s uploaded, which includes compressing them into a set of optimised video streams, resulting in a lowering of the bitrate. Their recommended bitrates are a little conservative, which is why I ramp them up a little.
Discover VP9 Transcoding
Quite by chance, I discovered a way of ensuring that my videos would be transcoded to the relatively new codec standard, vp9. The current codec standards are H.264, H.265/HEVC, and VP9. A neat trick for discovering how your videos are transcoded by YouTube once you’ve uploaded them is to right-click on the video itself and then click on Stats for Nerds at the bottom of the list.
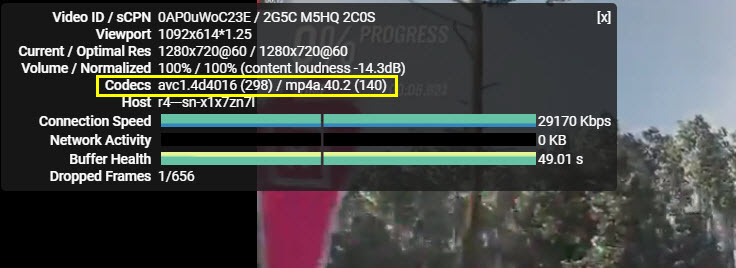
As far as I can see, videos uploaded in 1080p or less are transcoded in AVC1 (H264), however, if I record a video in 1440p and upload it to YouTube, it will be transcoded in VP9. The difference in clarity is significant and very noticeable, as you can see from this Forza Horizon 4 clip. In fact, try it yourself by right-clicking within the video and hitting Stats for Nerds.
This video was transcoded in VP9 and it shows.

Follow These Tips For Higher Quality YouTube Video
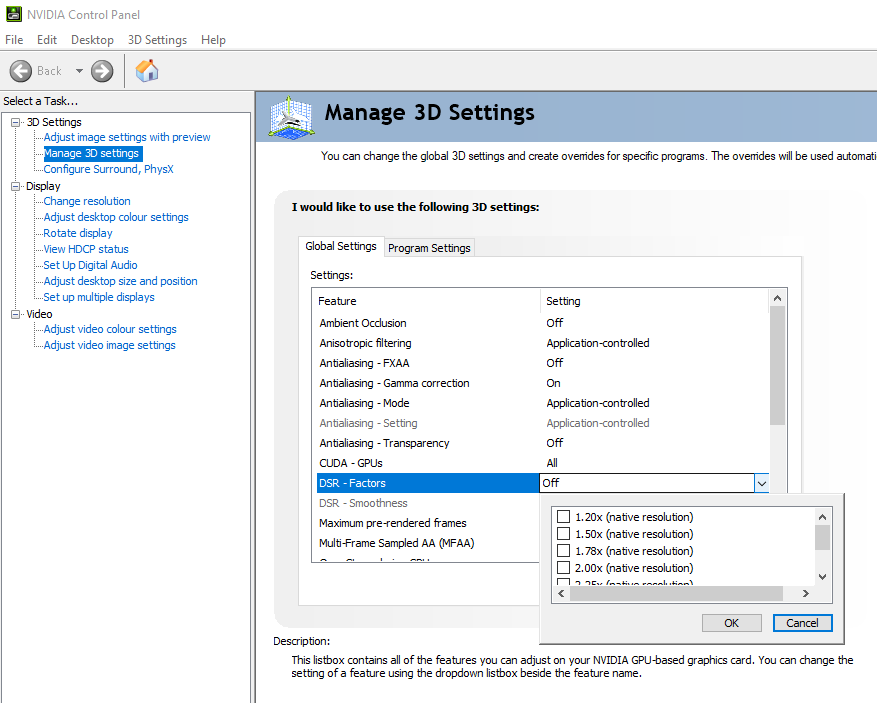
It’s important to realise that the original recording needs to be in 1440p and if you need to edit that recording, render it later in the same resolution. It’s no good recording your desktop in 1080p and later rendering it in 1440p or higher. That’s a bit like blowing up a very low-resolution photo and expecting it to look good. It never does. Of course, you need to ensure that your PC is able to play games at 1440p and that your GPU can handle it. You will also need to enable DSR in your Nvidia Control Panel or VSR in your AMD Radeon settings in order to make the higher resolutions available in-game. If you’re simply recording video from your mobile phone, choose the highest resolution available.
Once you’ve enabled DSR or VSR, make sure you change the game resolution to 2560 x 1440 or higher, record your game video and then upload your clip to YouTube. You can then check with Stats for Nerds for which kind of trans-coding has taken place and it should be in VP9. The end result should look like this clip from The Division.
https://youtu.be/py3MKuHE98E
As you can see, VP9 does make a big difference in quality, so the next time you want to record a game clip and upload it to YouTube, try it out for yourself. You’ll be pleasantly surprised, as I was.
—
Wow Mark, thank you so much. This really works, amazing. How come not a single video on youtube mentions this. I also want to upload gaming video’s, also forza horzion 4 and now it looks great. THANK YOU.