
If you missed it last week, we covered how to hide suggested reels on your Instagram app. Here is the link:
How To Hide Suggested Reels On Instagram
This week, we are going to change gears and look at Roblox. My kids and my wife play on this platform together. Yes, I do too, and I have been doing some research on it. What I recently found out is that Roblox sells and shares your data by default. Which I know is not a big surprise to any of us. After a little research, I found out where we can disable this option on our account. Before I begin our class, make sure to check out these other articles I have written for you:
Time to pull out those notepads and learn how to keep your data safe.
How To Disable Data Sharing On Roblox
This will be shown on the Roblox website using my Windows laptop and then on the app.
How-To On Website
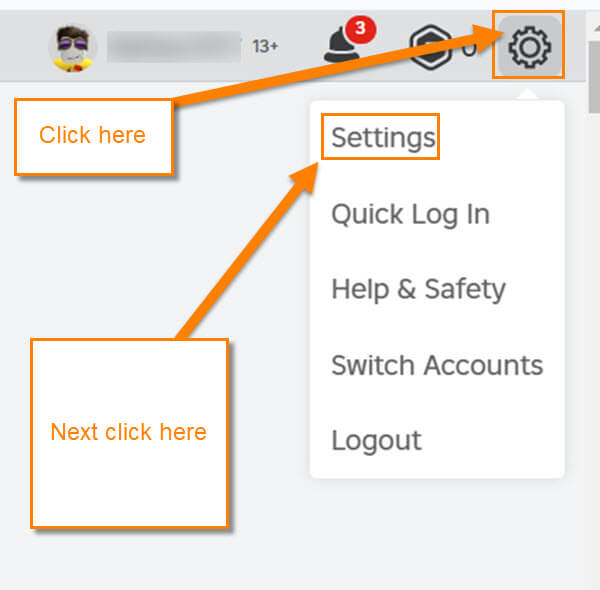
Step 1: Head over to Roblox.com and sign in to your account.

Step 2: Once you are signed in, look to the top right. You will see a Gear icon and click it. A menu will appear, and you need to click on the Settings link at the top.
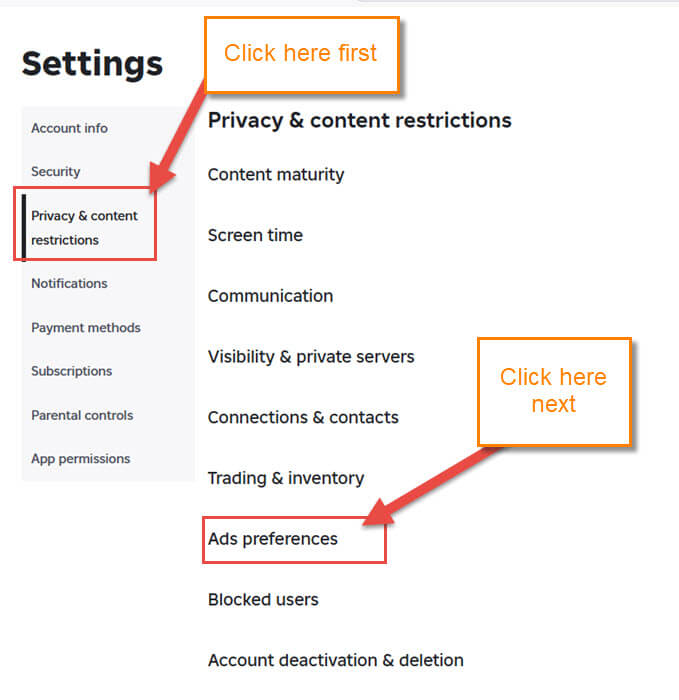
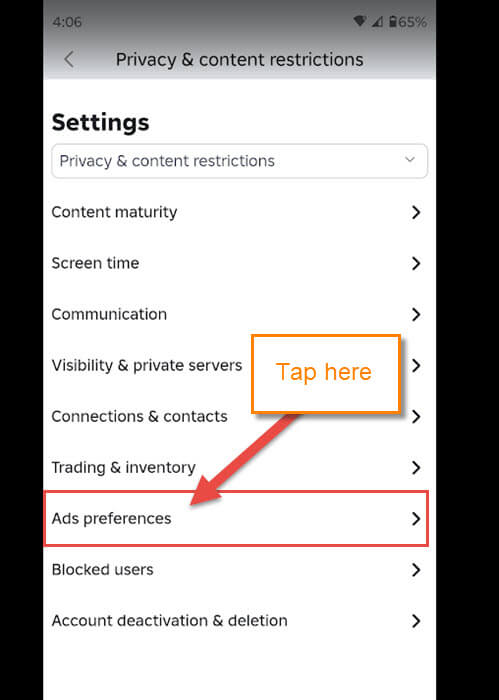
Step 3: After the Settings window opens, look to the left menu for “Privacy & content restrictions,” and click it. The menu will change in the middle of the screen. On this menu, find Ads Preferences and click it.
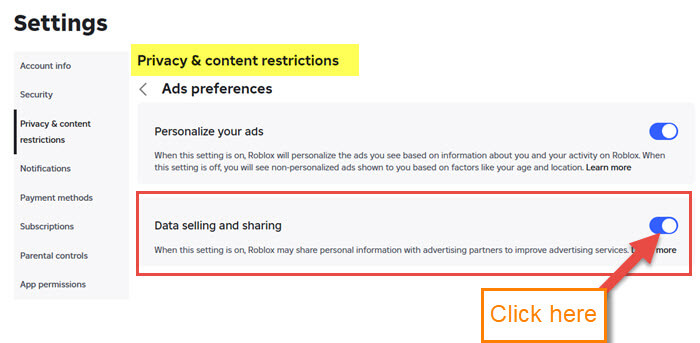
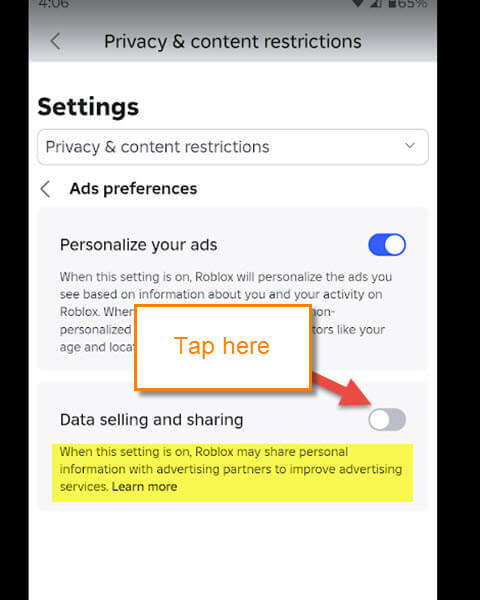
Step 4: Here is the Privacy & content restrictions screen. On here, they give two options:
- Personalize your ads
- Data selling and sharing
That second one is the one we want to shut off. It tells you what this does below the title.
When the setting is on, Roblox may share personal information with advertising partners to improve advertising services. (Learn more)
We do not want that to happen, so click on the switch to the right to disable it. This will affect the setting on here and the mobile app. DONE!
It is time to show you how to do this on the app using my Motorola Edge Android phone.
How-To On App
Step 1: On your device, look for the Roblox app. Tap on it.
![]()
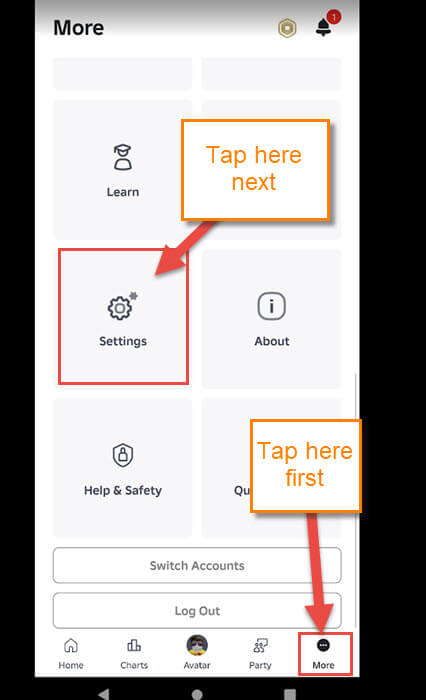
Step 2: After it opens up, look to the bottom right for the More option. Tap that and then the more screen will appear. On here, find the Settings option and tap it.
Step 3: On the Settings screen, find “Privacy & content restrictions,” and tap it.
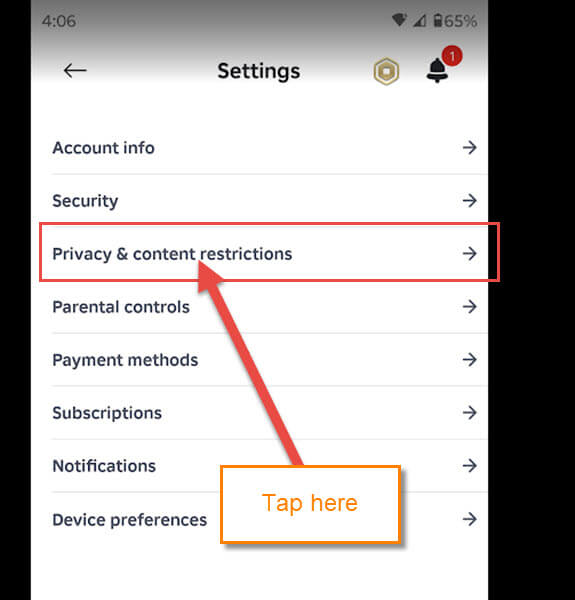
Step 4: Now, find the Ads preferences on this menu, like we did on the website. Tap it.
Step 5: Here is the magic screen on the app. Here, as you can see, the option is off since we already did it on the website. If it is on, tap it to disable it. DONE!
You now know how to do this on your computer and your mobile device. Make sure to help your kids out by disabling the option for their safety. Please share this with all your friends.
—