There are a number of notable types of software which often prove difficult to uninstall completely and can, because of leftover files and/or registry entries, potentially lead to issues when attempting a re-install or installing a replacement. Antivirus software springs to mind as s typical example, in fact, we published a guide on that very topic just on 12 months ago: How To Completely Remove Antivirus Software.
Printer drivers can also fall into this category, and definitely graphics drivers. I’m currently toying with the idea of upgrading my graphics card so was pleased to come across a free and portable software designed specifically for that very purpose. I must add that Display Driver Uninstaller has been around for some time now but I’ve only just discovered it… needs must.
Display Driver Uninstaller (DDU)
Display Driver Uninstaller removes the current graphics driver and all previous versions archived in the Windows Driver store, plus deletes all associated software, services and registry entries. The tool basically returns your PC’s graphics to the same state it would be in following a fresh Windows install, so you can then download and install drivers from scratch, and without fear of potential conflicts.
Download consists of a 1.22MB 7-Zip self-extracting archive. You don’t need to have 7-Zip installed, simply double click the downloaded executable, select your preferred location, and click the Extract button.
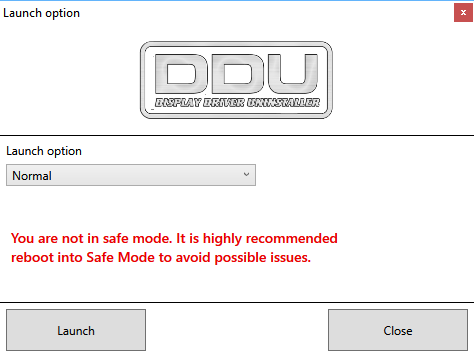
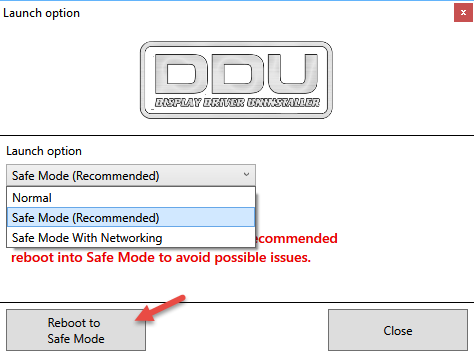
DDU does not require installation so running the program is just a simple matter of double clicking the extracted executable. As is the case with most of these types of tricky uninstalls, you’ll generally achieve better results when performed from within Safe Mode. DDU covers this very nicely, with its opening screen providing a reminder plus a simple option to reboot into Safe Mode:
Select Safe Mode from the drop down menu under “Launch option” and then click the Reboot to Safe Mode button.
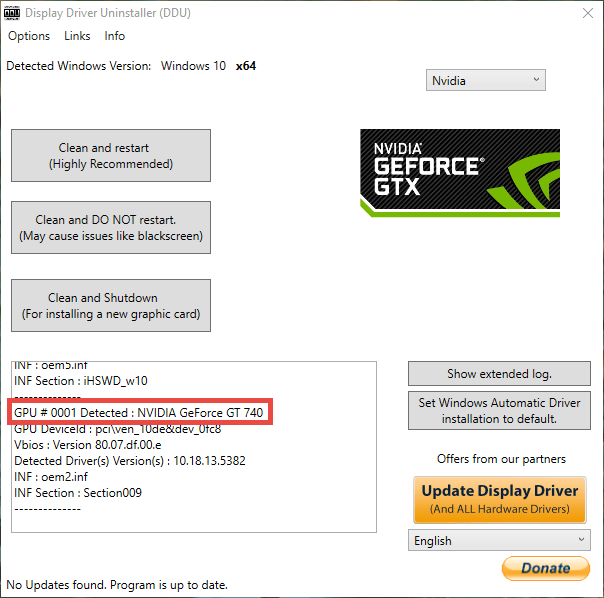
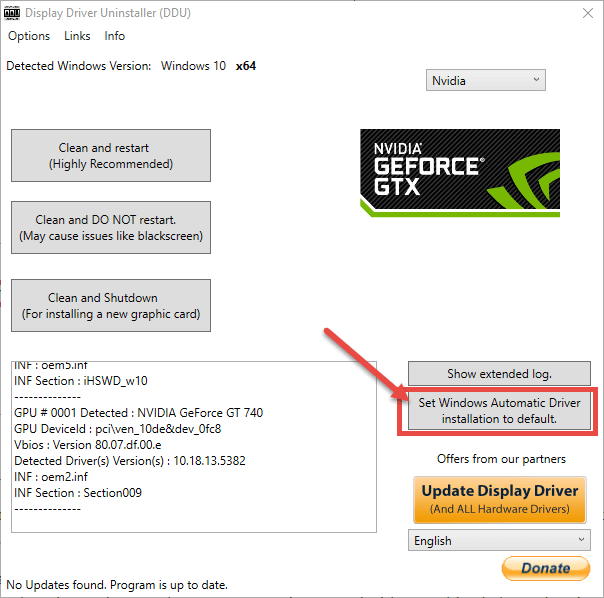
I tested this function in Windows 8.1 and Windows 10 and it worked flawlessly with both. Once the system boots into Safe Mode you’ll be presented with DDU’s main interface:
DDU supports NVIDIA, AMD, and Intel cards, and automatically identifies the currently installed brand and model. As you can see from the above screenshot, DDU is refreshingly simple to use with 3 clearly defined main function buttons:
- Clean and restart – used mainly when re-installing a driver for the same card.
- Clean and DO NOT restart – for advanced users [only] who may want to play around with something before rebooting.
- Clean and shutdown – perfect for when connecting/installing a new card.
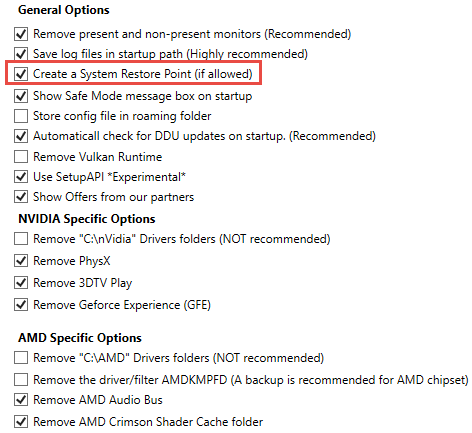
It should be noted that DDU is still in Beta mode and the developer, much to his credit, makes a point of not only mentioning this on the product home page but also includes an option in the software, which is enabled by default, to automatically create a restore point:
On the right hand side of the main interface, toward the bottom, you’ll also see an option to “Set Windows Automatic Driver installation to default“. This will install a Windows generic driver, not the best driver but handy if you want to make sure you’ve at least got a functioning driver in the interim.
I tested DDU on a perfectly good system with NVIDIA graphics and it worked flawlessly. The key aspect is that it removes pretty much all (if not all) traces of the driver, associated software and data, which may well be critical on a system where the installation has become corrupt or when installing a new graphic card, especially where a different brand is involved.
DDU is great concept and I really appreciate that it is portable – kudos to the developer.
- Download DDU direct from the developer here: Display Driver Uninstaller Download


Do 7-Zip self-decrypting files suffer from the critical vulnerability recently reported by Cisco for 7-ZIP itself? Does this program?