We’ve talked about how useful Windows Home Server is in the past. We’ve also talked about how Windows Home Server protects your files by duplicating them on multiple hard drives to protect against failure. But my motto has always been, “You can never have enough backups!” If you’re Uninteruptable Power Supply fails, your motherboard dies a horrible death, or your server is stolen your only hope is a backup! Fortunately Windows Home Server has a backup method built-in!
How to Backup Your Windows Home Server
To backup your Windows Home Server you will need the following:
- A Windows Home Server
- Files on the server you really don’t want to lose
- An external hard drive with a compatible connection
- Connect your external hard drive to your server. This will usually be a USB connection, but could be Firewire or eSata.
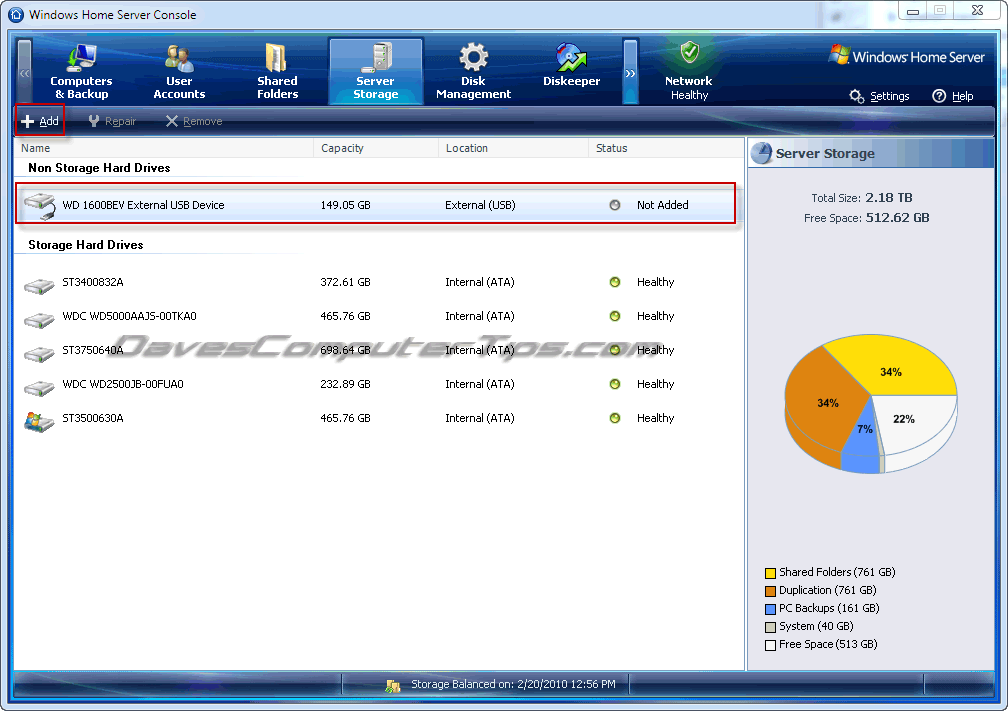
- Open the Windows Home Server Console and click the Server Storage tab.
- Click Add in the toolbar. This will open the Add a Hard Drive Wizard. Click Next.
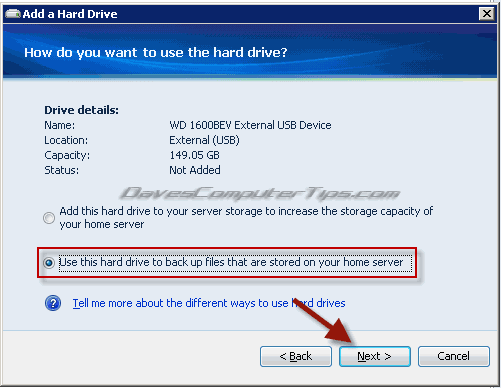
- Select the radio button beside Use this hard drive to backup files that are stored on your home server. Click Next.
- Select the radio button beside Yes, format this hard drive. click Next.
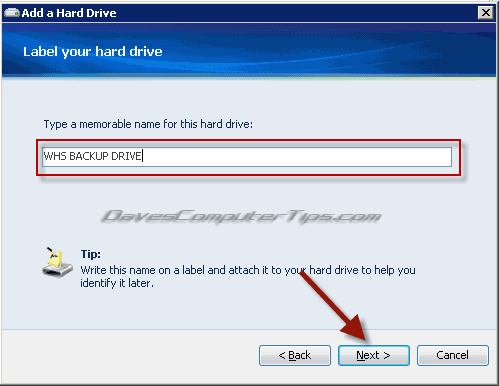
- Type a label for the external hard drive. Click Next.
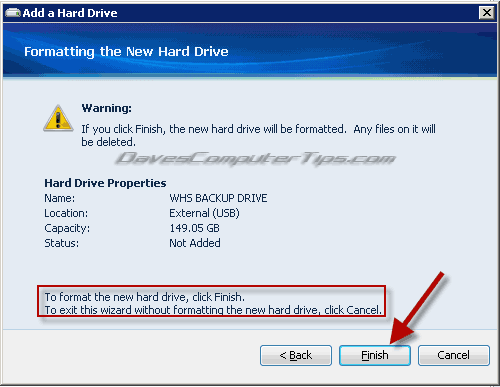
- Click Finish to begin formatting the drive.
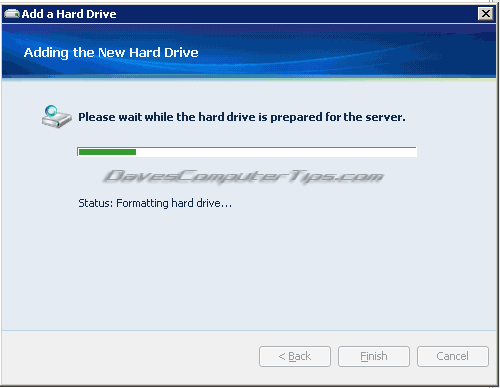
- Grab a refreshing beverage while Windows Home Server formats the drive.
- A summary will be displayed upon successful completion. Click Done.
- Click the Computers & Backup tab. Your home server will now appear as a computer available to backup. Click Backup Now.
- A new window will open showing the shares where your files are stored and allowing you to select which ones you would like to backup.
- After you have made your choices click Backup Now which will open a status window showing percent completed along with the share and file currently being backed up.
- When the backup is complete you will be presented with a summary page. Click Close to close the window.
- Return to the Server Storage tab and select your backup drive using the mouse. Click Remove in the toolbar.
- Select the radio button beside Temporarily remove it from my home server and click OK.

Note that the external drive is now shown as Not Added under Non Storage Hard Drives.



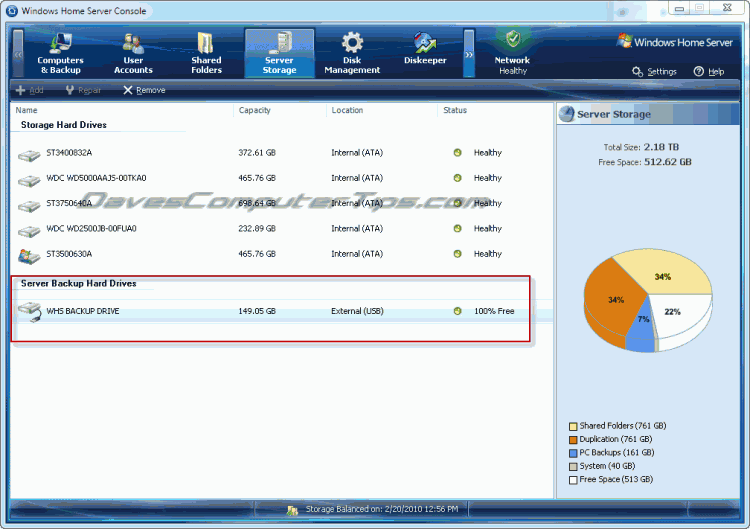
Note that the external drive now shows under Server Backup Hard Drives on the Server Storage tab.

Make your selections by using the drop down menu inline with the share you want to backup. In the above example I have chosen my personal share along with the Music, Photos, and Software shares.


There you have it! Your files are safely backed up on the external hard drive. You can unplug the drive from the server and store it somewhere safe knowing your files will be there if disaster strikes.



Can this method be used for the purpose of upgrading to WHS2011? In other words will the backed up files be accessible to the new installation or are they only available to the current WHS v1 system?
You did real good Dave on your tip. I followed the steps. Just had to exit back out to the Desktop of WHS and add it as a logical drive before I could back up. I am feeling good about backing up my WHS.
Richard asked a question I would like to hear the answer as well
I would like to add the question: Are the backups incremental as well?
Nice job Dave. I want to back up a shared folder from the server that is bigger than one external drive but will fit on two separate drives. Is there a way to do this?
I’d also like to know if the backups are incremental as well.
Also, is there any way to backup the shares to a network drive? I guess I can use SyncToy but if possible I’d like to use the built-in backup function.
Alex, unfortunately the server backup will be a full backup each time.
I would recommend Crashplan. The software is free, though I also use and recommend their paid service) and can perform incremental backups to local drives, network drives, and even remote computers. It’s free, offers scheduling, and works like a charm. If you’re really serious about your data you can pay $5/mo to backup unlimited data to the crashplan servers.
Thank you for the article Dave! One other thing… Is it possible to have an external drive in two partitions, and use one partition for backup, and the other for the general storage pool? I’m buying a 4TB external drive and was considering splitting it into two 2TB partitions…
I’m wondering if this is possible, or will WHS format the entire drive? (I don’t have my drive yet to test!)
I will take a look into CrashPlan as well. Thanks again!