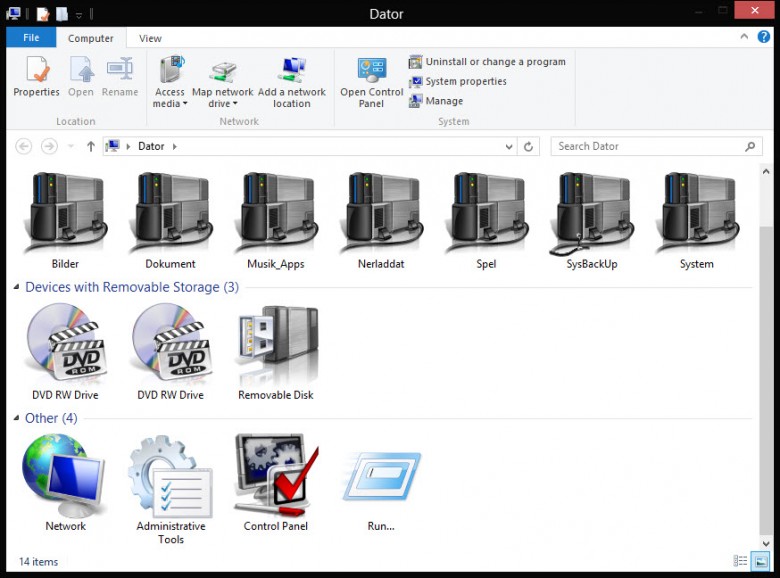
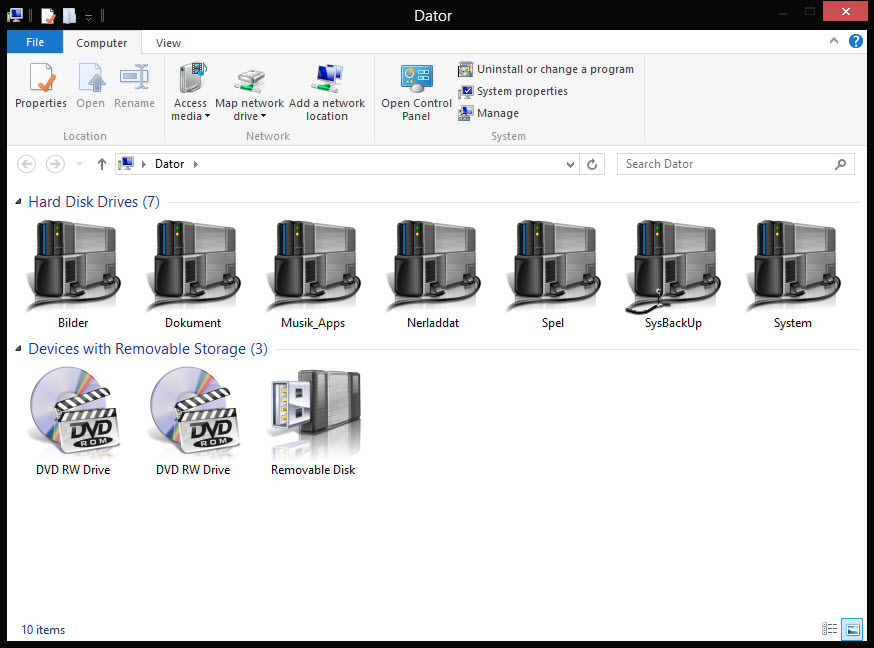
In this, the final part of the ‘Exploring The Explorer Navigation Pane’ articles, I will show you just how easy it is to add system shortcuts to the actual pane. The default pane has just the drives and removable storage devices showing.
Items that can be added are done so by using their respective GUID locations to which there is a list here.
This tweak will work with Windows 7 as well as Windows 8 but it must be said that not every GUID worked on my system (Win 8 Pro) under testing, although most did.
As this tweak involves editing the registry, usual precautions apply. Create a restore point and/or backup your registry before proceeding.
First thing you need to do is open your registry editor by typing regedit on the Win 8 Start Screen and pressing enter, or by clicking on the Start Orb and typing regedit in the Search box and pressing Enter on a Win 7 machine.
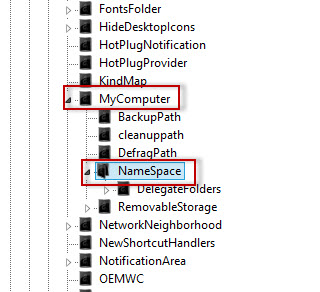
Click on HKEY_LOCAL_MACHINE then SOFTWARE.
Now click on Microsoft then Windows.
Click on CurrentVersion then Explorer, MyComputer and finally NameSpace.
What we are going to do is create new keys under NameSpace; so right click on NameSpace and the select New and then Key.
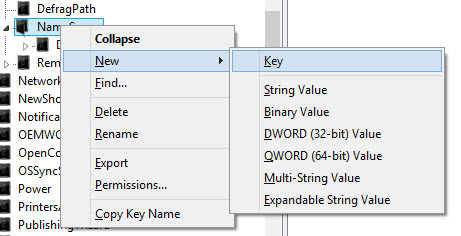
You need to give the new key the GUID as the name for any shortcut you want shown in the navigation pane.
For example if you wanted to add Network to the pane then you would name the new key: {F02C1A0D-BE21-4350-88B0-7367FC96EF3C}

Press Enter to finalize the name for the key and open your Explorer pane by clicking on ‘Computer’ and you will see the new shortcut immediately, no need to add any values, close regedit or reboot your machine. You can add as many new keys as you want.

The final result for my four shortcuts..

To remove any shortcuts you have added, just delete the key again.
To catch up with Parts 1 and 2 of this article, click on the following links:
Alan, thanks for this 3 part article on Explorer. I am new to Win 8, and I don’t particularly like it. It just seems to be designed for a touch screen, and not for a conventional computer. Part 1 was extremely helpful and I did many of the steps suggested. Parts 2 and 3 got to be a bit technical for me as I am not all that comfortable playing with the registry. I am looking forward to your next article. Thanks again.
You are very welcome Starchy. I understand what you are saying about editing the registry, getting it wrong can so easily mess up your system thats why I always recommend creating a system restore point before editing.
If there is any area’s that you would like me to write tips or tutorials about just say and I will be glad to help out.