

Passive Or Active, That Is The Question
The choice is pretty simple, really. If you don’t need high-performance, then you can choose Passive. This would be the case if you mostly surf the web, parse through your email, and maybe run the occasional spreadsheet or word processing software. On the other hand, if you need high performance all the time because you are a hard-core gamer, for example, or run many different programs both background and foreground, the Active cooling might be the better choice. As with many things in the Windows operating system, you will have to experiment to see what works best for you.
If you are experiencing hitches and giddyups when using your computer, then try Active cooling. Be aware, however, that you might not like the extra fan noise when it is set this way.
Getting To The Setting
- Tap the Windows key
- Type control panel and choose the Control Panel program in the right panel when it appears. (To learn how to create a handy shortcut to the Control Panel, please read Windows 10 Quick Tips – Control Panel.)
- In Control Panel, choose Power Options
- Click the Change plan settings link next to your selected power plan
- In the window that opens, click the link labeled Change advanced power settings
That should bring you a window similar to this one:
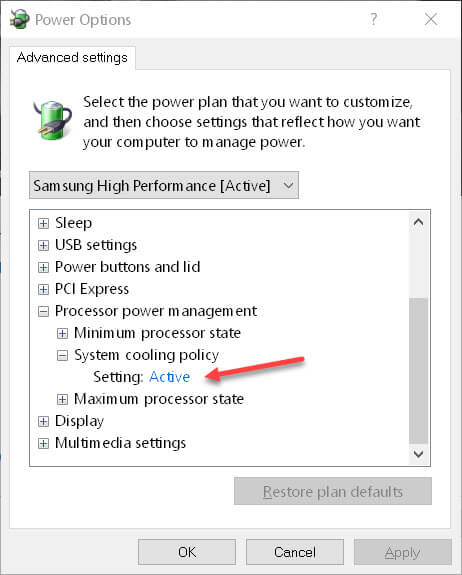
- Drill down the list until you find Processor power management
- Expand that item by clicking the Plus sign (+), then expand the item labeled System cooling policy
You will see a link there. In the above image, it is set to Active. If this is what you want, then you don’t have to do anything and you can simply OK your way out of all these windows. If you would like to change the setting, then simply click on that link to open a drop-down menu from which you can make your choice.
You should not have to reboot your computer for these changes to take effect.
Bonus Tip – Other Adjustments
Don’t go crazy! Many people like to try a lot of different settings to get their computers to run better. That is fine but you must be sure not to make so many changes that you forget what the original settings were. You can easily make things worse and that becomes problematic if you can’t remember all those changes you made. In cases such as this, I always recommend taking baby steps. Change one setting and see if it helps. If not, then you can easily go back and revert to the original setting.
Another problem with multiple changes is that you won’t know which ones helped and which ones hindered. One change at a time is the rule. Make the change, then run your computer as you usually would for several hours if need be. You will usually know in short order if things have gotten better or worse.
As always, if you have any helpful suggestions, comments or questions, please share them with us,
Richard
—
Thanks for the helpful tip.
Glad it helped!