And why not?
The essential tools required are already in your kitbag: eyes, hands and a lot of enthusiasm.
But beware, it could get dangerously enjoyable.
You’ve been buying computers from PC stores and internet retailers for years. They’ve never let you down or maybe they have and you’ve turned to friends when the ON button produces nothing more than a few alarming bleeps followed by silence.
But if you had built the machine yourself, you’d have a better idea of where to look when you opened the hood, wouldn’t you?
Build you own PC – where do you start?
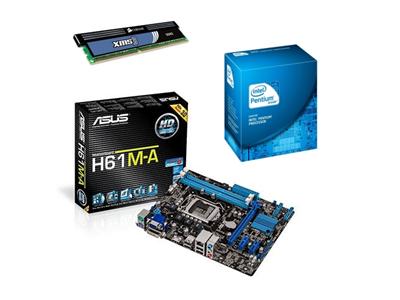
For many people, buying a bundle from an online retailer is an excellent way to begin. The bundle will usually include the motherboard, CPU and memory, which often comes at a more attractive price than buying those items individually.
What do you want to do with this shiny new machine? Do you simply browse the net, post to your favourite social networks, write a few articles from time to time? Or are you a serious gamer or video producer?
These are important considerations in the choice of hardware. Let’s assume in this first article that you are in the former camp and you are on a tight budget, so this is what you need to know.
The basics
There is a lot of preference expressed on the net for what brand of CPU to choose, but for the moment let’s start at a minimum dual core processor level, 4 GB RAM and a compatible motherboard included in the bundle. You will usually find that the CPU and memory will already have been fitted to the motherboard when you take delivery, however you may wish to ask for each item to be packed separately, so that you can fit them yourself for the full DIY experience.
Let’s also assume that you already have a good monitor and functional mouse and keyboard combination, which you’ve got used to over the years as they suit your hands and eyes very well. This leaves us with needing a computer case to house that shiny new hardware and a power supply unit (PSU) to bring it all to life.
The case & PSU
The choice of case is personal with regard to colour and functions and quality varies enormously. It’s worth paying a little more for a quality ATX mid range computer case, especially as you’re going to be living and working with it for some time to come. The very cheap cases often have sharp internal edges, are made with very thin aluminium and are not ideal for noise reduction and cooling.
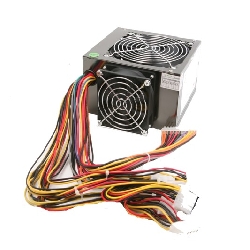
Power supply units or PSU’s are rated in watts and a good starting point for this budget PC is 500 watts which will also take into account a certain amount of upgradability in the future. Again, the criteria mentioned above for PC cases is similarly true for PSU’s.
So there you are at home, the courier has delivered all your new computer parts which you’ve laid out on the kitchen table ready to be assembled. This is often the most daunting moment as you circle round wondering where to start.
The assembly
Beginning with the PC case, open it up by taking off one of the side panels by unscrewing the thumbscrews. Don’t worry, you’ll soon see which is the open part of the case. Inside you should find a small bag of mixed screws and other goodies. Looking into the case at the back panel, you will see numerous holes drilled into the metal in detailed sequence. Going back to the bag of goodies you will find brass or chrome coloured ‘stand offs’ with hexagonal tops which will need to be screwed into that back panel to support the motherboard and prevent it from touching the back of the PC case.
Now lets assume that the motherboard bundle came pre-assembled with the CPU, cooling fan and memory already in place. Before you touch the motherboard, make sure you ground yourself by touching the metal part of the PC case and gently offer up the motherboard to the inside of the case back panel mentioned earlier. The pre-drilled holes should match the holes on the motherboard. Now screw the stand offs onto the panel fairly tight. With the motherboard bundle should be a small chrome coloured plate with holes stamped in it which match the various outer connections of the motherboard. Fit that into the rectangular opening at the back of the PC case. It’s a tight fit, but can be snap fitted quite easily.
Now place the motherboard over the stand offs, matching it up with the small chrome plate you just fitted and screw it into place using more screws form the goody bag mentioned earlier.
You’ve just completed the most nerve wracking phase of building your own PC, so grab yourself a coffee.
Making contact
Most components will fortunately only fit one way round in a PC and many compare it to playing with a mecano set, so when you now place the PSU in the case, you’ll find that it can only be screwed in one way.
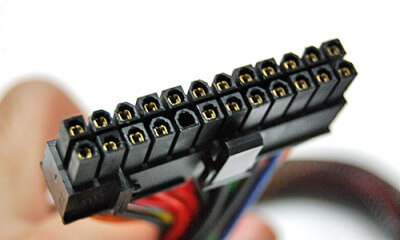
Once fitted in place, connect the PSU cables to the motherboard into the 24 and 4 or 8 pin blocks, and the front panel and USB connectors into the motherboard.
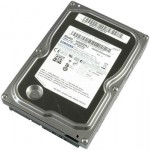
The remaining components to fit are the HARD DRIVE and DVD DRIVE.
To fit the DVD drive, you will need to remove a plastic panel from the front of the PC and slide it in, securing the drive with small screws.
Similarly, the hard drive should now be screwed into place and finally the POWER and SATA cables should be connected to both drives.
At this point you should find numerous unused cables from the PSU which can all be tidied up with plastic cable ties, ensuring no other objects can snag on fans.
The big red button
You’ve just built your own PC and should feel proud of yourself. It’s not such a black art in the end is it?
Finish your coffee and connect up the monitor, keyboard and mouse and finally the power cable to the back of the PC.
Now take a deep breath, press the button marked POWER on the front of the PC, sit back and watch your creation spring into life.
Hear that single beep? See the monitor flicker into life? The reassuring sound of whirring fans?
That’s all good, but our new machine needs human intervention or very little else will happen.
Grab the operating system disc of your choice and pop it into the DVD drive you fitted earlier and REBOOT the PC using the RESET button on the front of the machine.
Take control
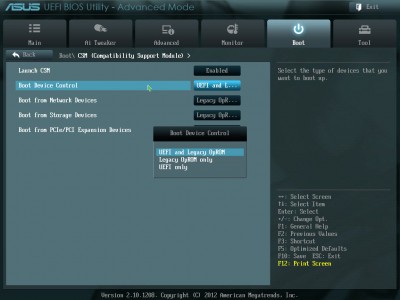
Stay alert and let the machine know who’s boss by hitting DELETE or F2 on the keyboard to bring up the BIOS or UEFI screen. This basic function on the motherboard is probably the most important element in taking control of your PC. With this, you can see which hardware the machine has detected, choose which device it will boot from first and even monitor system temperatures.
By selecting DVD drive as the first boot device, you’re telling the machine to look for the DVD you placed in the drive earlier when it next reboots.
Hit F10, the machine will ask you if you wish to save those changes, click YES and the PC will reboot automatically and in a few seconds ask for your intervention by clicking any key to boot from the DVD.
The installation of the Operating System is very straightforward and requires very little input from you, apart from some prompts required in the early stages of installation.
The final setup of your system will require the motherboard CD to install the motherboard software, after which you can really take control of your new machine to personalize it the way you wish to use it.
Sit back and give yourself a pat on the back in the knowledge that you’ve just created something unique.



How much would it cost to build the described system?
Good question buzmeg.
The answer to that largely depends on where you are in the world, what brands you choose and probably the choice of case.
A quick search would bring up a basic AMD motherboard bundle for around $150 plus hard drive and case.
In general terms, one can get started with all the components mentioned in the article for between $250 and $350.
I hope that helps.
Marc
I’m a lucky camper in that the store I frequent for computer parts only charges a $50. CDN fee for installation. I call this insurance, since if there is a defective part, they correct the problem. Should someone come across a problem, doing their own installation, where would they turn to? Most probably bring the unit back, and pay an hourly rate to find and correct the problem. The cost in time is well worth the small expense (for me).
IMHO todays computers are more sensitive to problems when an amateur tries to do the assembly, Mindblower!
Delighted to hear that you’re a happy camper MB. More power to your elbow!
Building your own PC isn’t for everyone, however the satisfaction gained and knowledge picked up along the way, is immeasurable for many.
I find old PC cases make excellent novelty BBQ housings. Just bung some charcoals in and set them alight before placing a grill on top. Sausages taste particularly meaty when done PC Style.
:o)
Anyhow, some suggestions in regard to graphics adapters would be a useful addition to your feature, especially in relation to what what one could expect in performance and application to budget ratio.
Keasy, I’ve seen old PC’s put to all sorts of uses, but I’ve yet to try that trick.
I didn’t touch on GPU’s in this article, since it’s a budget, non-gaming machine.
Reviewing specific hardware is an area I leave to others.
Cheers and thanks for writing.
Marc
Hi Marc. My first build was Antec Sonata case with a Intel D865PERL mobo and a Intel Pentium 4 processor with XP Pro as the OS. Bought another Antec Sonata and put a Intel DP43BF mobo and a Intel Pentium dual core processorin it and upgraded my first one to the same spec’s, used windows XP, Vista, 7 and Linux on both machines and both are still running today. My last build was a Antec 300 case with an Asus P8Z77 mobo with an Intel I53570 processor and windows 8 OS. Do I save money? No!!! But I like building my own, and the cases are more versatile than OEM cases. Marc, check out the screenshot I posted in the XP forum. Daniel.
Daniel, oddly enough the D865PERL is a mobo I know well and managed to snag one used down here about 5 years ago, built a machine for myself with it and later sold it to a selected customer.
I don’t think I’ve ever saved much money either and it gets to a point when you wouldn’t even consider buying off the shelf.
I’ll take a look at the screenshot….
Hi Marc.
Brought that old D865PERL back to life a few months ago just to see if it would work, and it still did have since disassembled and stored it. It would make a real good Linux machine. Tell me what you think about the dual boot with XP and Lubuntu in the screenshot. I have tried several different Linux distros on some of these old XP machines in the past few months and Lubuntu so far is working really well. Doesn’t have all the bells and whistles of Zorin or Mint but it is very stable and fast. I am using Lubuntu as I write this. I know they are only machines but once you build one and bring it to life they become an extension of you and part of your personality. What gets me, especially where I live, is the way people are discarding these old desktop PC,s just because they don’t fit their lifestyles. I,m afraid the day’s of building our own PC may be coming to an end. Daniel.