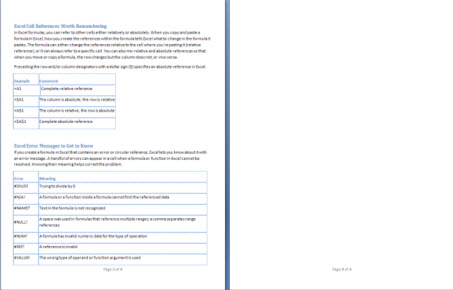
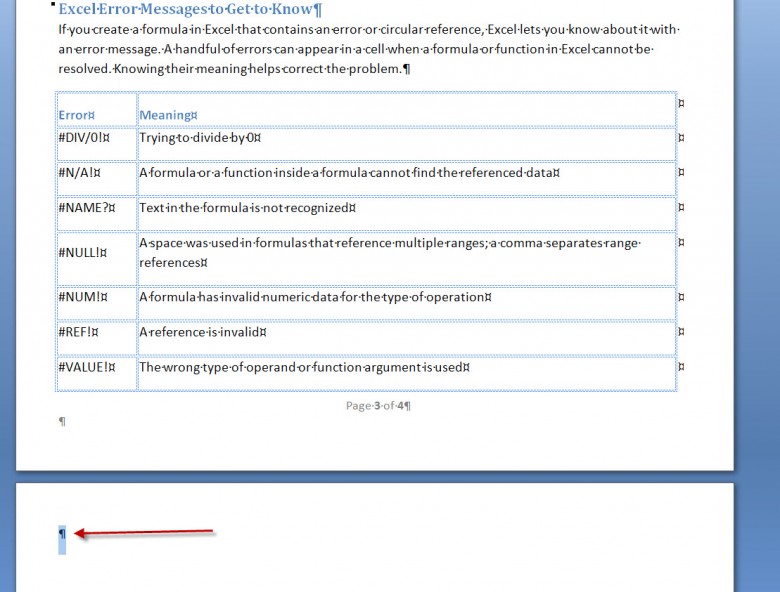
Every time I run into this problem I can’t for the life of me remember how to fix it; Create a Word document – end the document with a table – if the table is exactly at the bottom of the document, Word automatically inserts a blank page after it. The last space in your document is a cell and even if you go there and click on the delete key, that unwanted page stays put. If you are just printing the document – no problem. throw that empty page away. If you’re fitting it into a larger document though, you need to know how to rid yourself of the phantom page. The solutions are really work-arounds, but until the Wizard of Word shows up and tell us otherwise, here are two fixes:
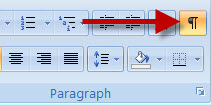
NOTE: Both of the following options require that you click on the Show/Hide paragraph marks button in Word. It’s located in the paragraph group in the Home tab.
This allows you to see paragraph marks and other hidden formatting symbols. You should see a paragraph mark in the upper left hand corner for the last blank page. See the bottom of the figure below.
To Format the Paragraph Mark as a Font
- Select the paragraph mark on the blank page.
- Click in the Font size box in the Formatting toolbar.
- Replace the font size with the number 1.
- Press [Enter].
- The blank page should disappear. Keep in mind: This page is merely hidden in your document. You need to adjust page numbers in your footer/header if they read (as in the sample shown above) Page x of y, with y being the total number of pages in the document.
To Format the Paragraph Mark as Hidden
- Select the paragraph mark on the blank page.
- Click on the Home tab, open the Font group by clicking the dialog launcher (small curved arrow) in the bottom right corner.
- Put a check in the box for Hidden and click OK.
- Turn the Show/Hide paragraph marks button off by deselecting it. (It works as a toggle.) It is located in the Paragraph group in the Home tab.
- The blank page should disappear. Keep in mind: This page is merely hidden in your document. You need to adjust page numbers in your footer/header if they read (as in the sample shown above) Page x of y, with y being the total number of pages in the document.


Ahhhhh, the nuances of Word for long time users.
IMHO:
1. Anyone that is tasked with creating Word documents should ALWAYS have the paragraphs marks ‘shown’.
2. Hidden text and items are a dangerous proposition in Word, as you discussed and come back to bite you sooner or later.
As you speculated there are many work-arounds but may I also recommend the possibility of using the page break command at the end of the table? Although, this option may also lead to other unforeseen formatting problems during further revisions to the document.
There must be a more elegant solution that ‘we’ are not thinking of or even the makers of OfficeWord has not thought of yet!
Cheers, RandiO
This behavior of Word drives me nuts! Thanks for these tips. Another possibility is to add a continuous section break before the table and decrease the bottom margin for that section only. It’s a little tricky, but it can be done.
Best solution is actually (1) highlight the last paragraph following the table, (2) hit alt+O+P and it will open up paragraph formatting. (3) change spacing before and after to zero and change “Line Spacing” to “Multiple” and At: 0.6 pi. That will make it fit if you adjust the “multiple” line spacing. The following paragraph on the next page would have to be “normal” style if such a page was needed.
OH MY GOD!! THANK YOU SOOOO MUCH! YOU ARE A GENIUS! I’VE BEEN GOING MENTAL – LITERALLY TRYING ALL THE BUTTONS IN WORD THAT I NEVER KNEW EVEN EXISTED TO TRY AND GET RID OF THIS BLANK PAGE AT THE END OF MY WORD DOCUMENT- NOW ITS GONE! THANKS TO YOUR WORK AROUND 🙂
I have seen this advice on multiple sites. The problem is the paragraph symbol does not appear on the first or secondary phantom page. The hidden button has no effect. Are these instructions written for Word 2013 using Windows 8 or has microsoft just tweaked it so we have to deal with this poor programming?