

How To Install Linux In Hyper-V
Once you have completed the steps to enable Hyper-V on your PC, the next step is deciding which new Operating system to install.
Operating Systems range from Windows XP through Windows 11 to full Linux and FreeBSD systems.
Search the web for the OS of your choice. Locate the ISO file associated with it and install it into Hyper-V.
Windows Installations
All recent Windows Operating Systems from XP to Windows 11 are available as an ISO file. Most require a software key to activate. If you purchased a key, then just enter it at the prompt and you are good to go.
If you only want to try out a system and don’t mind the “Activate Windows Watermark” on the desktop, then try it out, and when you decide to purchase a key, you can always install it later.
Linux
Linux is a set of operating systems called distros. Ubuntu is the most popular distro. I suggest you research for the type you want to install. Some distros can emulate Windows 7, 10, 11, and Apple. Some have their own look. Some are designed for systems with only 1GB of memory and small HDs. Also, Zorin is very popular and you can change the desktop to your liking.
Installing The ISO
Before you do anything, you need to first locate and download the ISO file of your choice. In the example below, I will start with one of the most popular distros, Mint Cinnamon.
Installing the ISO in Hyper-V
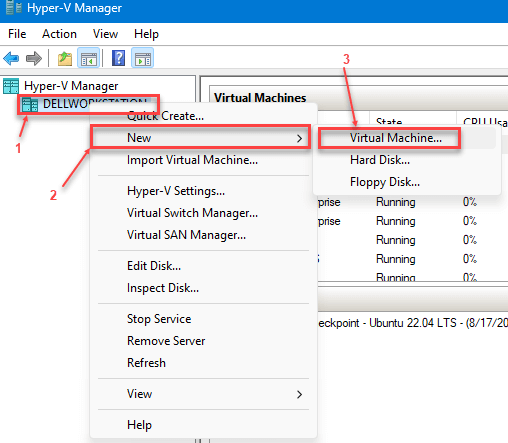
- Right-click on the PC listed under Hyper-V Manager
- Select New
- Choose Virtual Machine
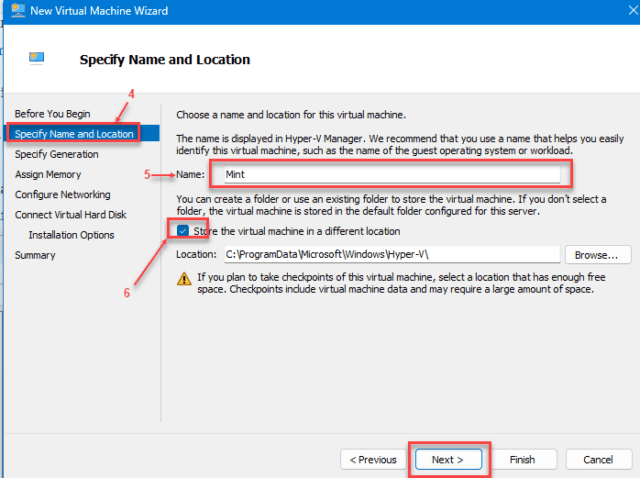
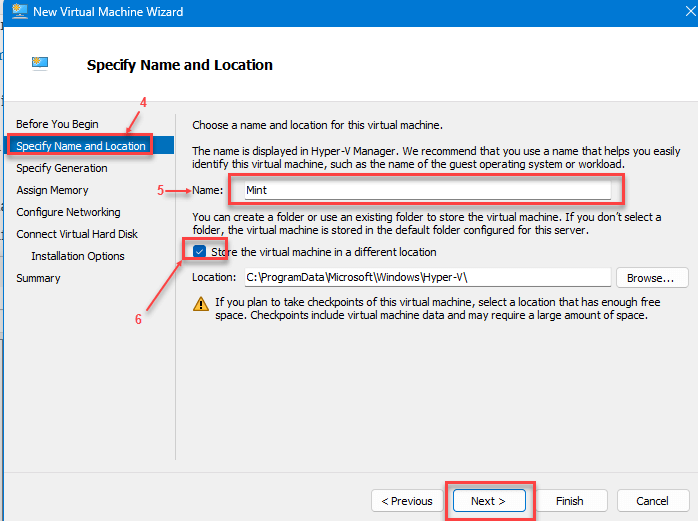
- Click on Specify name and location
- Enter a new Name for your Virtual Machine – I used Mint
- Click on Store the virtual machine in a different location and use the location presented or use the Browse button to select your own location. Select Next
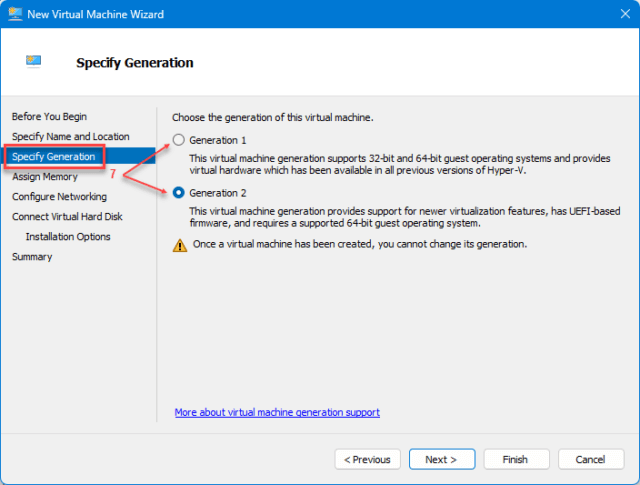
- Choose Generation 2 because it supports newer systems If you have problems, restart the process and select Generation 1
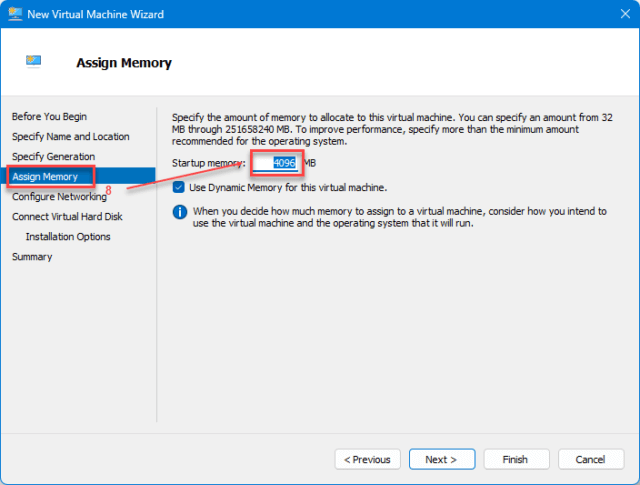
- Click Next to assign memory allocation. I recommend using the suggested setting. Click Next
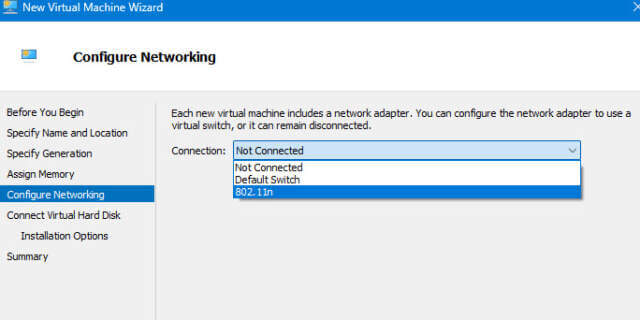
- Change the Connection to Default Switch. Click Next

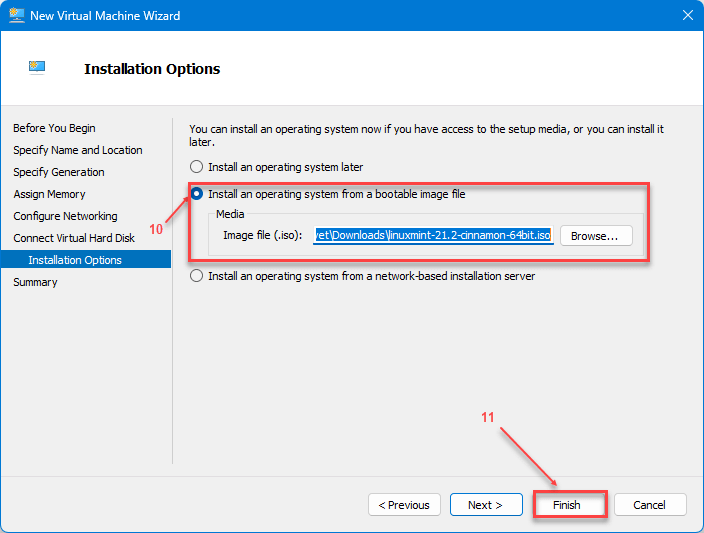
- Select Installation Options and operating system from a bootable image file. Use the Browse button to locate the ISO file you downloaded and enter it into this area

- Click on Finish


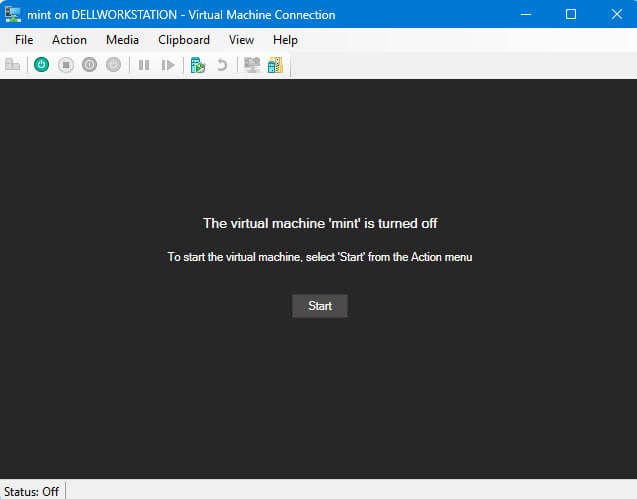
Mint will appear as a Virtual Machine with the State being “Off”. Double-click to connect 
After starting, you will see an opening screen asking you to Try or Install Linux Mint. Select Install. Once installed, the Mint opening screen will appear. After a successful installation, the next time you start the VM, select Start Linux Mint
Potential Issues
- If you come across any errors where the VM fails and receive this message:
- Then you will need to click on the VM, select Settings in Hyper-V, and change the Security Settings to Secure Boot Disabled

- Then you will need to click on the VM, select Settings in Hyper-V, and change the Security Settings to Secure Boot Disabled

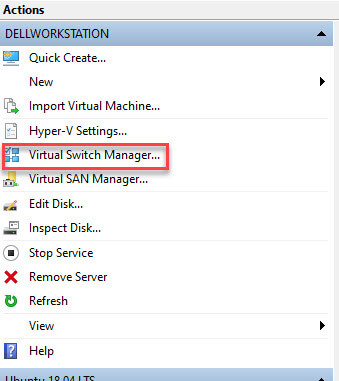
- In the actions menu, select Virtual Switch Manager
- Select New virtual network switch
- Make sure External is highlighted
- Click on Create Virtual Switch

- In the new window, give the new virtual switch a name
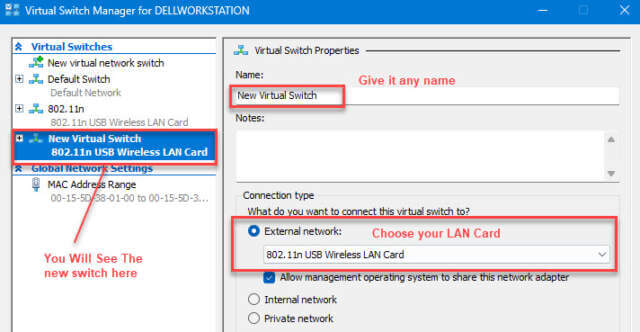
- Select External Network and choose your Internet Controller
- Select the newly created virtual switch in Step 9 above instead of the Default Switch


Summary
Installing any Operating System in Hyper-V should be an easy task but some Distros have issues, particularly newly released ones. Try to stay with older established versions. The most likely problems you might encounter are those listed above. Fortunately, Hyper-V Manager has a great feature called Quick Create that can make the installation of some systems automatic. See the final article on how to install a VM using Quick Create.
This is the 4th of a 5-part series about Virtual Drives:
- Understanding a Virtual Drive
- Installing Oracle’s VirtualBox
- Installing Hyper-V Manager
- Installing A Linux Distro ⬅ You are here
- Using Quick Create In Hyper-V Manager
—

