Using Quick Create In Hyper-V Manager
In the previous articles, we installed a Linux system using an ISO file by following the steps offered in Hyper-V Manager. This method gives you the widest choice of options and experienced users can modify settings to fit their needs. However, Hyper-V offers a gallery of virtual machines that can be independently launched using the Hyper-V Quick Create Desktop App. This app can also be accessed within Hyper-V Manager under the Actions Menu.
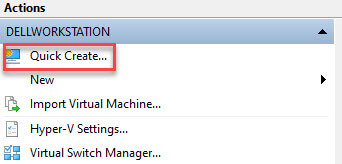
Quick Create
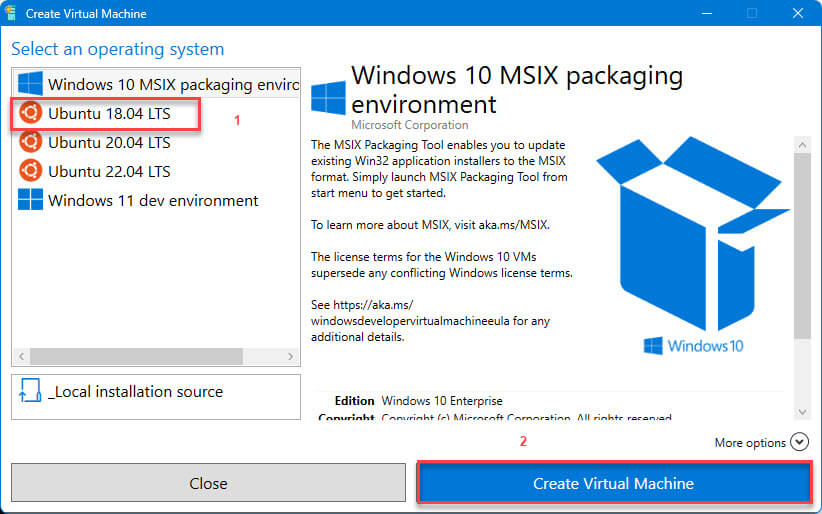
Start by entering “Hyper-V Quick Create” in the search area of the taskbar. Depending on the version of Windows you are running, you will see a pre-set gallery of Operating Systems you may choose from.
Besides the OS available, Quick Create lets you create a new virtual machine using an existing virtual hard disk file. Either VHDX or VHD. If the VM you make a copy of already has a software key, it will be carried over. Copying a master or “golden copy” of a VM allows you to experiment with different deployments of an OS. You can change software settings, antivirus programs, and game settings all without having to change the master copy. This is usually for experienced users. I assume that if you are already making VMs, then making copies should be no problem for you. I did want to show new users how to let Quick Create automatically create their Virtual Machine with virtually (no pun intended) no VM knowledge.
Using The Preset Gallery
The focus of this article is to use Quick Create to create a new Virtual Machine that is already included under “Select an Operating System”. On my version of Hyper-V, I have two Windows deployments each with a 90-day license Activation, and three free Ubuntu versions available to Quick Install. This is the easiest and fastest way to create a VM.
- Select the OS you wish to use.
- Click on Create Virtual Machine

- Windows will download the image from the internet automatically.
- Depending on your internet speed this should take between 1 to 5 min.
- After downloading the image, Quick Create will extract the image and create the VM.
- Select Connect and follow the prompts in Ubuntu to set it up.
Using Quick Create only takes three clicks of the mouse to install a Virtual Machine in Hyper-V. This is by far the easiest method and the one with the least chance of failing. It does everything for you.
Local Installation Source
Instead of using the ISO file you downloaded and used to manually create a VM, you may choose to use the Local installation source option provided.
- Click on Local installation source.
- In the right panel click on “Change installation source” and locate your ISO file.
- Uncheck the box that enables Windows Secure Boot.
- Click on Create Virtual Machine.
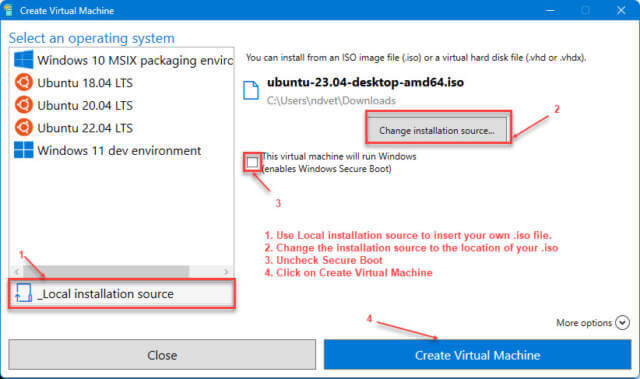
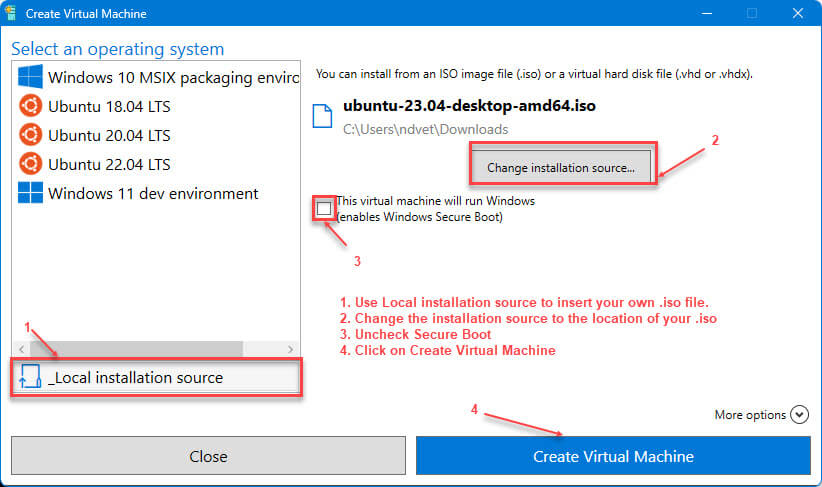
Quick Create will automatically extract the image and adjust the settings as necessary. You should have your new VM up and running in minutes.
Adding To The Gallery
Microsoft Learn offers a great tutorial on how to create your own VMs and enter them under the Quick Create gallery. It is an excellent way to experiment with VM and learn more about the process.
Summary
- Understanding a Virtual Drive
- Installing Oracle’s VirtualBox
- Installing Hyper-V Manager
- Installing A Linux Distro
- Using Quick Create In Hyper-V Manager ⬅ You are here
Hopefully, in this 5-part series, you have found a way to run a VM on your Windows 10 or 11 Operating System. We covered Virtual Machines, Oracle’s VirtualBox, and installed Hyper-V Manager along with a way to install it on Windows 10 and 11 Home versions. Finally, how to install Operating Systems in Hyper-V Manager using the new Quick Create App.
—
Excellent series on Virtual Machines. I have been using Win10 for a while but on machines with NO virtualization. Bought a newer Dell which can run virtual machines. Started with Sandboxie Plus. Worked well but could not seem to get Win7 OS to install in Sandboxie Plus. Then went to Virtual Box by Oracle. That had some learning curves to get to use it. Got Win7 up and running but it is unstable and uncontrollable. Going to go back to Restore Point where it all began and start over using Hyper V system. Hope it goes better. Many hours have been lost but guess it takes some learning time since I have to do it by myself. Will let you know how the Hyper V experience goes in comments later. Appreciate all the time you devoted in doing this series of articles. I have been a loyal follower of Dave’s Computer Tips since they started. You guys are all doing an awesome job.
Thanks for the kind words. Let me know how it goes
Hey Jimbo,
I just had to pop in and say… what an outstanding series of articles. Awesome work, mate.