
2-Step Verification
Recently, it was reported that a prominent security expert acquired a database with 272.3 million eMail accounts, with passwords, from a hacker on a Russian underground forum. All it cost him was a nice review of the hacker’s skills. The stolen IDs/passwords contained accounts from Gmail, Yahoo! Mail and Microsoft eMail, along with a large collection from Mail.ru, one of Russia’s largest eMail providers. It was unclear how well the passwords match up with the eMail IDs, and the providers who were hacked have had little to say.
The unfortunate truth is that there is a constant assault by hackers around the globe to breach security barriers and acquire information that doesn’t belong to them. Your information, and mine. It points squarely to the need for better personal online account security management. And it’s not like better security isn’t already available. Several online services already offer 2-step verification for online accounts. Yahoo! Mail and Google Mail both provide this feature, though I’ve not seen any numbers on how many subscribers actually use it. Amazon.com also offers 2-step logins.
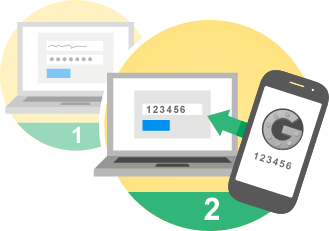
With 2-step verification, even if someone buys, steals or borrows your password, they won’t be able to access your Google account without the 6-digit code sent to your phone.
I recently started using the 2-step verification for my Gmail account. So far, I feel like the extra measure of security is worth the extra few seconds it takes to log in to my Gmail account. So I thought I would provide a description of the process to enable the 2-step login security in Gmail to show DCT readers how easy it is to make their Gmail accounts 100 percent more secure against intrusion.
Notice I said 100 percent more secure. Not 100 percent secure. The actual effectiveness of the 2-step login depends on how secure your cell phone is because receiving a 6 digit code number becomes a necessary part of the 2-step verification process. Let’s begin.
How to set it up
Step 1 – To setup the highly secure 2-step verification for Gmail, log in to your Gmail account. Once you are logged in, click on the orb in the upper right-hand corner of the page. The orb may contain the first initial of your account name. Or, it may contain a picture you uploaded to personalize your account. From the resulting dialog box, click on the My Account button, shown in the graphic below.

—
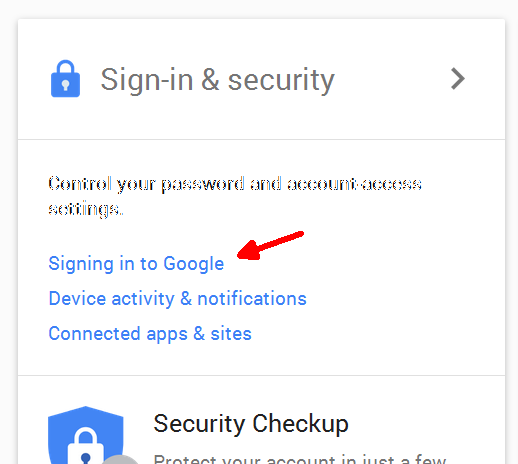
Step 2 – From the Sign-in & Security menu, select “Signing in to Google.”
—
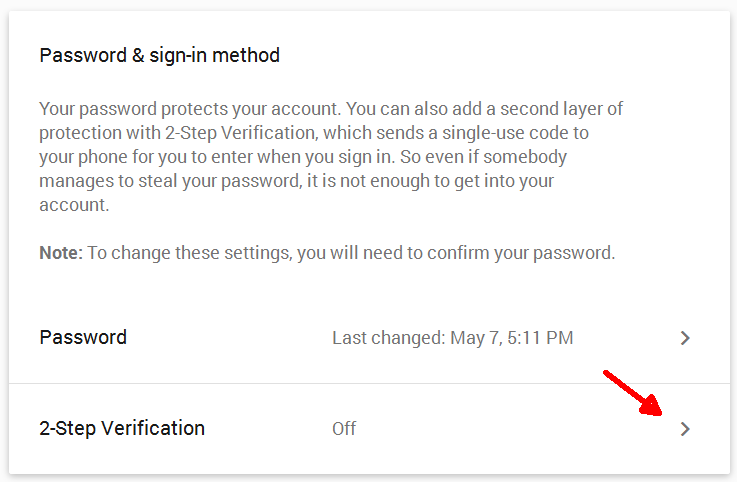
Step 3 – Now, click the “>” symbol to access the 2-step verification setup section.
—
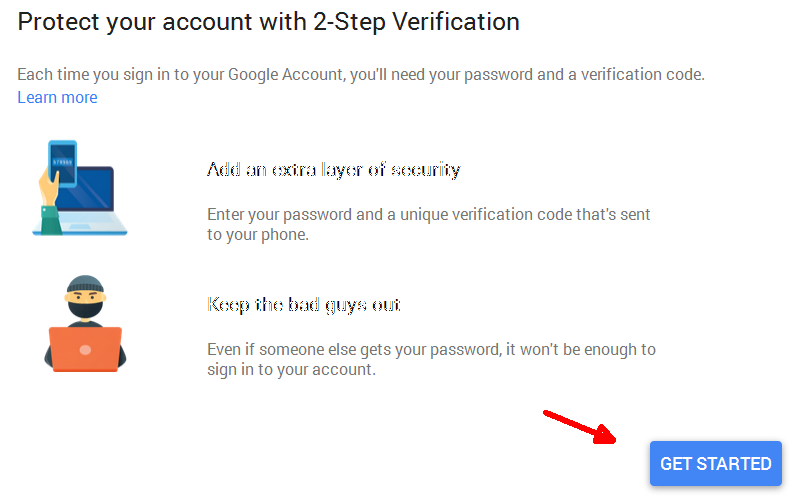
Step 4 – Yippee! We’re finally at the 2-step verification setup section. Click on the the blue Get Started button to continue.
—
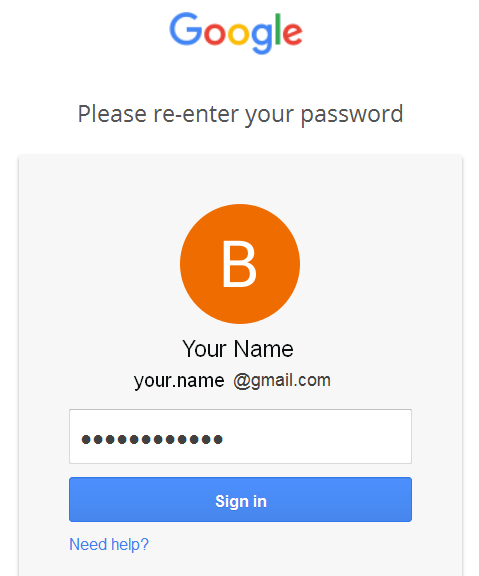
Step 5 – You will need to re-enter your Google account password to proceed to the next step.
—
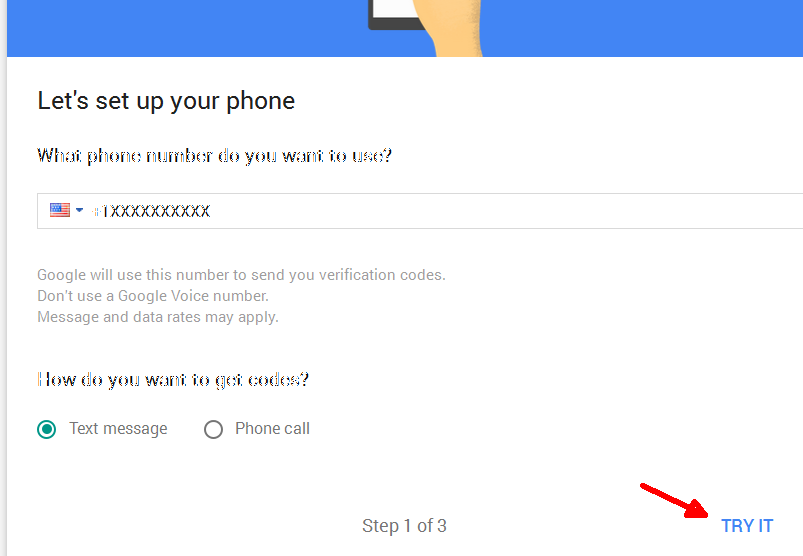
Step 6 – After re-entering your password, you need to enter your cell phone number to receive the 6-digit code to verify your login. After entering your cell phone number, click TRY IT.
—
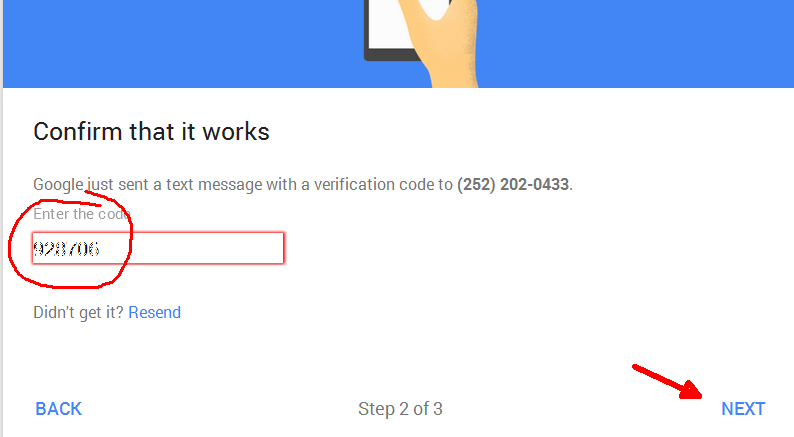
Step 7 – Google’s verification process will send a 6-digit code to the cell number you provided. Enter that 6-digit number into the code verification box, then click NEXT.
—
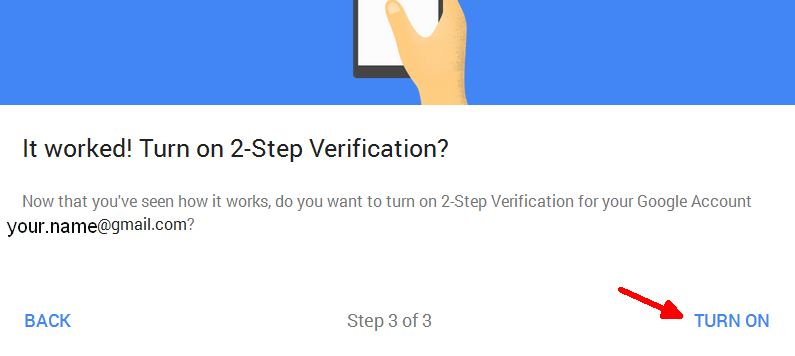
Step 8 – Congratulations! You are finally at the point where you can enable Google’s 2-step verification. Click TURN ON.
You have now virtually assured that no hacker is going to take a peep into your Gmail. Only Google’s keyword Bots will be able to do that, as they scan your eMail and collect keywords to “personalize” your Google experience with regard to targeted ads. That, my friends, is the price for “free” eMail service.
Some more thoughts…
After turning on 2-step verification, you are taken to an options page. Here, you can review alternative
second-step options that might appeal to you. They are certainly worth taking a look at.

Finally, I strongly recommend that you create backup codes just in case you should need to access your Gmail account and don’t have access to your phone. Click SETUP.

This will give you a list of 10 backup codes that should be saved in a safe place. You might even want to print this list and keep it tucked away in your wallet.
The next time you check your Gmail, you should have an eMail from Google confirming the 2-step verification setup has been successfully completed.
Go ahead, let someone look over your shoulder while typing your password. But whatever you do, don’t let them read the confirmation number in the text message Google sends to your phone!
You like? Have you enabled 2-step verification? How long have you been using it? Will you continue to use it, and do you feel that your private eMail is now more secure? Let us know in the comments section, below!
—
Thanks that was the push i needed i saw that the other day with my email and youtube a/c’s, i remember my old yahoo being used by me in Korea only problem is that i was living in Melbourne at the time…..
I am having problems editing my phone number. I have moved to Palau and Google does not recognise the phone number and will not accept it. What can I do?
Hi Daniel,
I would dearly love to use Two-Step Verification but unfortunately I am working in Palau. For some strange reason Google doesn’t recognise the cellphone numbers in Palau – I think because they are only 7 digits. IE a Palau cellphone number is: +680 xxx-xxxx. I have noticed that landline numbers are recognised. They are 8 digits.
So can someone find a way to get through to Google and remedy this?
That’s interesting. Both my cell and VoIP numbers are 10 digit numbers… 3 digit area code, plus 7 digit number. (nnn-nnn-nnnn). I would have guessed that the area code + 7 digits would work before the area code + 8 digits.