The other day I was trying to think of a new article. During that time I was shopping on my Amazon account. Most of us probably have shopped on Amazon once or twice in our lives, for some of us it is a daily experience. This reminded me of an article I wrote back in 2017 about how you could clear your browsing history on your Amazon account. Since it has been awhile, I thought I could update you all on how to do this on your App and then touch on where they moved it on the website. If you would like to see the one from 2017 here it is:
Also, make sure to check out some of the other articles I wrote on Amazon:
- How To Find Coupons On Amazon
- How To Find Amazon Digital Receipts
- How To Update Amazon Profile Picture
- How To Use Visa Gift Cards On Amazon
- How To Remove Amazon Payment Methods
Now that we have that out of the way, let us start the lesson.
How To Manage Amazon Browsing History
This will be shown using my Motorola Edge Android phone. The app is the focus of this article but will touch on the website at the end.
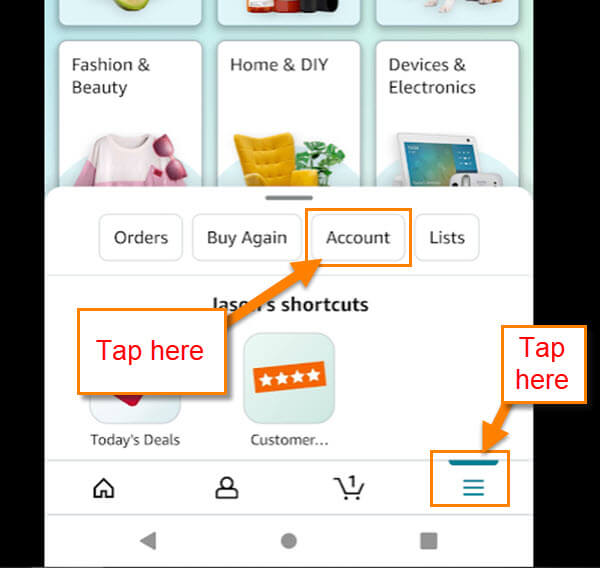
Step 1: Find the Amazon app on your device. Tap it.

Step 2: Once on the app, tap the 3 horizontal lines on the bottom right. On the menu that pops up, tap the Account tab.
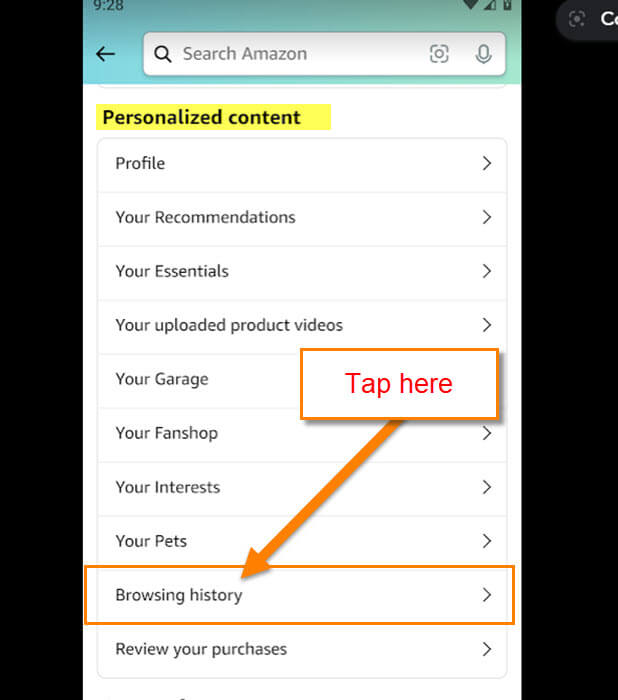
Step 3: Here you will want to scroll down until you see the section entitled Personalized content. Under here, tap on Browsing History.
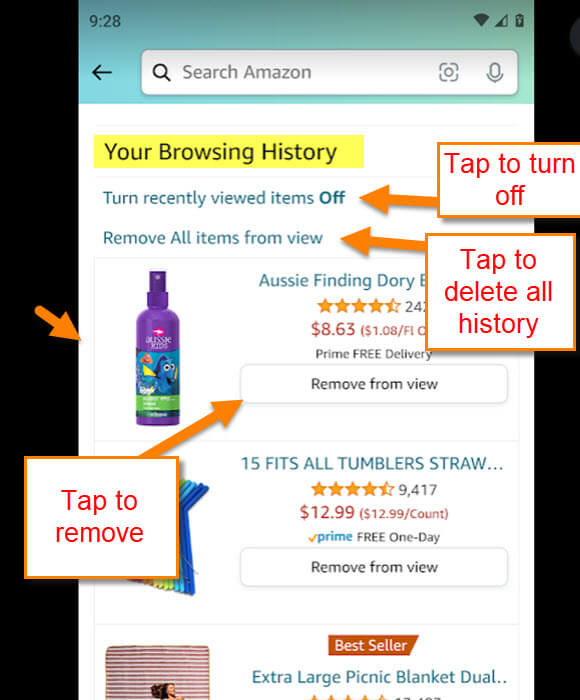
Step 4: This is the screen where you can manage your browsing history. You have a few choices to choose from:
- Turn recently viewed items off (basically, this turns off the browsing history) Tap it if you want to turn it off
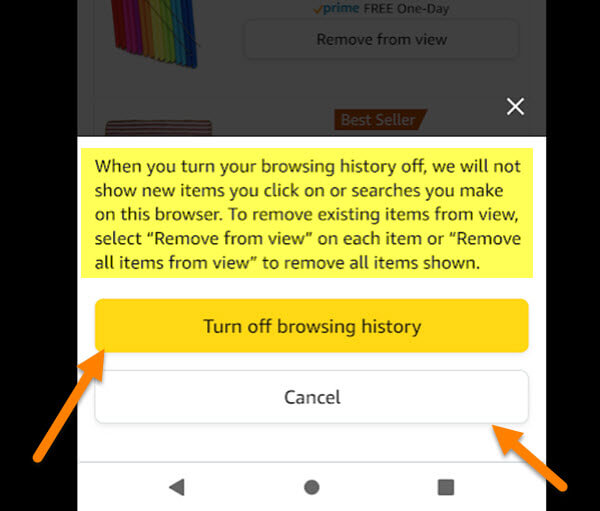
You will get this warning screen:
When you turn your browsing history off, we will not show new items you click on or searches you make on this browser. To remove existing items from view, select “Remove from view” on each item or “Remove all items from view” to remove all items shown.
If you still want to turn it off, tap the yellow button, “Turn off browsing history“.
- Remove All items from view (Exactly what it is telling you)
If you wish to remove only one item, then find the item on the list and click the Remove from view button next to that item.
That is all you need to do to manage your Amazon browsing history on the app. Time to touch on the changes in how you find it on the website.
How To Manage Amazon Browsing History on Website (Updated)
This will be shown on the Amazon website using my Windows laptop. Since Amazon loves to move things, it is time to give you an update.
Step 1: Log in to your Account.
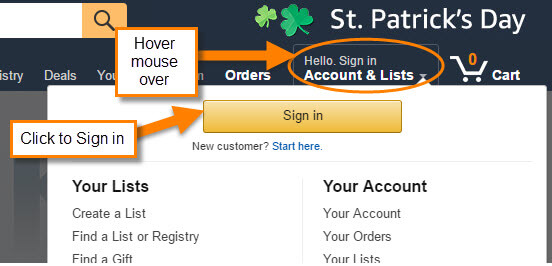
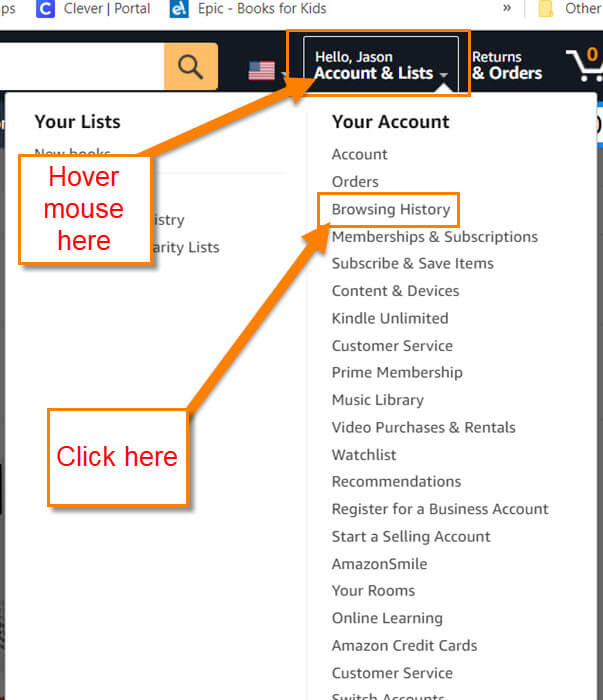
Step 2: This is one of the steps they decided to change for us. You will need to head up to the right and hover your mouse over Hello (Name). This will open the drop-down menu and from there, click on the Browsing History link.
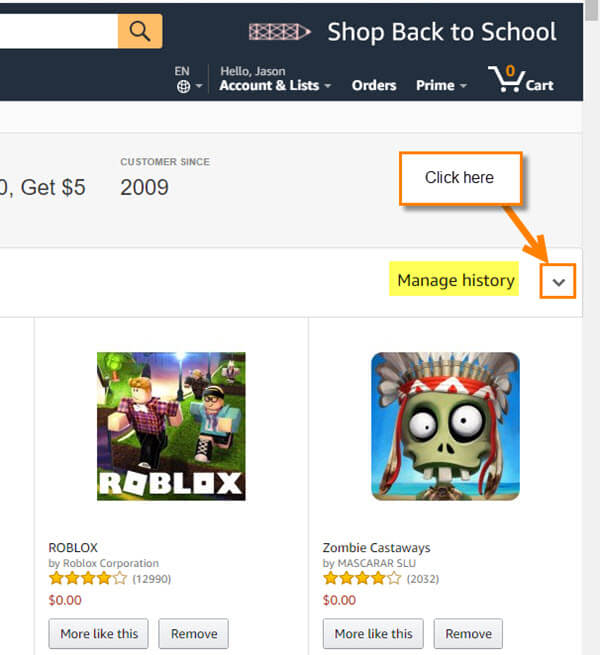
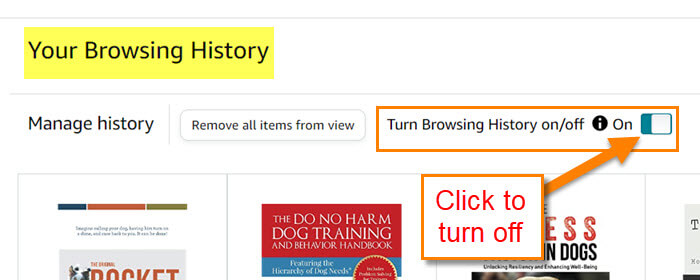
Step 3: Now we will be on the Browsing History page. From here, look to the far right and there should be the words, Manage History. Click on the adjacent down-arrow.
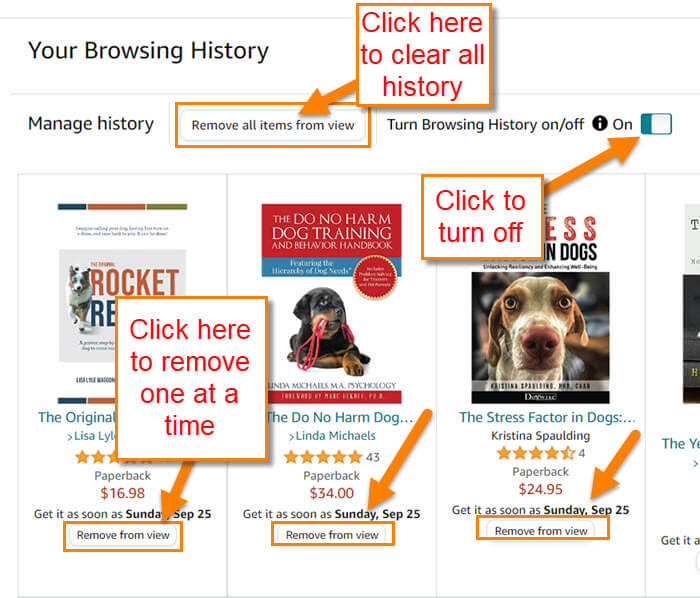
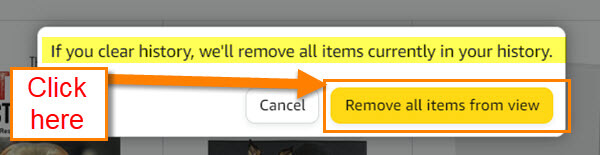
Step 4: This will bring up the Manage History line of options. To remove individual items from the history, simply click the Remove from view button on each item. If you would like to clear the entire history, click the Remove all items button next to the wording Manage history. Next, there will be a warning window that you will need to click to confirm that you want to delete this history.
Step 5: That is how to clear the history. Now we want to Turn Browsing History on/off. The way to do this is to click the On/Off button. Once that is done, it will stop them from keeping track of your browsing. Or as they like to say, “When you turn your browsing history off, we will not show new items you click on or searches you make on this browser. To remove existing items from view, select “Remove from view” on each item or “Remove all items from view to remove all items shown.”
Now you know how to clear the Browsing history. From what I could tell, this needs to be done on each device or browser. It does not affect the other ones.
—