
Did you know you can surf the web and test software with perfect safety from within Windows Sandbox?
Sandboxing is an isolation technique whereby all data related to the user’s online and offline activity is encapsulated within a special container (or Sandbox), completely separate from the system. Emptying the container (Sandbox) at the end of a session means that zero data is recorded or retained, everything is gone, including any malware or nasties picked up along the way. Windows Sandbox employs this type of isolation technique within a cut-down version of Windows which acts as a sort of basic VM (Virtual Machine).
What makes Windows Sandbox appealing over a full-blown VM is its comparative simplicity and ease of use. Anyone, regardless of their level of computer proficiency, should be able to easily work with Windows Sandbox. However, Windows Sandbox is disabled by default and in this article, I’ll show you how to enable it.
- You also might like: Windows 10 Quick Tips – Defender Sandboxed
Windows Sandbox System Requirements
Unfortunately, Windows Sandbox is not available in Windows Home editions:
- Windows 10 and 11 Pro, Enterprise, or Server
- A 64-bit processor capable of virtualization, with at least two CPU cores
- Virtualization enabled in BIOS, if not already
- At least 4GB of RAM (8GB recommended)
- At least 1GB of free disk space (SSD recommended)
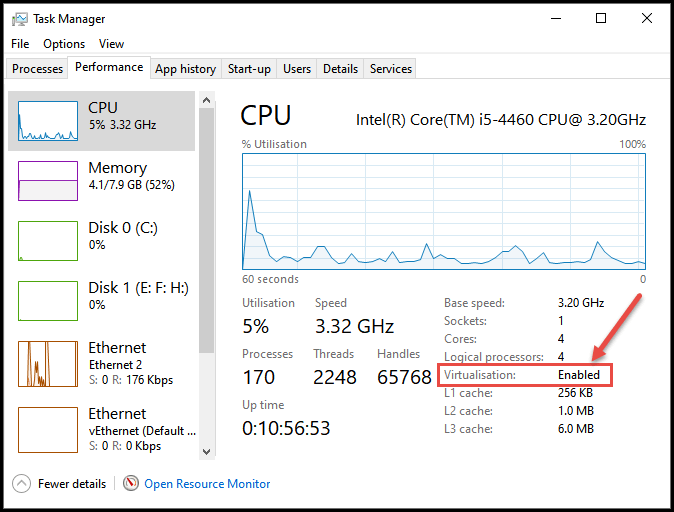
To quickly check to see if virtualization is already enabled, open Task Manager, go to the Performance tab, and look for Virtualization toward the bottom right of the window:
How To Enable Windows Sandbox
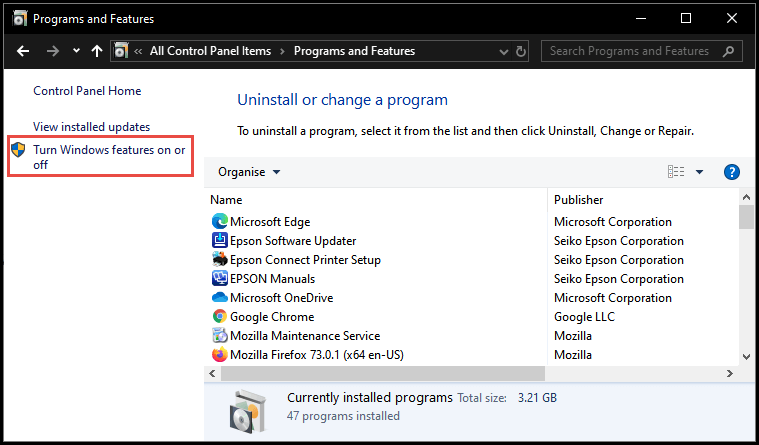
Go to Control Panel > Programs and Features, and from the left-hand panel click Turn Windows features on or off
In the Windows Features window, scroll down the list, locate the Windows Sandbox entry, and enable it:

Click OK and a new window will open with a progress bar, you’ll receive a couple of messages: Searching for required files followed by Making changes. When the process has completed – it took about 30 seconds on my machine – you’ll be required to Restart the system in order to apply the changes.
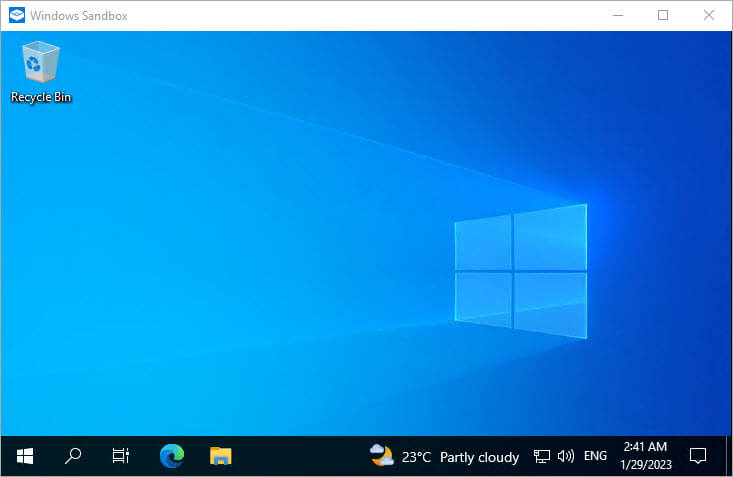
To run Windows Sandbox, open the Start Menu and type Windows Sandbox:

From here you can also choose to Pin to Start or Pin to Taskbar to create a quick access shortcut.
Working Within Windows Sandbox
- For obvious reasons, you cannot install software that requires a Restart within a sandbox, including Windows Sandbox
- While no browser history will be saved locally, your ISP will still be able to see what sites you’ve visited
- Windows Sandbox is a fairly primitive VM and there is no persistence or other features one would normally associate with a full-blown VM. That said, for its purpose, Windows Sandbox is a very simple, secure, and user-friendly mechanism
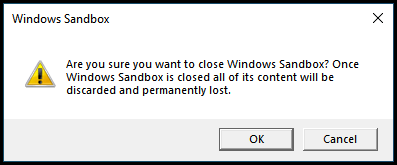
- During the initial run of Windows Sandbox, you will receive a warning message that Windows Defender is not enabled. You can safely ignore this warning, there is no need for Windows Defender to be running or any other antivirus software. Windows Sandbox is designed to keep malware isolated away from the main system and any malware inadvertently picked up along the way is automatically expunged whenever Windows Sandbox is closed out:
- You can also transfer files from your main operating system into Windows Sandbox – visit the following link to find out how: How To Transfer Files Into Windows Sandbox
BOTTOM LINE:
I use Windows Sandbox frequently when testing software for articles. At the risk of repeating myself, it’s a very quick, safe, and simple method for testing software, and any activities where security is paramount.
—
Thanks Jim,
Great article on a solid feature within Windows as long as you have the requirements to enable it. I’m going to start using it to test software before installing on my computer.
Thanks Again,
Robert
Cheers Robert.
Can we protect against this anti-sandbox software?
https://www.techrepublic.com/article/beep-malware-evades-detection/
The “Beep” malware discussed in that article is no different to 99.9% of all malware in that it requires some sort of interaction from the user to deliver its payload- clicking on a malicious link, opening an infected email attachment, etc. Beep also exploits Windows RDP which most home users would (should) have disabled. Whereas business users often require RPD enabled so employees can access work computers from home.
That’s why the warning is primarily aimed at business users- because multiple networked computers operated by multiple users in an enterprise environment with RDP enabled are far more susceptible to malware infections, such as Beep, than a single home user, and especially if that home user is security savvy.
So, the answer to your question is, yes, it’s possible for the Beep malware to bypass sandboxing security mechanisms, but highly unlikely in a home user situation.
You can use Gibson Research Corporation “ShieldsUP!” to scan RDP port (3389) to see if it’s open on your computer.
Hey Robert,
Yes, ShieldsUp is a terrific resource. However, simply disabling RDP is widely recognized as the most effective method for safeguarding against RDP attacks.
Pretty much all advice for safeguarding RDP and port 3389 is aimed at enterprise deployments where RDP is often enabled by necessity. All home users need do is disable RDP.
Jim,
Might be a good topic to write about. The different methods of enabling or disabling RDP, the benefits or disadvantages of doing so. What other common ports could be an issue etc.
Robert