So, you have just started streaming and recording your game play on Twitch.tv. Now you are wondering how you can clip out the best parts of your stream to share with others. Well, you came to the right place. I have been streaming on Twitch for a little while now and I can show you the steps to create your own video highlights. Let’s start with an example of why you would like to do this.
Example: You beat a Boss in Dark Souls III and want to share the battle, or as Twitch calls it, ‘Create Highlights.’
How to Create a Highlights Video On Twitch
This is something that I recently started doing myself. Here is how you can edit the best part of your gaming video on Twitch and remove all the unnecessary running around. The first part of this, you will probable already know, but it is good to cover all the steps.
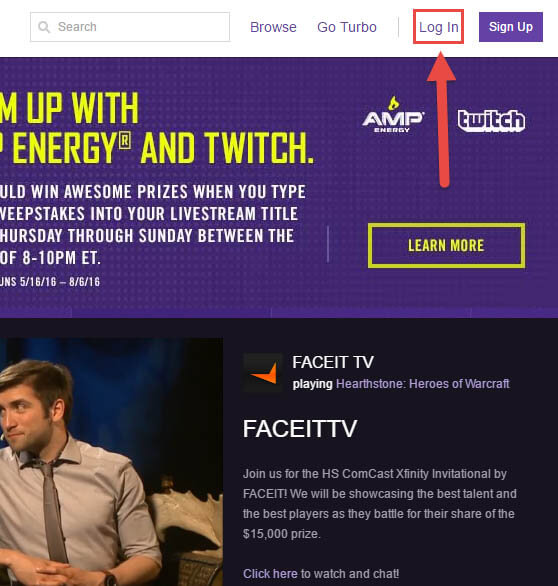
Step 1: Head over to Twitch.tv and click on the “Log in” link on the top right of the website
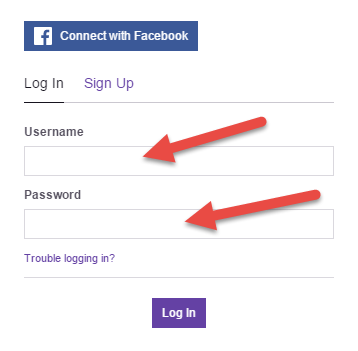
Step 2: Here, you will just need to fill in your login info and click “Log In”
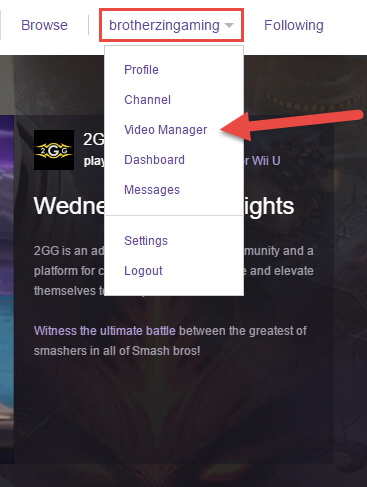
Step 3: Your Twitch name will show at the top. Click on your name and a drop down menu will appear. There are two ways to get to the Highlighting part. I will show you both ways in this article. First, go ahead and click on the Video Manager link.
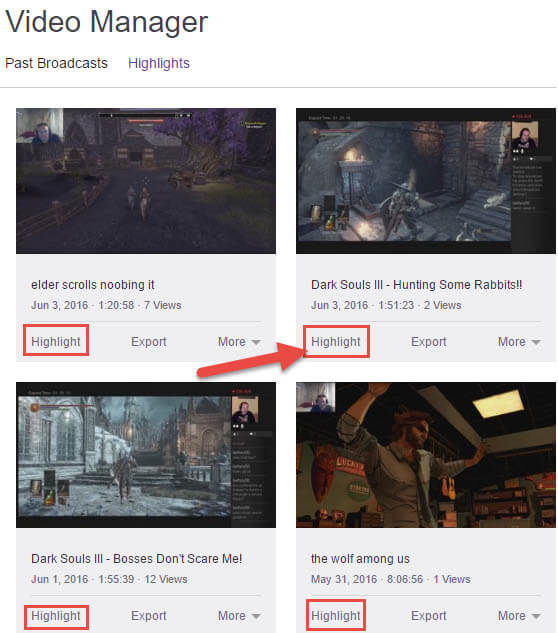
Step 4: In the Video Manager you will see all your recorded gaming streams. Right under the videos you will see the option that says “Highlight”– click it.
Other way:
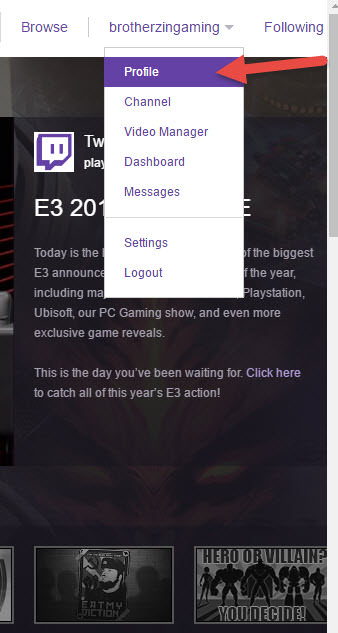
Step 3.1: Another way to get to this same area is instead of clicking on “Video Manager” at the main menu, click on “Profile”.
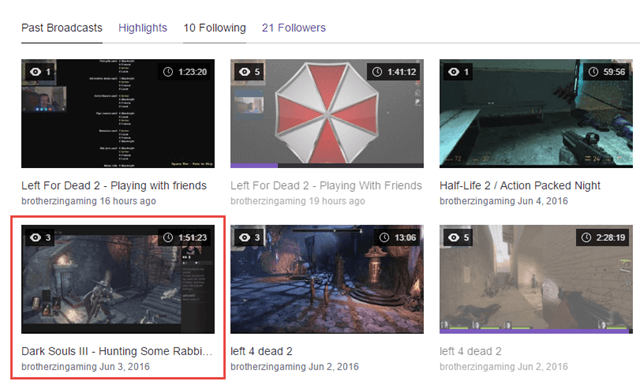
Step 4.1: This will bring up your Profile Page with all your Broadcasts. Here, you will want to choose which video you would like to create a Highlight from. Just click on the video you want.
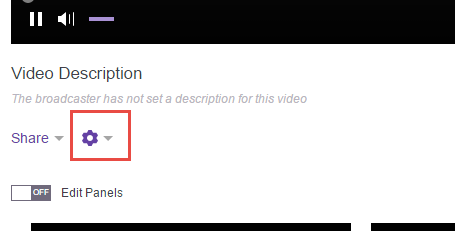
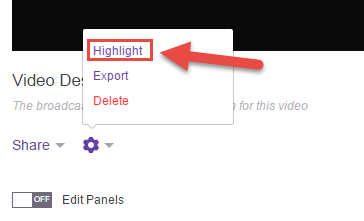
Right below the Video, you will see a gear image. Click on this. A drop-down menu will appear with three options to choose from. Click on “Highlight.”
Back on course: Both ways will bring you to Step 5.
Now we are in the same spot the Video Manager took us to. Time to continue with our steps to creating Highlights of your video.
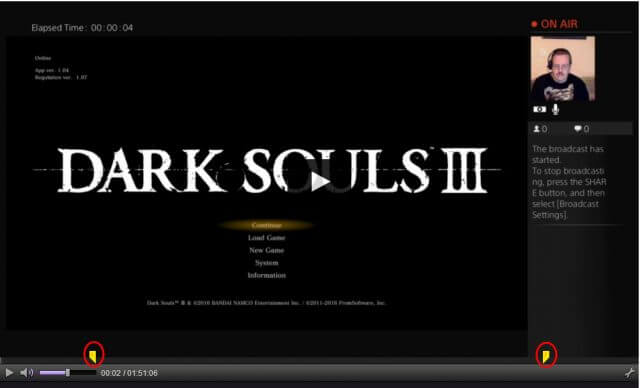
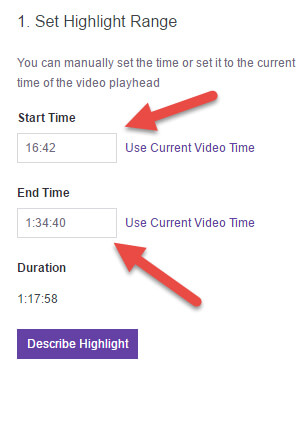
Step 5: Once in the Highlight editing area, you will see your video. On the right side of your screen you will have “Start Time” and “End Time” options. What you want to do is find the spots in your video to Start and End at. You can do this by moving the yellow tabs on the video line to the desired area which will automatically fill in the Start and End times. The way I like to do it is to find the spot on my video and write down the Start time and End times. Then I key it into the desired boxes. This makes sure I get the exact time correct on my Highlight.
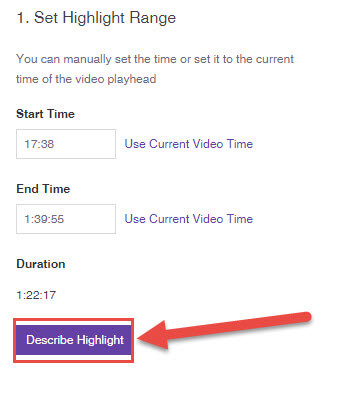
Step 6: Once you have found and entered the Start and End times, you just need to hit the “Describe Highlight” button at the bottom.
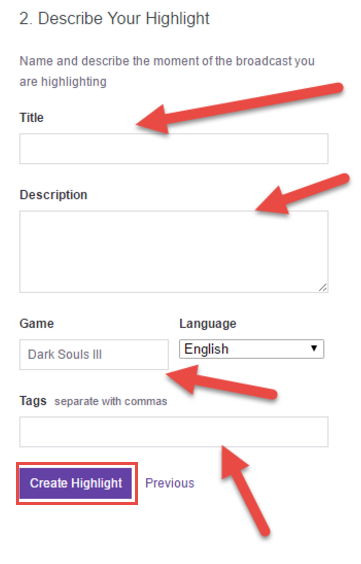
Step 7: In here, you will be able to add Descriptions, Meta Tags, Title and what game you played. Once you have done that, click on the “Create Highlight” button at the bottom.
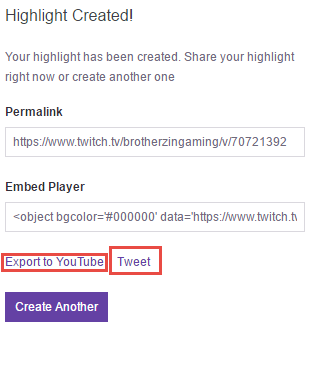
Step 8: “Highlight Created!”. Great, now you can export it to YouTube or Tweet about it. The clip will be saved to your Twitch Page under ‘Highlights’.
With these simple steps you can capture the best moments of your stream. If you have a Twitch Channel, let me know about it and share some of your Highlights with me.
—
