Have you ever wanted to create an Animated GIF? A series of pictures strung together that when opened it’s like watching a video clip. I’m going to show you how to make one using a photo editing program called GIMP.
But first, you need a bunch of photos that you want to be incorporated into one package. If you’re artistic enough (I am not), you can create your own animations or you could use a series of pictures to create a slideshow.
I don’t have any pictures ready at the moment to create an animated GIF so I’m going to Frankenstein an already prepared GIF file. I’m going to tear it apart and see if I can put it back together again.
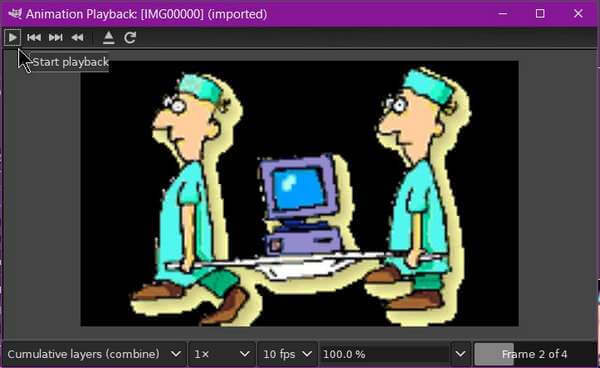
My GIF is one that has two interns or medics carrying a computer on a stretcher.
GifSplitter
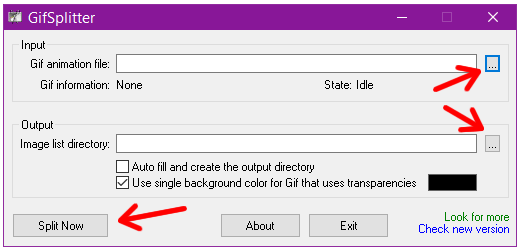
First, I used a program called GifSplitter to split up the file into its individual pictures. There are only four frames in this one, so four pictures.
The original website, www.xoyosoft.com, seems to be down. The CNET download, at the time of this writing, has no adware or third-party programs. It’s a portable program with no installer. The filename is gs.zip.
I opened the animated GIF in question by clicking on the square with the three dots on the right-hand side of the Input line. Then I chose an Output folder. If you click on the black square you can choose a different colour for the image background when dealing with a GIF that has a transparent background. I left it black, why my end result has a black background when the original was transparent.
Then click on Split Now. In the output folder, you’ll see a series of images labeled IMG00000.bmp, IMG00001.bmp, and so on, depending on how many frames are in the original GIF.
Now we have our pictures to reassemble into an animated GIF.
Open GIMP
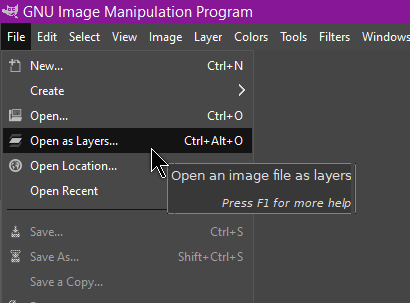
Click on File and then Open as Layers…
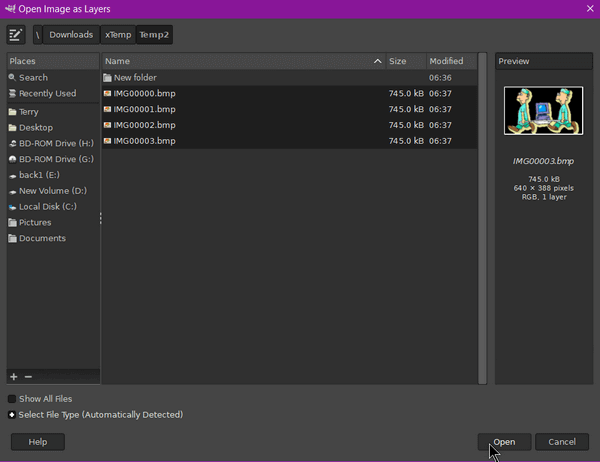
Select the images you want to use for your new animation. I have all four of the extracted images in the same folder so I selected them all at once by clicking on Ctrl + A, then Open.
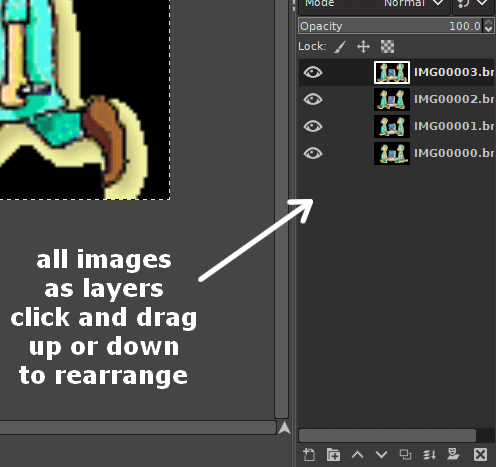
Now you’ll see all the images open down in the right-hand corner. If they are not in the right order, then click down and hold and then drag it either up or down the list. Do any editing of the pictures that you see fit.
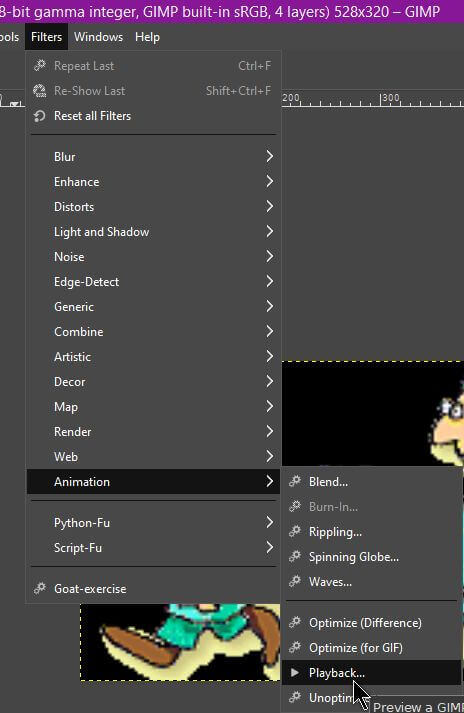
You can then test the animation before saving by going to Filters, Animation, then Playback.
It opens a little media-like player. Press the Play button in the top left corner.
Satisfied? Now you need to save it. So click on File, then Export As…
Put in a name and be sure to add the .gif extension on the end. For example, I just decided to call this “test”. So I typed test.gif as the name. Now click on Export.
In the box that opens next, I checked As animation, and Loop forever. I left the delay time as is (1000 milliseconds = 1 second). Then click on Export.
Here is the result:
And if you are still interested in the Animated GIF format, here are a few more articles to wet your whistle:
- Change Any Image Into An Animated Gif Online
- Convert Animated Gif To Video
- How To Convert Animated Gifs To WebP
- How To Create A Gif On Samsung
- How To Create A YouTube Gif
—


