
Remember back in the day when all computers came with a recovery disc? Then you just popped it in to the computer and it walked you through all the steps? Yep, those were the days – now when you buy a computer you have no disc and no one tells you how to get one. So in this article I’m going to show you how you can make a System Image back-up of your hard drive for your Windows 8.1 and Windows 7 Pro. An image is an exact copy of everything on your drive and will restore it back to the date you created your System Image. This is a very important step to do when setting up your new computer. Some of you might be thinking “doesn’t the manual tell you to do this?” Yes, but how many people do you know that actually read the manual? If you are that person then great! But for the ones who don’t, this article is for you. Going through this process will save your tail in the long run, because we all know that eventually our computer will need help.
I will show both Windows 8.1 and Windows 7 Pro processes with each step since they are a little different from each other. I have tested this process on both Window versions. So let’s get this guide started.
Opening System Image Backup in Windows 8.1
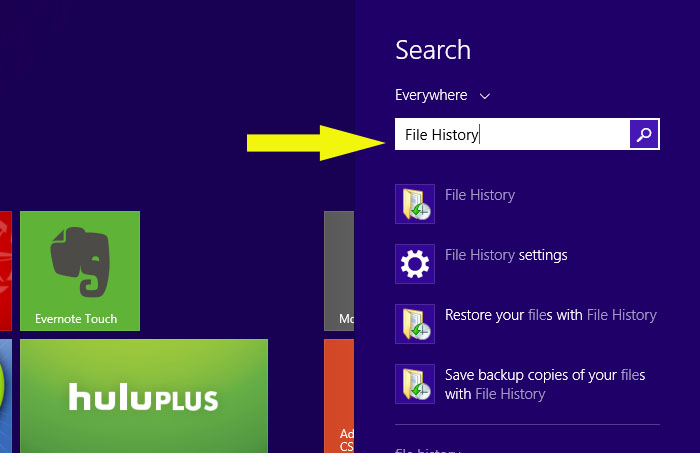
- In Windows 8.1 go to the search and type in “File History.” You should see the folder “File History” showing up below the search box. Click on this Icon.
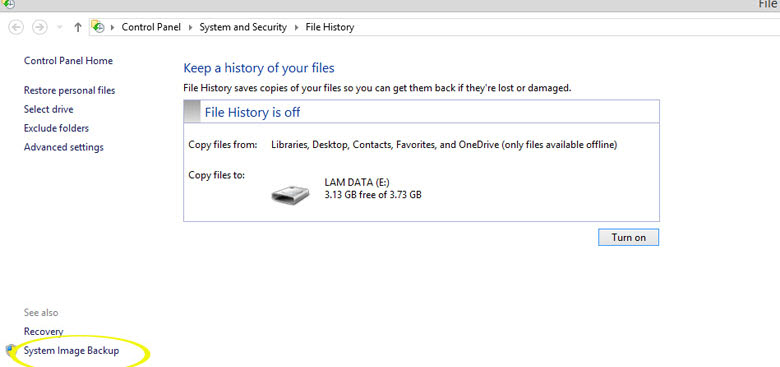
- Now a window will pop-up and you will see “System Image Backup” which is located in the lower left-hand corner of the page. Click on the wording “System Image Backup”.
Opening System Image Backup in Windows 7 Pro
- On the home screen Click on the “Start” button then go to “Control Panel.”
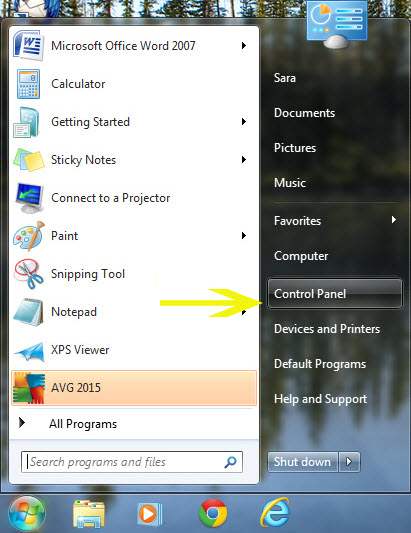
- Click on “Control Panel.”
- In the next Screen you will see “Back Up your Computer” which is under “System and Security.” Now Click on “Back Up Your Computer”

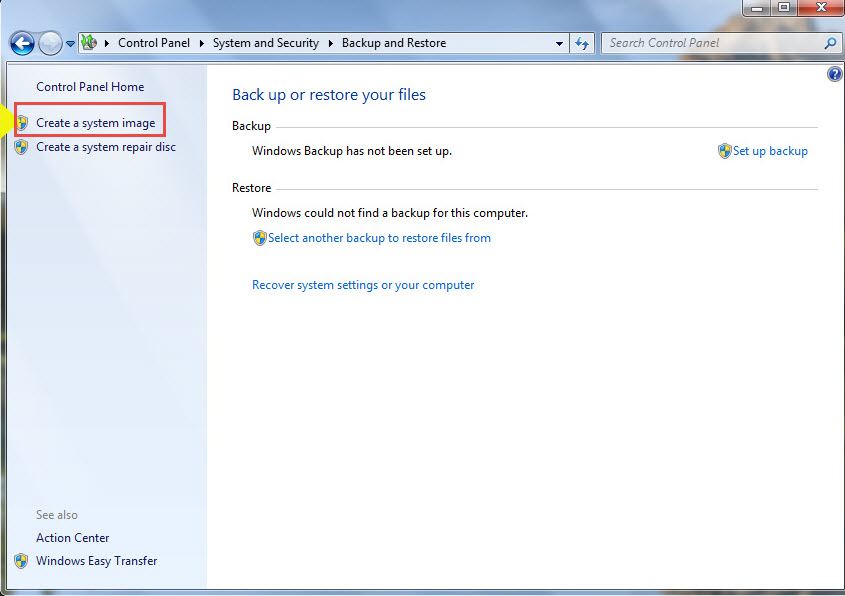
- Now you will want to Click on the “Create a system image” which is on the left side of the screen.
Creating a System Image Backup in Windows 8.1 or Windows 7 Pro (from this point on, both Window versions continue the same way).
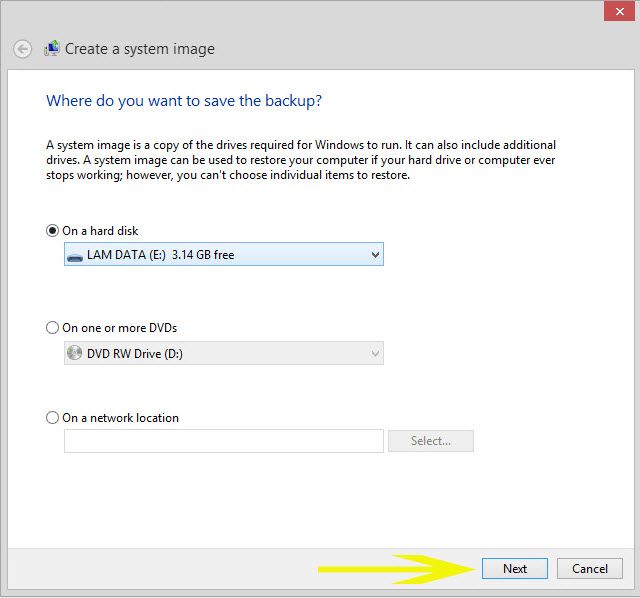
- This screen is where you will need to decide where you want to save your back up image. They give you 3 options to choose from (Hard Disk, DVD or on a network location). Choose the one with the most space. You will understand when you see the next steps. I suggest using an external hard drive. Once you have chosen the location Click “NEXT”.
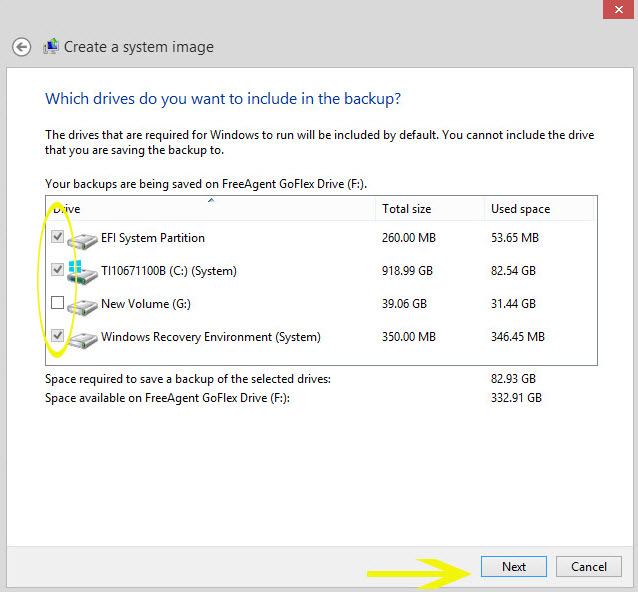
- Once you have chosen your drive to back up your system image to you will see a new screen. This is where you choose the drives you want to have backed up. Simply check the boxes next to the drives you want. Some are defaulted so you will not be able to uncheck them. Now Click “Next”
- Now you will see a confirmation screen that will show you the amount of space the back up image will take. This is why I said to choose the one with the most space and suggested using a external hard drive. If you need to make any changes this is the point you can still go back. This is the point of no return! Now all you have to do is click “Start Backup.”

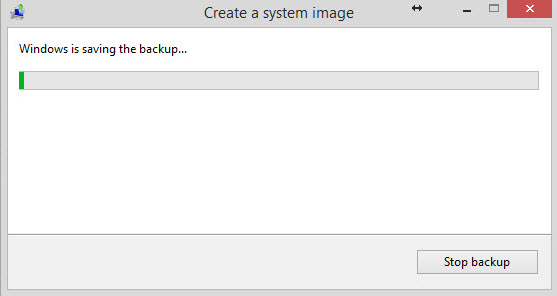
- Next you will see the progress bar start. While the image is being created and backed up you should make yourself a cup of coffee because depending on the size, this can take a while. The time depends on your system and where you’re backing it up to.
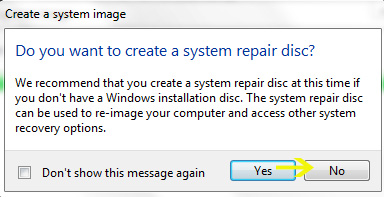
- Once the process is complete you will see an option to create a system repair disc. On this box click “NO” to skip the system repair disc creation process. I will be covering how to create a system repair disc in another article.
Now you have a System Image of your hard drive. You now have a great tool to restoring your computer when needed. Hopefully you never have to use this. Like I said at the top I have tested this process on both versions of Windows. So if you have any questions please leave a comment below.
Is it necessary to image other system partitions like recovery and UEFI partitions in order for the image to work or can one simply image the C:\Windows partition and be good to go?
My Lenovo has 7 separate factory partitions that I assume are used for recovery, boot and UEFI besides the Windows partition, when imaging is it safer to image them all or just the Windows partition.
In my experience I would include the other partitions. When you are creating your System Image it is a clone of everything on the hard drive as of that date. It is best to clone every part of that hard drive at the same time. So when you have to use the restore image you have it exactly the same as it was instead of trying to remember which you saved and which you didn’t. Plus better safe than sorry.