If you enjoy collecting video clips from sites such as YouTube and would like a means of successfully burning them to DVD so they can be viewed on television, DVD Flick is for you!!
DVD Flick supports many more formats than Windows DVD Maker; it supports more than 45 file formats, over 60 video codecs and more than 40 audio codecs.
DVD Flick is free, open source software which, apart from being very easy to use, is an all in one solution. Have you ever installed DVD maker software only to find out later that you also need to download and install a further 2 or 3 programs to make it all work? Well, that is not the case with DVD Flick; it encodes, authors and even includes the terrific ImgBurn for automatic burning to DVD.
Here is how:
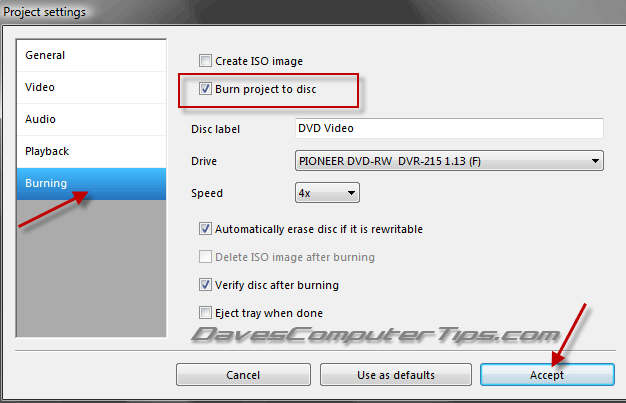
DVD Flick has options to either save the file to hard drive as an ISO or burn directly to DVD. The option to save as an ISO file is set as default so the first thing we need to do is change that.
Click on the ‘Project Settings’ button in the main menu and, from the left pane, click on ‘Burning’. Select the option to ‘Burn Project to disc’ and then hit the ‘Accept’ button.
Now we need to import the video files we wish to burn. The files can be mixed format, i.e. they don’t have to all be the same format. You can include .wmv, .avi, .flv (for example) in the one project.
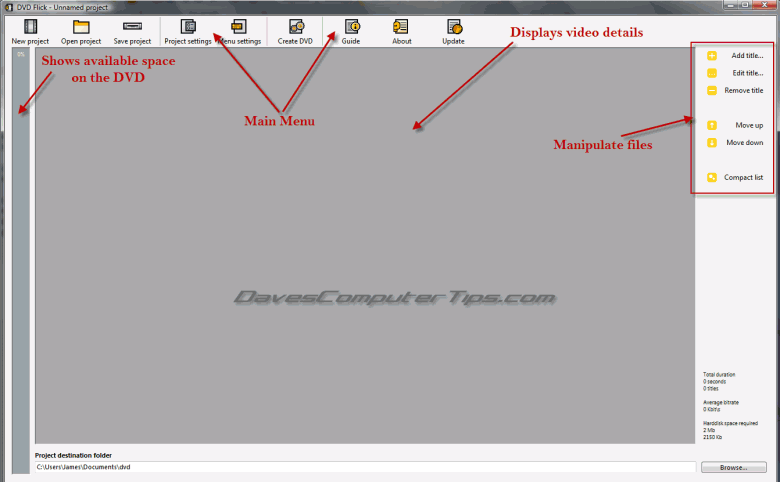
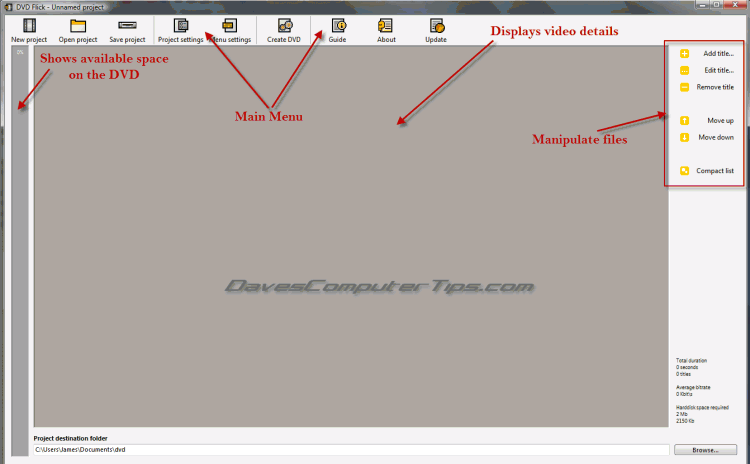
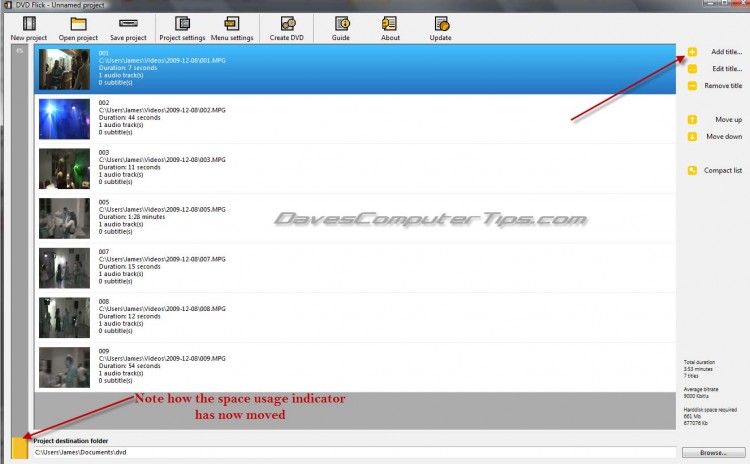
Just click on the ‘Add title’ option (from the ‘Manipulate Files’ menu) and then navigate to the location of your files. Select the files you wish to include (highlight them) and then hit the ‘Open’ button.
You should now see the files details displayed in the main window and the space usage indicator will have moved accordingly.
As you can we still have a lot more space left so we could go on adding files until the indicator neared the top (the 100% mark). Use the ‘Manipulate files’ menu to add/remove titles or move change the order in which they will be displayed.
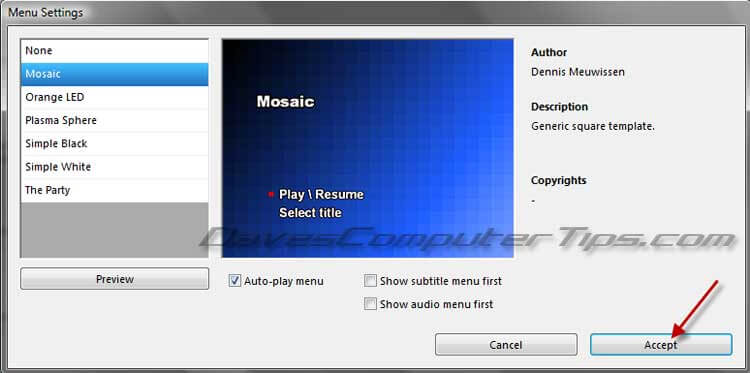
You can also add a menu to your movie by pressing on the ‘Menu settings’ option in the main menu. When you click on each menu option a preview will appear in the window, simply select the one to your liking and then hit the ‘Accept’ button.
That’s just about all there is to it. Once you are finished just hit the ‘Create DVD’ button from the main menu and watch DVD Flick do its thing.
A couple of things to keep in mind:
- Regardless of which software you are using, working with video files is generally a slow process. There are quite a few steps DVD Flick has to go through and it will take some time.
- When DVD Flick has finalized the file ready for burning ImgBurn will open automatically and begin burning it to DVD.
hi dave,
see i am a new user. of dvdflick. tell me one thing, is that really works. do we require nero also… pls let me know.
DVDFlick does work really well but it has a few gotcha’s. One is that it takes a very long time to create the DVD sometimes; I think it’s when the DVD has a lot of low light images. It uses IMGBURN, not NERO, to create an ISO image and/or to burn to disk. Also, if you want to add subtitles and have them appear automatically, you add the subtitles file by doing an EDIT TITLE, and then go into PROJECT SETTINGS and click on ALWAYS ENABLE FIRST SUBTITLE under the Playback settings. I’ve burned a DVD with up to ten 20 minute episodes of a show, and it’s worked okay.
I get an error each time “53 file cannot be found”” how can I rectify this please?
Apologies for not responding sooner Keith, I’ve been away for a few days.
When exactly during the process are you receiving this message, at what stage??
Try running DVDFlick as administrator. If still getting the same error message, try cleaning out temp files using something like CCleaner and then run as admin again.