

I wanted to connect my Chromebook to my printer. My printer model is a “Canon TR4720”, and I’m going to connect to it through the WiFi.
I went into “Settings”. Click the clock and then the Settings cogwheel icon.
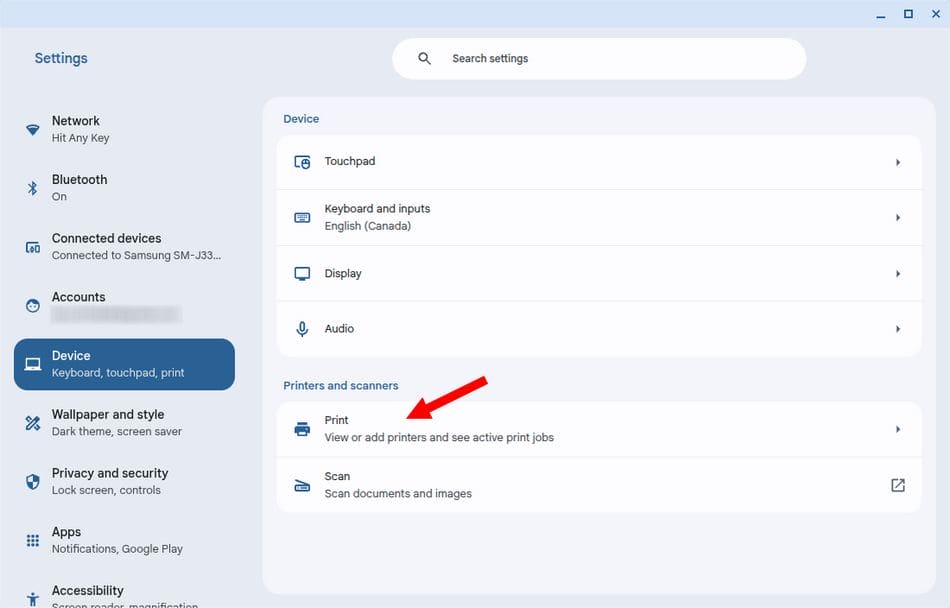
Then select “Device” from the left-hand menu. Then select “Print” in the “Printers and scanners” section.
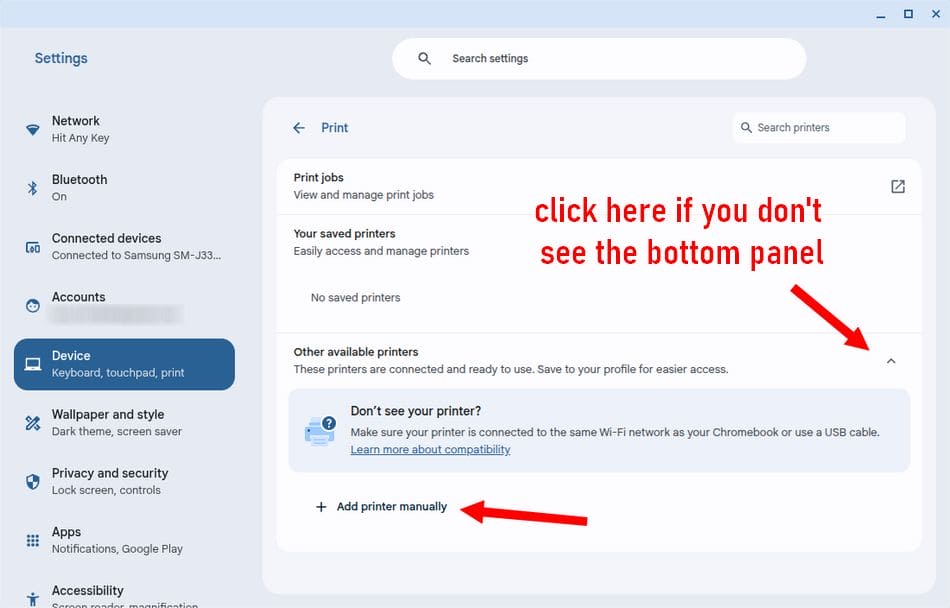
My printer was not detected, so I clicked “Add printer manually”.
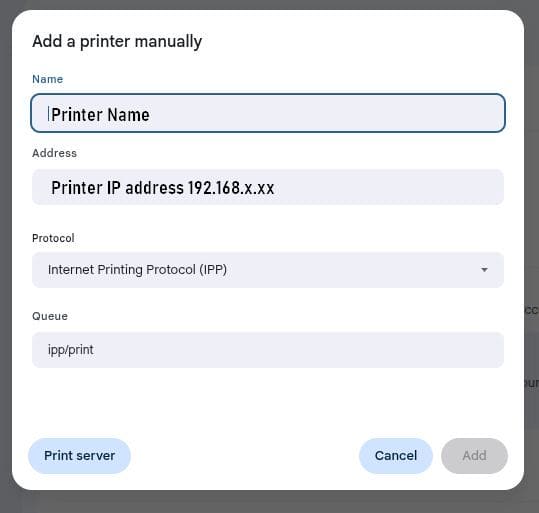
Now type your printer name and its IP address.
The easiest way to find the IP address is in Windows. Open Windows File Explorer. Click on “This PC” or your “Network”. Hopefully you’ll see your printer listed in the right-hand panel.
Right-click on your printer’s icon and go to “Properties”. You should see the IP address listed towards the bottom of that window.
Otherwise, you will have to dig through the printer settings using its control panel.
So, put in your IP address. Mine was 192.168.4.xx.
For the “Protocol” and “Queue,” I left the settings as is. Then click on “Add”.
If you don’t see any errors, you should be connected to your printer. Try printing something. It’s File -> Print, just like in Windows. Print a test page.
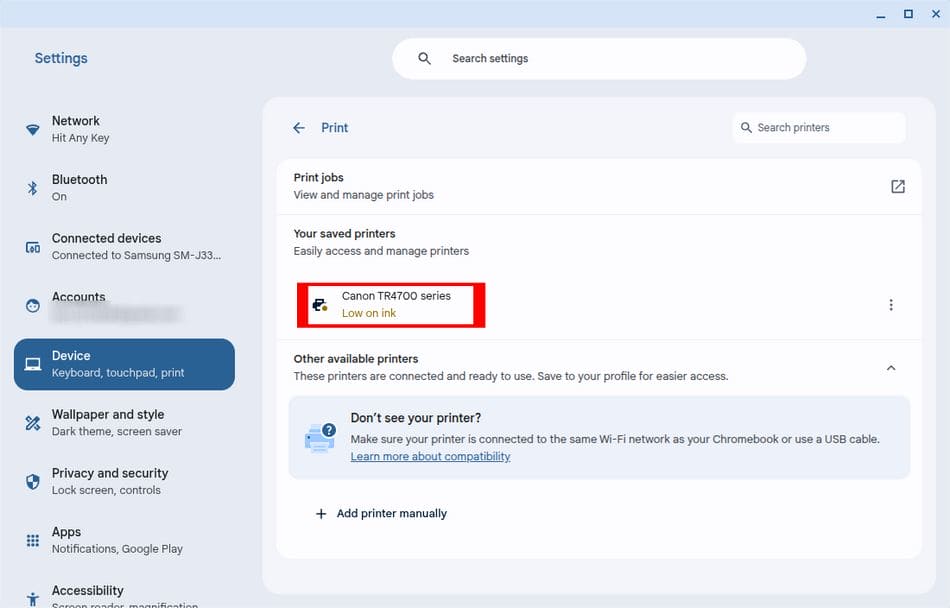
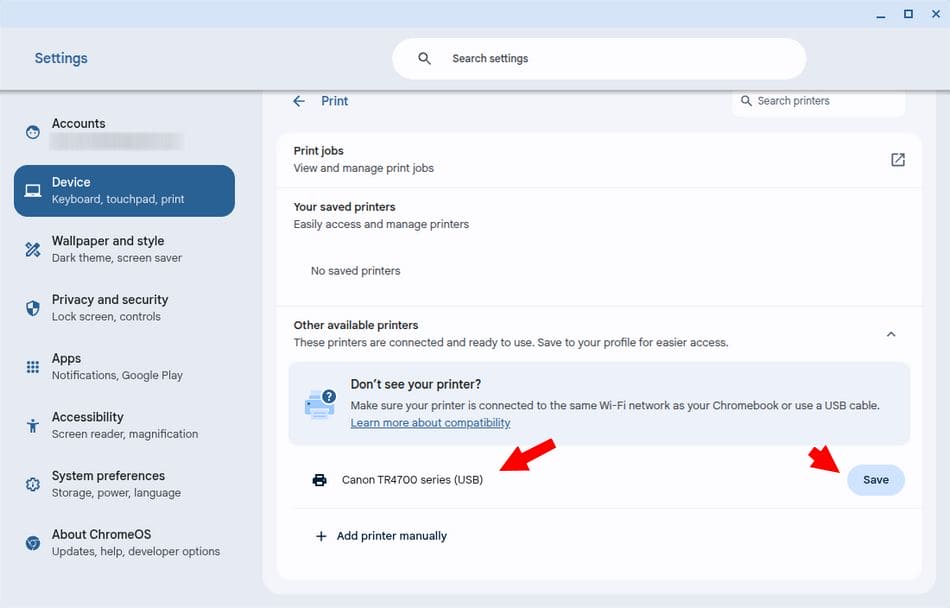
If the wireless connection won’t work, try using a USB cable. I removed the wireless printer info and plugged my printer in with a USB cable. It detected it properly, and all I had to do was click on “Save“.
As long as you’re using a compatible printer, there shouldn’t be too many problems.
For more information on compatible printers for Chromebooks, click here.
For more articles on printing, click here.
For more articles on Chromebooks, click here.
—
