
This tip is particularly useful for people who live in medium to high-density residential areas to help avoid local congestion on a particular wireless channel. The generally recommended wireless channels for a router are 1, 6, and 11. These channels are recommended because they are far enough from each other on the 2.4 GHz band that they have sufficient space between channels to avoid overlapping.
If you’re experiencing dropouts, poor speed (especially at peak times), or general instability, sometimes changing the wireless channel can help improve performance.
NOTE: There is no certainty nor guarantee but definitely worth a try.
Know Your Channels
The first thing you need to do is to find out what channel you are on and what channels your neighbors are using. The best way to do that is by using a small free utility called WirelessNetView — www.nirsoft.net/utils/wireless_network_view.html
I just downloaded the portable version, unzipped it and ran the program which then automatically identifies all wireless transmissions in your close vicinity and lists them:

Accessing the Router Settings
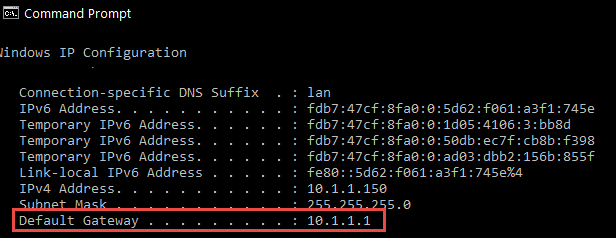
Remember, the recommended channels are 1, 6, or 11. If some of your neighbors are using the same channel you are using, changing to a different channel can help avoid congestion and possibly improve your wireless performance. Changing the wireless channel is achieved via your router settings. You access your router settings by typing your router’s default gateway address into a browser’s address bar and then hitting Enter. Most modern routers include the access address on an attached label.
If you are unsure, open a Command Prompt, type in ipconfig, and hit Enter:
Changing Channels
All routers include the ability to change wireless channels but the settings will differ between brands and models. To give you some idea, this is how I change my settings. I’m using my Eastlink setup and my modem identifies as Arris.
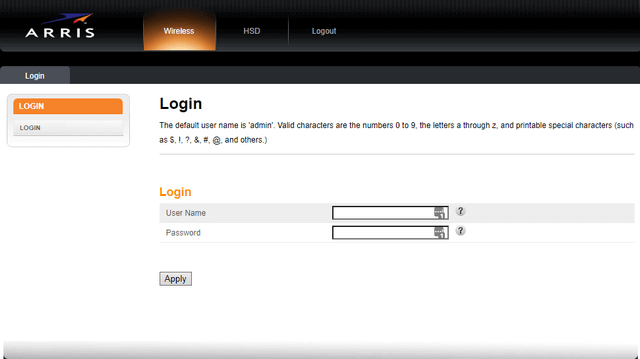
In my web browser, I type in 192.168.0.1 to go to my modem/router settings page.
So first I have to log in. You should always protect your modem/router settings with a username and password.
Then I get taken to System Basic Setup. In the Wireless 2.4 GHz, I can see my basic settings. I click on More Wireless Settings…

Here in the Channel drop-down menu, I can change the channel settings.

Then I click on Apply. The other options are rebooting and resetting. In my case, neither seems to work in the long run.
You may need to experiment a little, including checking your speeds on the existing channel first and then again after changing channels to see if there has been any improvement. You can do this by visiting the Ookla Speedtest website.
So, if you are having connection issues, for a quick fix, try changing the wireless channel. Check online using the name and model of your router if you need help or call your Internet Service Provider (ISP). They can help you from their end. Or leave a comment here. If I can’t help you, maybe some other reader can.
—
Great tutorial, thanks. Images made it simple to follow.
Only thing I’d add is to use a smartphone and an app called “Wifi Analyzer.” (On my Android, anyway.)
That let’s us bring the phone to where the wifi device is. As we move around the house, we see a graph — signal strength on the y-axis, channel on the x-axis — changing step by step.
That’s useful because a channel might have higher interference in one part of the house (closer to a neighbor’s router, for example), but less in another (on the other side of the house from a neighbor).
Changing channels definitely works in my experience.
I’ve seen people in videos on Youtube using that app or similar but unfortunately, I don’t have a smartphone. Still, thanks for the info.
You don’t have a smartphone? I thought I was the last holdout. 😉
I pay about $10/month ($15?) to Ting for minimum minutes and data. The phone is used only for car breakdowns and to call home if I’ll be very late.
I find it more valuable as a camera and MP3 player than a phone. It also earns its cost when I’m texted a temp password or PIN in order to get into a financial website. Also to see what’s happening in a long power outage.
You may want to look into it, Terry. I bought mine kicking and screaming (and refurbished) so understand the reluctance.