Bypassing The User Account Controls
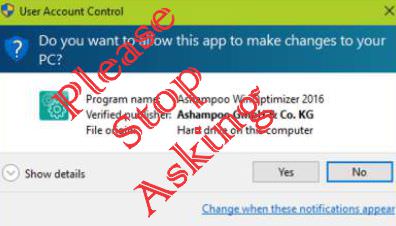
Do you ever get annoyed by the constant messages generated by the User Account Control dialog box? Frankly I get a little tired of getting the message “Do you want this app to make changes to your PC?”
Yes, yes yes! Just Do It. However, I also know that message is there for a very specific reason. To keep you safe. When this message appears it really means that the program will be running in what is defined as an “Elevated” mode. That basically means that instead of anyone being able to run it, you are running it as an administrator and it has access to your entire Operating System.
Once you allow a program to install software or make changes to your computer, you better be sure who or what is making the change, and that you do indeed want the change made.
To quote the lyrics of Pettit Project – “I’m down with that”. Security is and always should be a concern for any Operating System user.
But, and there is always a but, what if I open that application 10 times a day and I know what it is and exactly what it does. I mean, I am clicking on it, I do want it to open and if Microsoft can’t find an algorithm to determine that after a hundred OK’s this is a safe program, yes, I am comfortable with it so let’s just add it to the exception list or white-list so Windows can keep me safe from other programs but not this program.
What! No exception list? I am afraid that’s correct. I personally think this is a mistake by Microsoft because some individuals after getting tired of the same warning will eventually slide the UAC marker to “Never Notify” and I know that is a mistake. If you do that, you are making yourself vulnerable to malicious code opening with just a click.
Using the UAC Slider
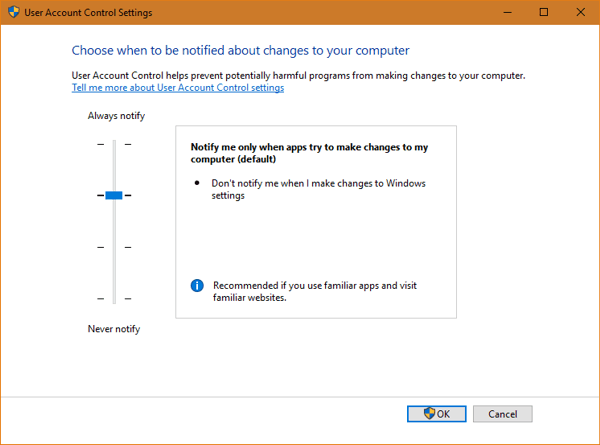
The UAC does give you some control on how a program should be handled. You may choose to change the way you are notified based on the proposed action of the program.
For example:
- The highest security setting is the top position. It will always notify you whenever apps try to install software or make changes to the computer. It will also ask for permission if you make changes to Windows settings.
- The next setting is the default setting (the darker line on the slider) which will notify only when apps make changes to your computer. It will also darken the screen and thereby isolate the UAC warning.
- The next setting is basically the same as the default but does not dim the desktop
- The final setting is highly Not Recommended. You will not receive any notification whenever a program or you are about to make a change to your computer. This option is never a good choice. Sooner or later you will click on something that you should not have and Boom! You’re infected.
The warnings, as I have said, are important. I do not want anyone to assume that using a bypass is good for any reason other then what is explained below.
When you know and use a program on a regular basis, like Windows Autoruns, or Event Viewer, or a host of other programs that initiate the UAC warning, there is a way to bypass the warning so the program will open when clicked on. It is not hard to do.
Creating The Bypass
Right-click on the Start menu and select Computer Management. Because this program will make changes to your computer you will receive the UAC warning. Select OK, and it will open the Computer Management Console.
Note: you may also access the CMC by using (Winkey+R) and typing compmgmt.msc in the Run Window, or by clicking on Administrative Tools in the Control Panel, then selecting Computer Management. All three will get you there.
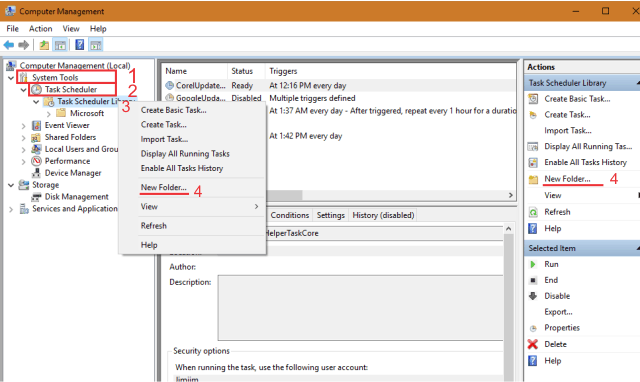
Using the image below as an example,
- Select System Tools
- Select Task Scheduler
- Right-click on the highlighted Task Scheduler Library
- Create a new folder. I called mine “MyTasks” You can name it pretty much anything you wish. Click on OK.
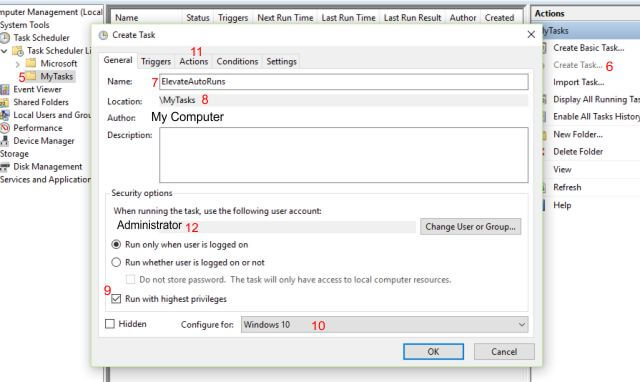
Continue the process by using the next image as a guide
- Click on the folder you just created
- Click on Create Task The Create Task Dialog Box will open
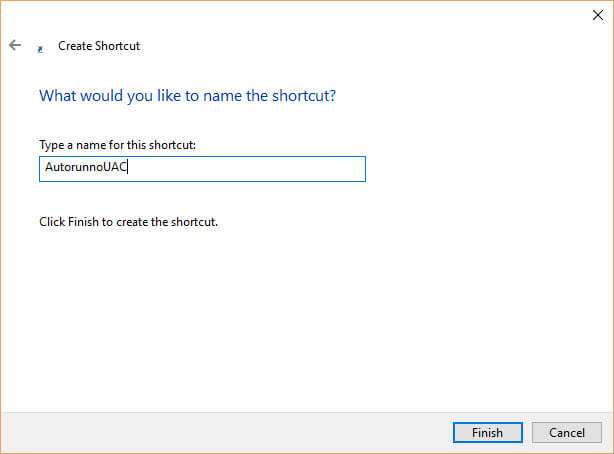
- Enter a name for your task– one that you will easily remember later. In this case I am going to have the Windows Autoruns.exe file run automatically in an elevated mode simply by clicking on the icon in my Task Bar or Desktop.
- Make sure you are in your New Folder. In my case it is \MyTasks
- Make sure the box “Run with highest privileges” is checked
- Select the OS you are using in the “Configure for” Box
- Click on the Action Tab at the top of the page
- Make sure you are using the correct User Account. Yours might be just your name.
- In the Action Drop Down box, select Start a program
- Enter the name and path of the program
- You may use the Browse button to navigate to the file position
- Click OK to finish

Click on OK again and you should see the new Task located in your folder.
![]()
Creating The Shortcut
Now that you have the task created, you need to make it easy to access. To do this, we are going to make a Shortcut on your Desktop.
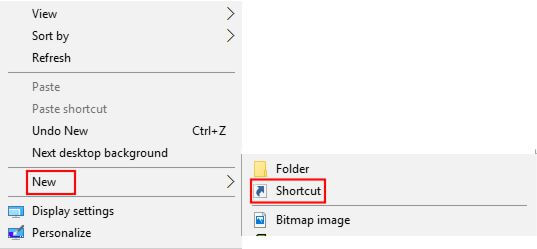
- Right-Click on the Desktop
- Select New
- Select Shortcut
Unlike other shortcuts, shortcuts made from tasks must use the syntax:
schtasks /run /TN “filename”
If you created a sub-menu as suggested the syntax must include the full path. It would look like this:
schtasks /run /TN “MyTasks\filename”

Click Next to get here:
Changing The Way The Shortcut Looks
Now you should have an Icon on your desktop. In many cases it will not be an icon that matches the actual program but there is an easy way to fix this. In the sample below, I have a program called “Everything.exe” which is really just a fast search utility that I open and close many times a day.
Because it must access all the drives on my system, it will initiate the UAC Warning. I used the process described in this post to create a Shortcut for this program. All Task Shortcuts look the same– a white box with a blue box inside.
I decided that a Magnifying Glass would be a more appropriate Icon and used the feature provided in the Shortcut Properties Dialog Box.
Right-click on the icon and then Click on Properties. This will bring up the Shortcut Dialog Box.
Select “Change Icon”.
Note: You will most likely get a warning that there are no Icons for this shortcut, but if you close the warning box it will display a list of several Icons that might come close to the one you want.
![]()
Summary
The bypass, when used carefully, can help make you more efficient while operating your computer. Furthermore, it provides an excellent reason for not having to shutdown the UAC completely.
Jim
—
Hi Jim,
Nice article. Useful concept. I am having a little problem right at the end where I create a shortcut on my desktop. When I enter
schtask /run /TN “BulkRename”
I get “The file schtask cannot be found”. Here is a screenshot if it helps.
https://drive.google.com/open?id=0B2e6jub3vW6jX3ZXdUJEVWl0MUU
Since I cut&pasted from your article, I don’t think I have a spelling mistake.
Tom, what a dumb place for me to have a some typos. the syntax id sorrect in the sample by the photo of icons. The correct syntax is schtasks / rung/ TN / “filename” the tn does not have to be caps.
You must make the shortcut from the desktop not from where the file resides. Just right click on the desktop. If you still have a problem, Lets move it over to the forum and I promise you we will get it working. Truly sorry for the typo. Jim
Jim,
Solved the first problem. The command should be
schtasks /run /TN “BulkRename”, there is an “s” missing.
New problem. I have made the shortcut, but when executed there is a slight blip where something starts and then nothing. The program does not execute.
If I go to the task I created and right-click on it and select “Run” it works fine.
Still something not quite right.
Have a good day,
Tom
Jim,
Followed all the steps best I could and I was able to create a task in “\MyTasks” that works when I right-click on it and select “Run”. But when I create a shortcut using your example, the shortcut does not load the program. It looks like the CMD window momentarily runs and then closes. I must be missing something.
Jim,
OK, I have done some research and found another article similar to yours. In the comments someone wrote if your new task is not in the “root” directory you must tell the shortcut the location. Using your example it would be “schtasks /run /TN “MyTasks\Filename”.
I made this change to my shortcut and everything now works fine.
Tom, I really appreciate you help in correcting my oversight. I don’t know how I missed adding it for the post but I will try and have the post deleted and reinserted with the correct information thanks to you.
Just a note to all those who read the comments, this post had two major mistakes and I really apologize for that we take our work seriously at DCT and this was not reflective of our quality. Without TomL they would have gone unnoticed. So thank you again Tom.
Hi Jim
I am really annoyed with the user account, I really would like to pull it out and throw it away but I realize it is a safety tool to stop loosing my PC .
The thing that annoys me is a box appears many a time and there is no name of what is trying to change my PC ie in your example Ashampoo. If I am opening a programme that requires a UAC warning and has its name on I quite except its opening and clicking yes on it but my trouble is I have a UAC warning pop up at any time even in the midst of say a you tube clip, and it has no name on it only it comes from my hard drive so I do not know what it is so I always say No. It is totally irritating as it stops what ever I am doing until I answer the question yes or no. Is there any answer to this. It is stopping my wife wanting to take opt for the free offer on Windows 10 on our main PC.
I hope you can help me Hugh Williams
Hello Hugh, you are absolutely correct in not clicking giving approval of an unknown UAC. I do think we can probably help you with this so I would like to suggest that you post this problem in our forum. Just click on the Forum tab above and enter it in the Operating System that is currently experiencing the problem. Make sure you tell me the Windows version, XP 7, etc. and describe the text on the UAC. I will look for your post and start right on it.
Jim
i have windows 8.1 and my yes box is disabled on user account control. How do I get back the yes box? Please help! Very annoyed. Thank you in advance for your time.