HTTPS Is Secure Browsing
The green padlock you see at the top left of most browsers indicates that the website you’re visiting is using TLS encryption, meaning that any data passing between you and the server is encrypted– hence the HTTPS prefix. In other words, your browsing is safer from hackers, with more and more website owners now using SSL– but there is a cost. I manage three websites and up until recently have only migrated one of them to SSL for budgeting reasons and even then, the cost was around $60– not very expensive by most people’s standards. However, it’s possible to acquire SSL for FREE by using Let’s Encrypt.
Let’s Encrypt is a non-profit certificate authority run by Internet Security Research Group that provides X.509 certificates for Transport Layer Security encryption at no charge. The certificate is valid for 90 days, during which renewal can take place at any time.
Let’s Encrypt uses the ACME protocol to verify that you control a given domain name and to issue a certificate. In order to get a Let’s Encrypt certificate, I needed to choose an ACME client, so I chose ZeroSSL because it uses an easy-to-follow wizard.
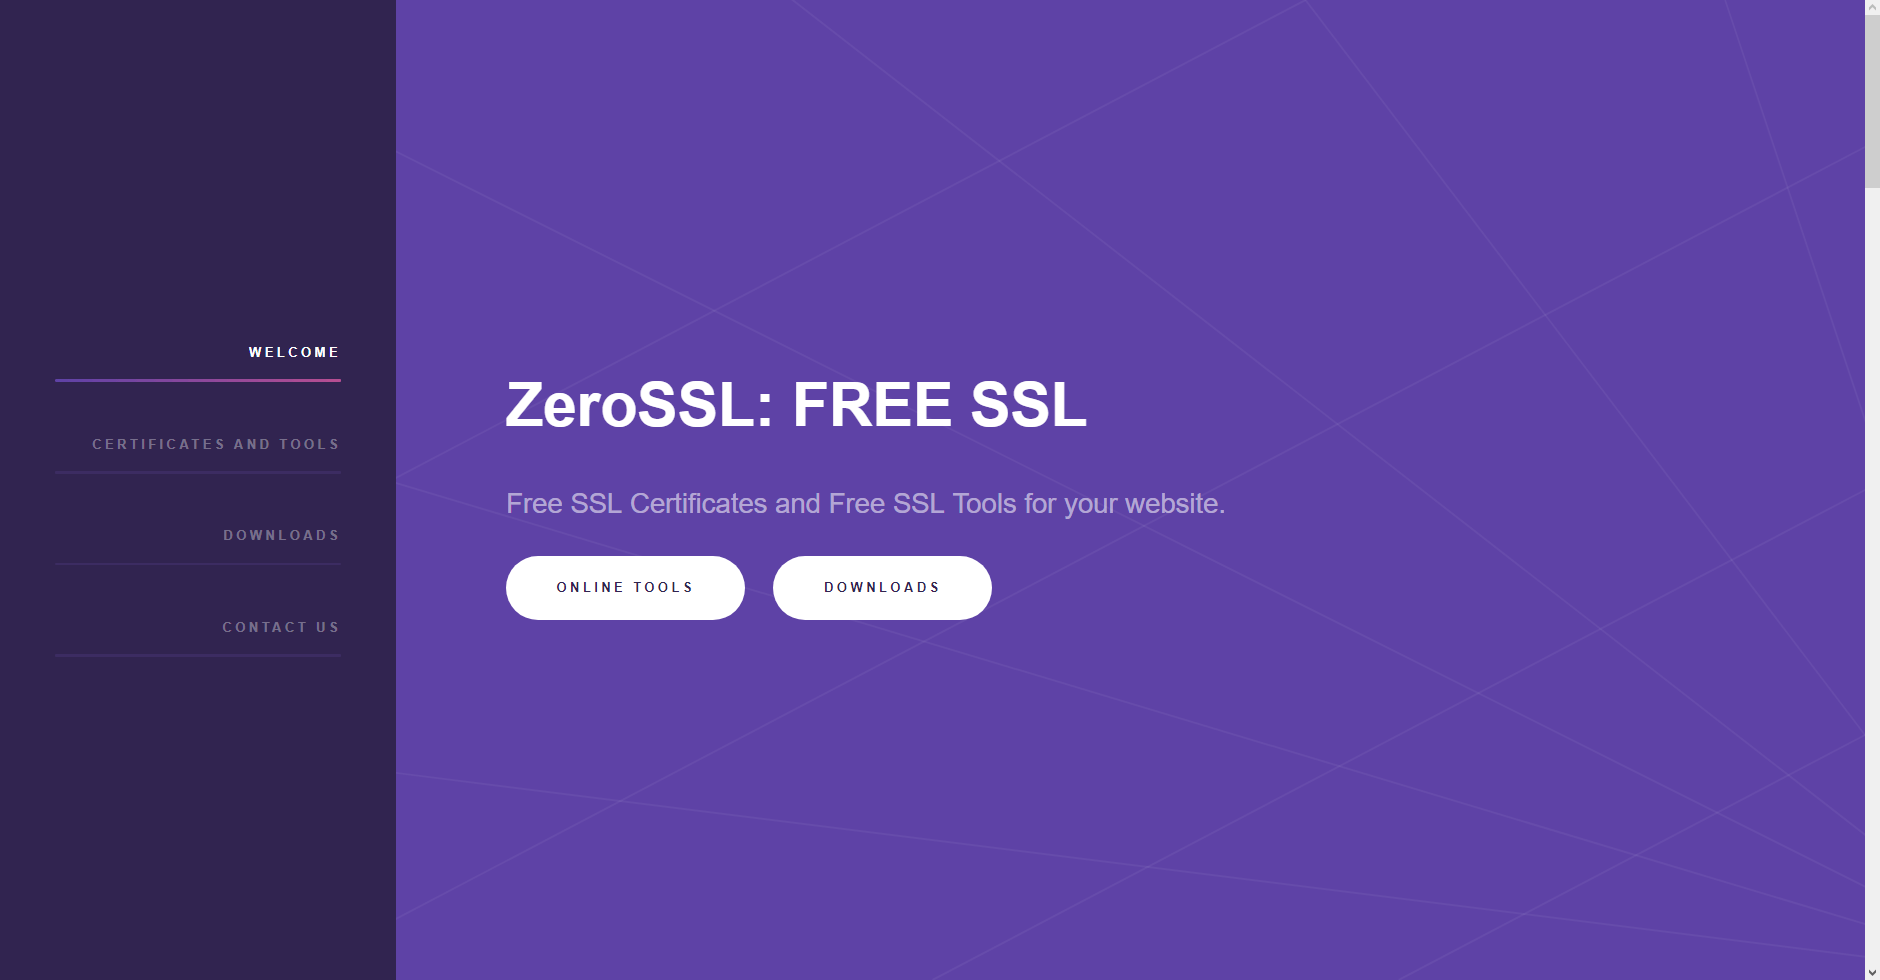
My new author website The Last British President costs money to host and any further outlay would eat into royalties from book sales. Added to which, GoDaddy is now asking for over $1000 a year for SSL protection which, for a small ten-page site is a lot of money to spend, especially if an SSL certificate can be obtained for free. With ZeroSSL, the entire process for acquiring the certificate and key is automated and once I’d clicked ONLINE TOOLS, I simply followed the steps outlined below. For the purposes of this article, I’m installing SSL on one of my other domains, Compufix.
- Type both versions of your website with or without the www prefix into the box where indicated.
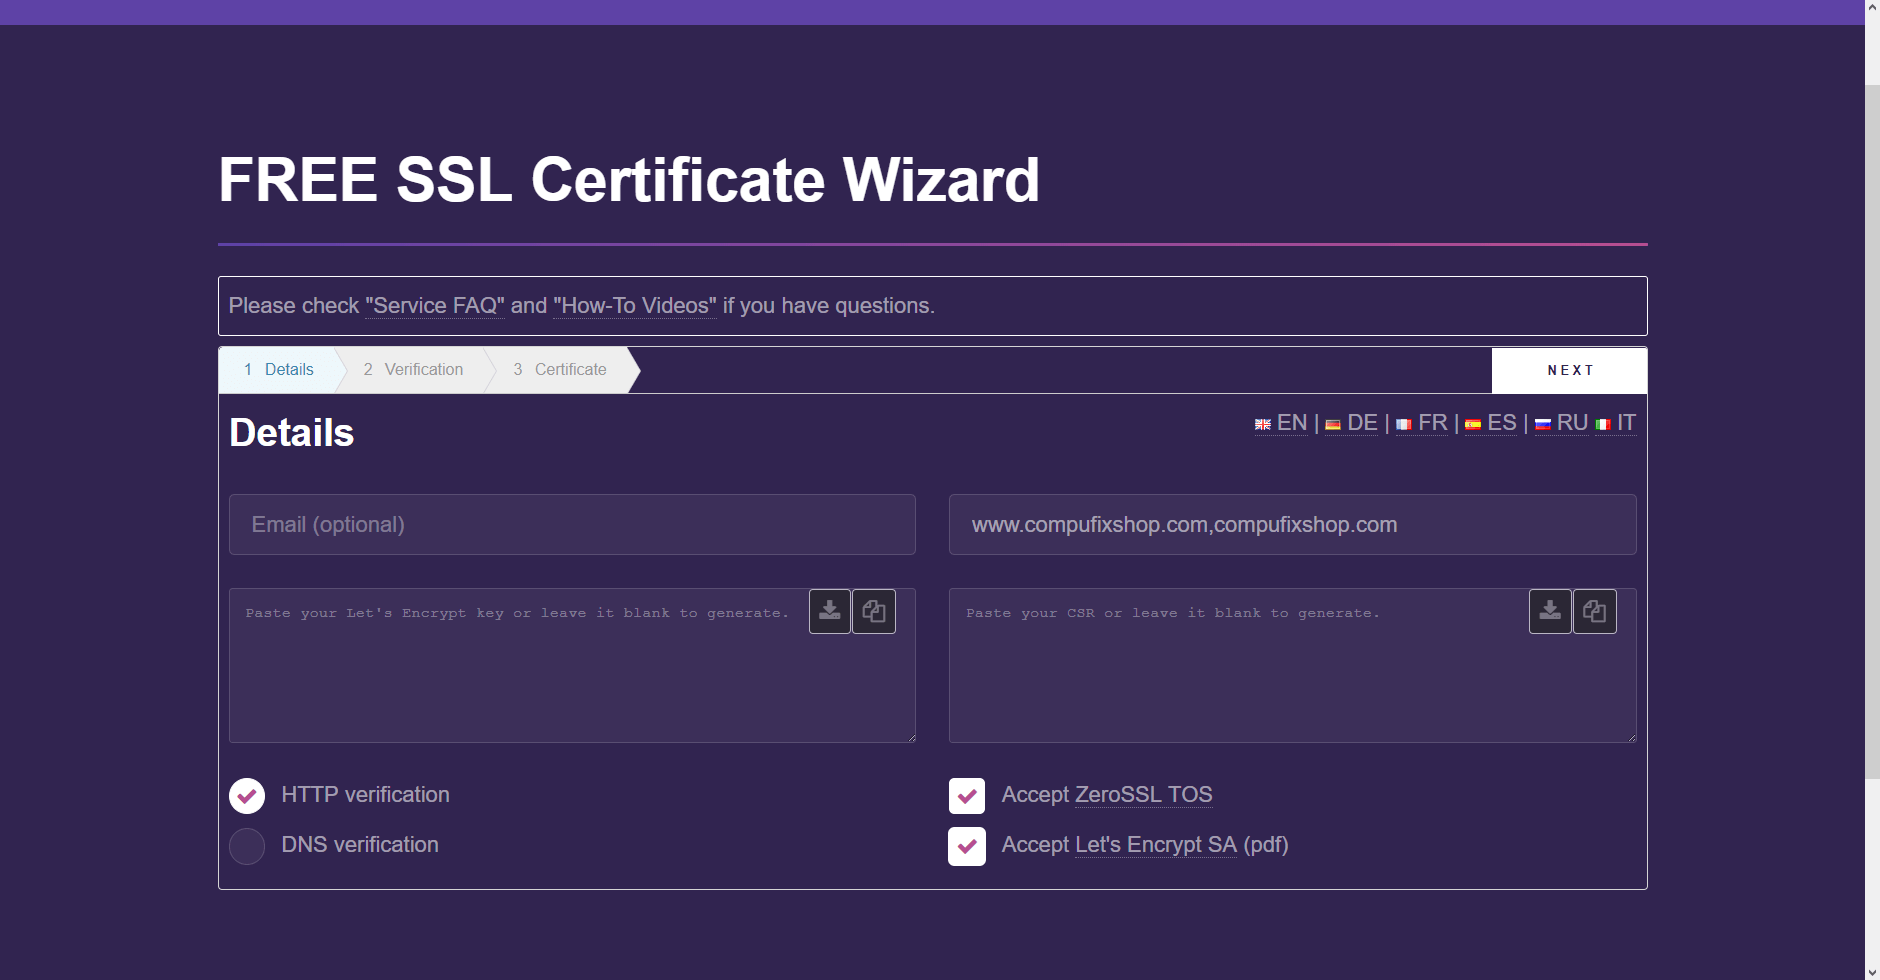
2. Accept terms (TOS) and Let’s Encrypt SA, then click NEXT.

3. Copy or download the CSR in the right-hand box, making sure you create a new folder somewhere safe on your PC so you can keep all the necessary files in one location. Click NEXT.

4. Download the two text string files to your folder and then head over to cPanel for your website. IMPORTANT-– do NOT click NEXT just yet. In my case, I use GoDaddy for my hosting, so I logged on in the usual fashion, went to Web Hosting, clicked MANAGE and then cPanel Admin and finally, File Manager.

5. Go to your root directory, which is normally public_html, create a directory named .well-known (do not forget the DOT) and within that new directory, create a sub-directory named acme-challenge. Upload the two text string files one after the other (into the acme-challenge directory) that you just downloaded and this will verify your domain ownership. Click NEXT on the ZeroSSL page and you should see the following certificate ready message.

6. Please note that I’ve obfuscated some of the certificate and key information for security reasons. You’ll now need to copy both the certificate and the key to your folder once again and I would suggest creating a new local folder for this purpose so that they are both easier to identify for the next step.
7. Now go back to cPanel and scroll down to Security and click SSL/TLS.
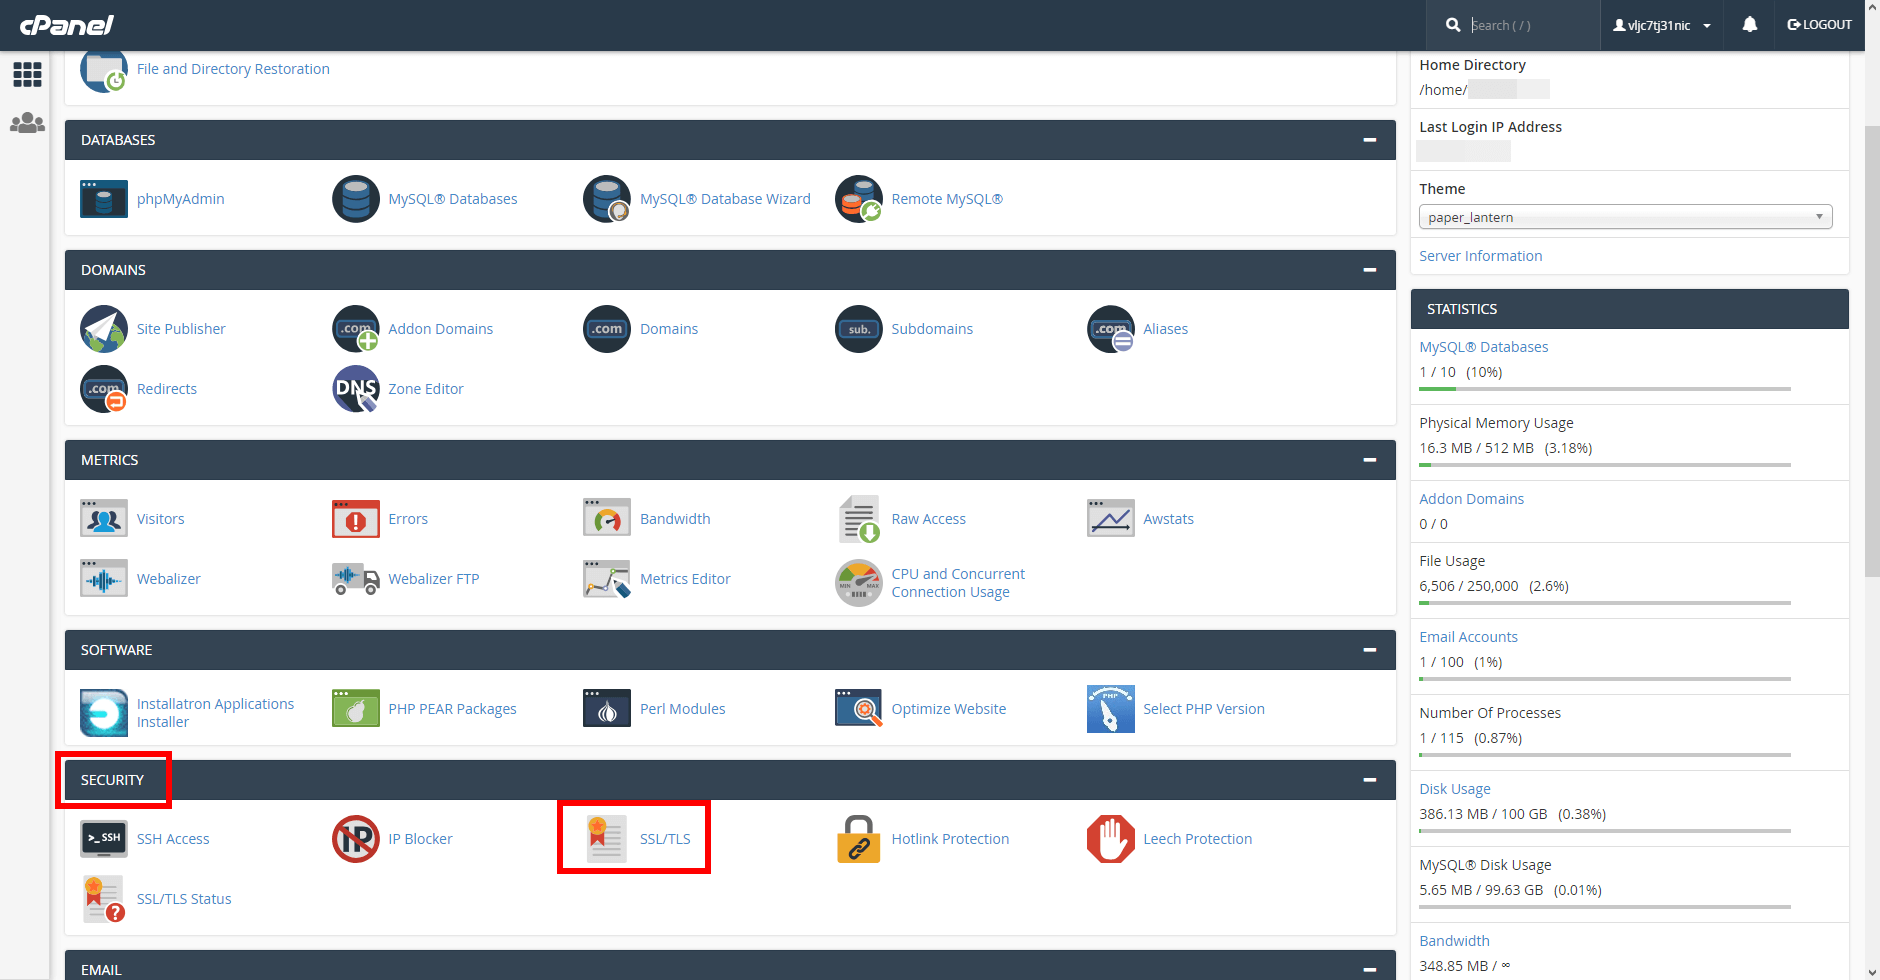
This will open your SSL management page in cPanel and allow you to input the certificate and key you downloaded previously.
8. Following the numbered steps in the following diagram, you now copy and paste the certificate and private key into the boxes as indicated.
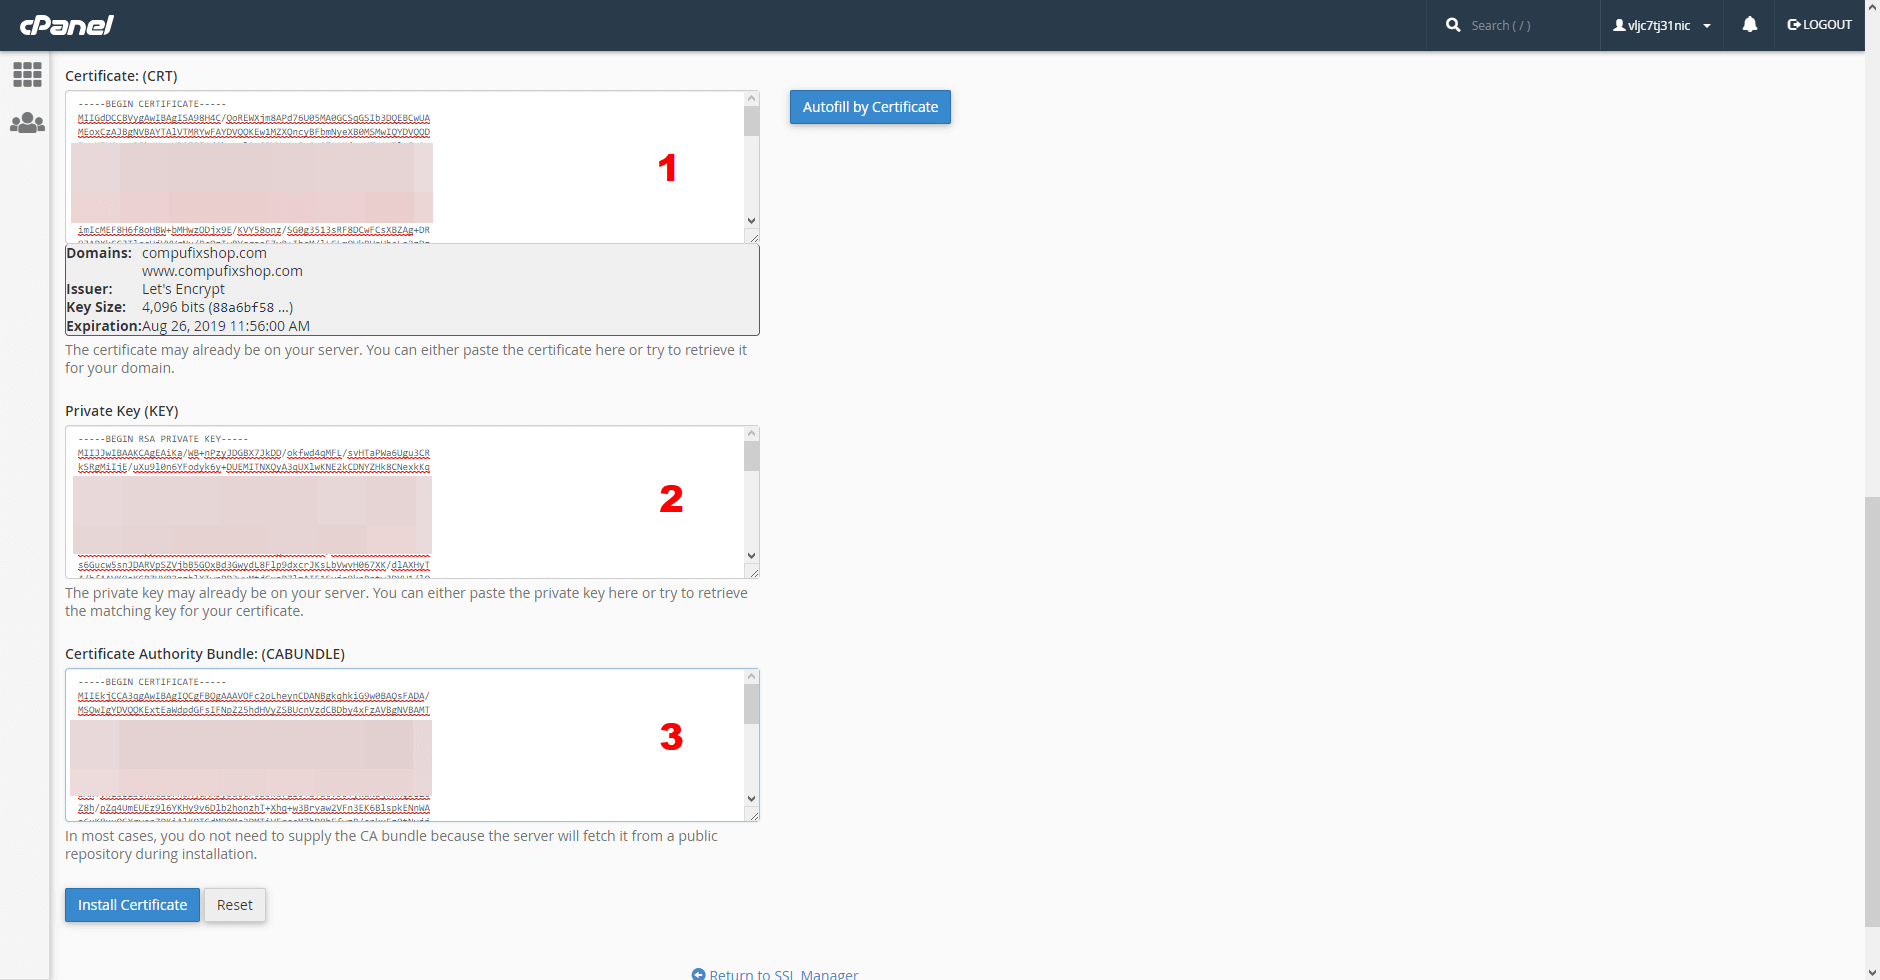
9. Now paste the entire certificate into Box 1 named Certificate (CRT), then highlight the second chunk of that text which starts with ***BEGIN CERTIFICATE***, CUT that text (NOT copy) and paste it into the bottom Box 3, named Certificate Authority Bundle (CA Bundle). Finally, copy and paste your private key into Box 2 named Private Key (KEY) and if no errors are shown, click INSTALL CERTIFICATE, which should result in a message confirming that the SSL certificate has been successfully updated. The following image is generic because I’m not quite ready to install a certificate on Compufix just yet, as I have other preparations to make first with regard to the design and other issues. I installed the certificate on The Last British President website successfully using this method, without a hitch.

10. Now we have to force the site to redirect to HTTPS, which is done by editing the .htaccess file which you will find in your root directory (public_html), by adding the following code:
RewriteEngine On
RewriteCond %{HTTPS} off
RewriteRule ^(.*)$ https://%{HTTP_HOST}%{REQUEST_URI} [L,R=301]
If you can’t see the .htaccess file in cPanel File Manager, make sure that hidden files are being shown, then download the file and add the code before all the other code in the file as I did on my author site. In most cases, this file will have been automatically generated for you but if it hasn’t been, you can create the file using notepad, paste the code into it, save it as .htaccess.txt and upload the file through cPanel or FTP.
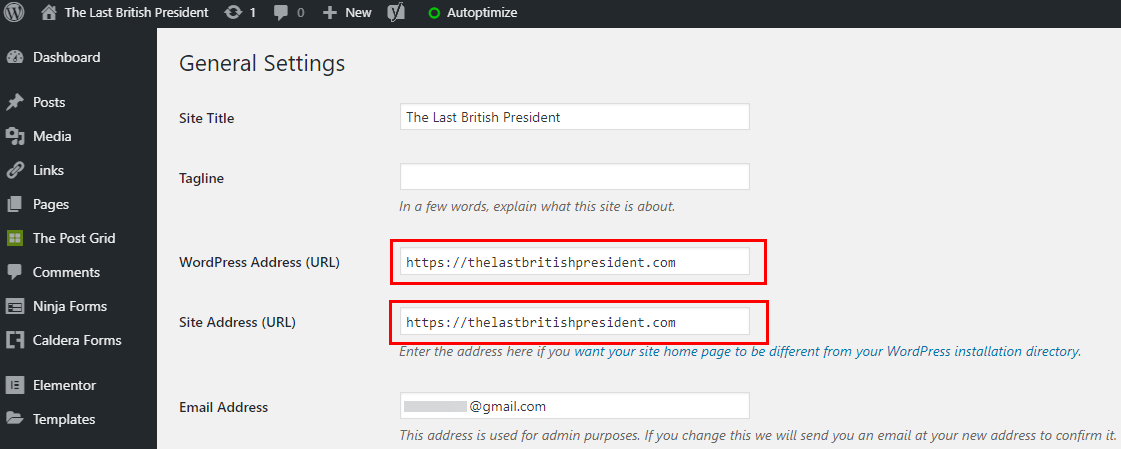
11. If you’re using WordPress you’ll need to make some changes through the dashboard and settings page by changing the URL to HTTPS.
12. Now refresh your site (F5 on your keyboard or restart your browser) and you should see your site open as HTTPS with a green padlock in the upper left corner. Success!

At this stage, it’s likely that you’ll come across MIXED CONTENT, where image and other files on your website are not being served through HTTPS. When I received those messages, I simply tracked down the files in question, checked the paths and changed the URLs to HTTPS from HTTP by adding an ‘S’. If in doubt, you can go to Why No Padlock and run a free scan of your newly secured HTTPS site and you’ll be shown a report of the mixed content which isn’t being served through HTTPS. You can then make the necessary changes to the URLs.
—