In this article, I’m going to show you how to add borders to images and screenshots using native tools built into Windows and how to add frames using a popular 3rd-party image viewer.
How To Add Borders To Existing Images
Adding a border to images and screenshots can really make them pop, especially if the background color is plain white. First off, I’m going to show how to add a border to existing images using the native “Paint 3D” app.
- Right-click the image you want to add a border to. From the menu select Open with and then click Paint 3D
- The image will open in the native Paint 3D app
- In the menu across the top, click 2D shapes and then click the square shape on the right
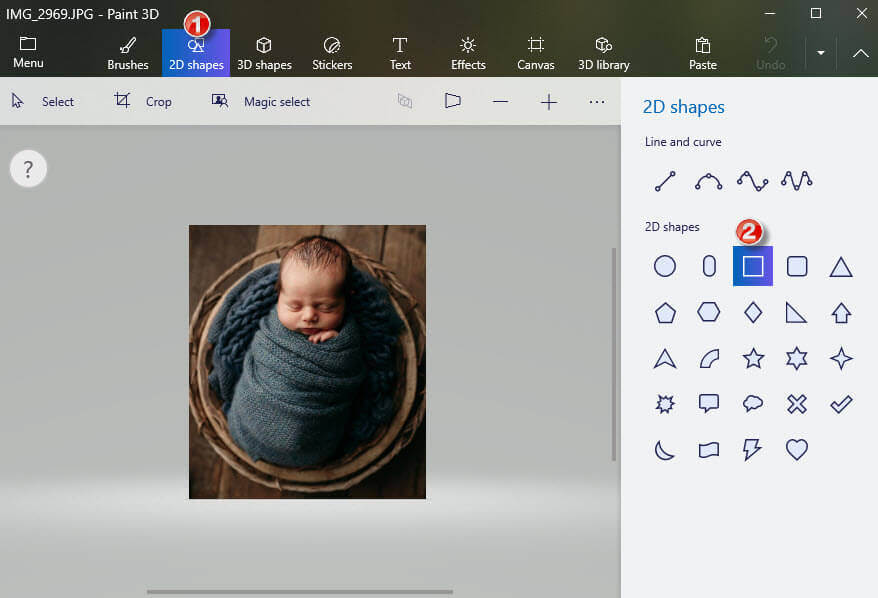
- Now, align your mouse cursor with the top left-hand corner of the image, hold down the left mouse button and drag diagonally down and across the image to the bottom right-hand corner then release the left mouse button. If one edge or another of the border is not quite aligned you can drag each edge individually into the correct position
- You will now see, in the right-hand panel, controls to adjust various elements – color, thickness (width), and opacity
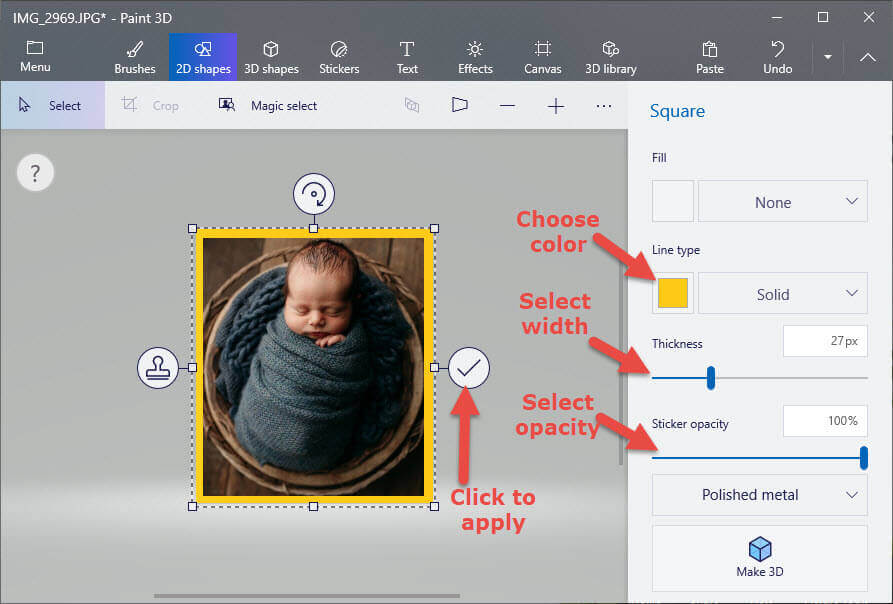
When satisfied, click the tick in the circle to apply the changes. You’re all done and you can now save the image with the new border applied.
How To Add Borders To Screenshots
In this case, I’m going to show you how to use the built-in Snip & Sketch app to apply borders to screenshots.
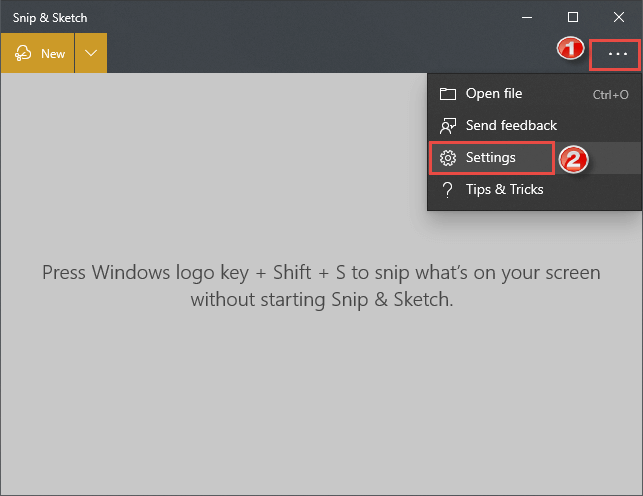
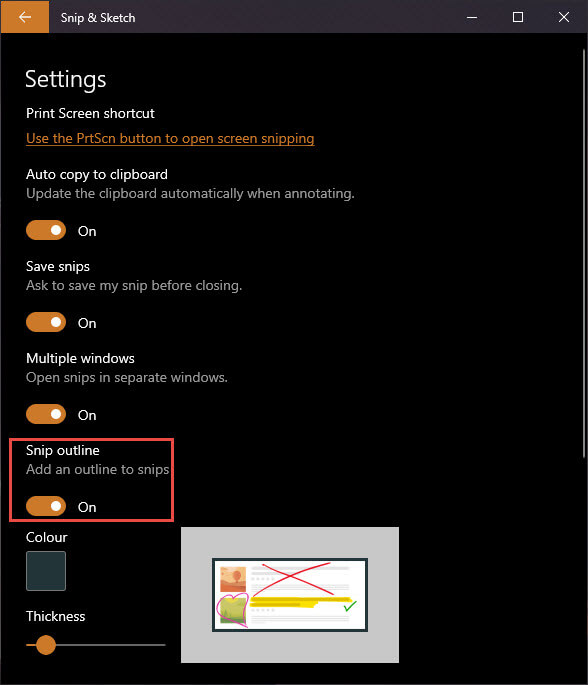
Open Snip & Sketch, click on the three little horizontal dots at the top right of the window, and from the menu, click Settings
- Locate the Snip outline setting and switch it to On
- You’ll now see options to adjust color and thickness directly under that switch
Click the back arrow at the top left in the title bar to return to the capture window and take your screenshot
You can also take the screenshot first and then go through the steps as described above – same result. You can head back to those settings at any time and change the color and thickness for each individual screenshot.
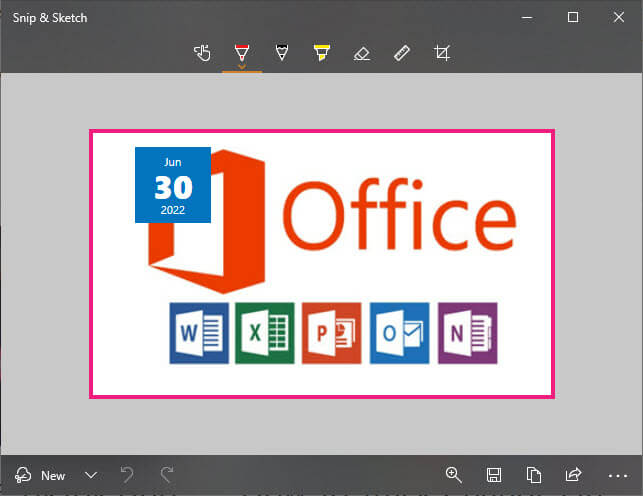
Make sure to save the image when you’re done.
How To Add Frames To Images
As far as I am aware, there is no native app in Windows that will allow you to add a frame. However, most popular image viewers will include this as an option. For the purpose of this exercise, I’m using my favorite image viewer, FastStone.
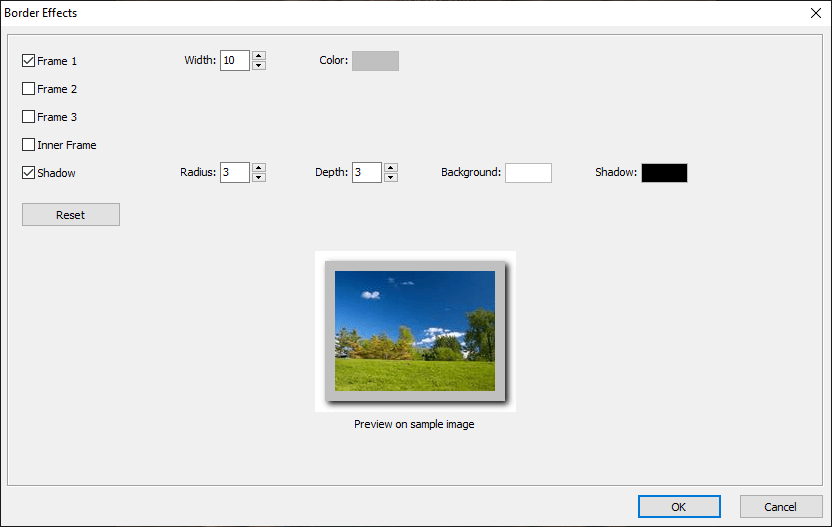
- Open the image in FastStone Image Viewer and hover your mouse cursor over the left-hand side of the window to bring up the hidden editing menu
- Under Effects you’ll see two options: Border Effects and Frame Mask
- Clicking the Border Effects option will bring up a menu where you can choose up to three frames and adjust the color and thickness for each:
(example)

Clicking the Frame Mask option will bring up a selection of 95 different fancy frame shapes to choose from, including hearts and flowers:

Click your chosen frame shape and then click OK. These frames and frame shapes from FastStone can really dress up an image.
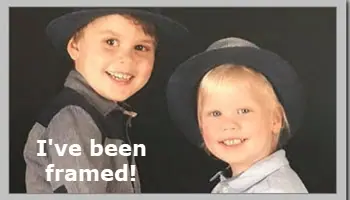
Incidentally, the baby in the photo is my 7th great-grandchild of 8 great-grandchildren in total, and he is a bonny boy.
—
PhotoScape X which is freeware offers quite a bit for creating borders and frames and by using Matte one can easily add a border and frame as otherwise for some reason if using borders first and then a frame the border disappears and I have not found a solution. PSX also offers text and one can save about 16 texts so one does not have to re-type if the same info is needed more than once — eg. signature file.
If more that the freeware is needed, their Pro version is not expensive but for most things the PSX program will work beautifully for editing from any file type through to a completed framed image.
I have and can use a variety of imaging programs but enjoy using PSX Pro. Just wish that there were better tutorials on YouTube or anywhere. My goto image viewer for many years, maybe at least 20 or more is Faststone Image Viewer.
This is outdated information I assume. Snip and Sketch no longer has any setting options for snip outlines. I just want to make a simple black frame because Poshmark photos get blown up/zoomed in when you upload them.
No, this is not outdated information. “Snip outline” is an option in Settings. I am in Windows 10 version 21H2.
Oh and also, Paint 3D following these instructions only fills in the photo and doesn’t make a frame around the photo.
Hey Veronica,
What version of Windows are you running? I think that maybe you are on an old version of Windows 10. Either that or there is something wrong with your system.
Both these processes work perfectly in Windows 10 version 21H2.