What Are Ghost Devices?
When you attach a device to your computer, such as a keyboard, mouse, USB thumb drive and so on, Windows makes a record of this device along with the driver information it needs to manage it. When the device is unattached this information is not removed, leaving behind what are known as ghost devices.
These entries accumulate over time and basically clog things up. It doesn’t have to be this way…
Spring Cleaning
Everything in your home needs a good cleaning from time to time and your computer is no exception.
There are many ways to clean up your computer and getting rid of junk is one of them. Junk can be defined as anything that is unnecessary, disk-hogging, or system-slowing clutter. Ghost devices qualify.
Removing Ghost Devices
There is the manual way. This is probably for geeks because they like to get their hands ‘dirty’ and take things apart even though they are working perfectly. I’m guilty of that and have often wondered how I’m going to put it all back together– much to my parents’ chagrin in my younger days.
Then there is the software method which is probably better for those who don’t care about the mechanics so much but just want to get the job done.
The Geeky Method
To get rid of unwanted drivers, devices, or services, use the following steps:
- Open the Start menu and choose Run
- Type in cmd and click OK
- At the command prompt, type: set devmgr_show_nonpresent_devices=1 and press Enter. (Note that nothing seems to happen. This is expected. You are actually setting an environment variable which is going to help you to see hidden devices.)
- On the next command prompt line, type devmgmt.msc and press Enter. This will launch the Windows Device Manager Console.
- In the Device Manager Console, from the View Menu, select Show Hidden Devices.
Note: Make a backup of the registry before making any changes. Do not tamper with System Devices. You can break your system if you remove something you shouldn’t.
The Non-Geeky Method
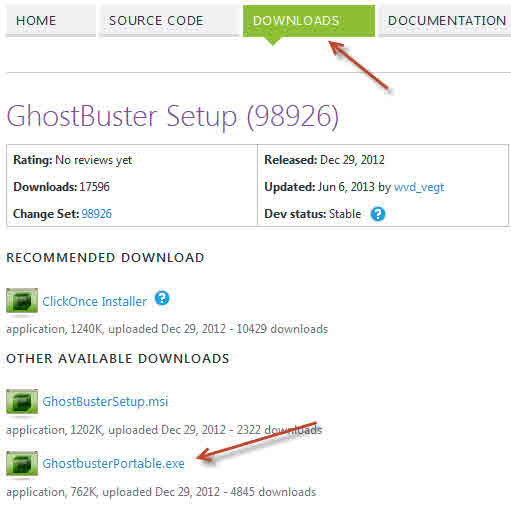
Codeplex has written a utility to accomplish all of the above with no fuss and no muss. It is called GhostBuster. There is a Portable Version, also.
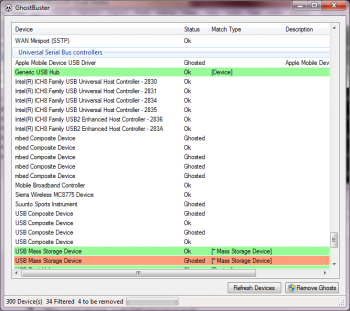
This application enumerates all devices, detects ghosted devices and removes these if they match selectable devices types and/or devices classes with a single mouse-click.
Change Log:
- Added WMI based RestorePoint support. Note this is experimental code, it creates a ‘GhostBuster Restore Point’.
- Removed test code from program.cs.
- Improved counting.
- Changed color of ghosted but unfiltered devices.
- Changed HwEntries into an ObservableCollection.
- Added Properties Form.
- Added Properties MenuItem to Right-Click Context Menu. It shows a dialog with some more information on the driver properties found in the registry.
- Added Hide Unfiltered Devices to Right-Click Context Menu. This will hide all unfiltered and non ghosted devices and will condense the list’s size.
Note: If you choose to have GhostBuster create a System Restore Point, be sure you have System Restore enabled first. It will break if you don’t do this.
Final Words
Even though I have called using GhosterBuster a non-geeky method there is nothing non-geeky about this entire endeavor.
Ghost Buster is a small but powerful utility. It does it’s job. Period. Use it wisely.
Once again, you will probably see no performance benefits from removing ghost devices. It won’t speed up your computer any more than cleaning your Registry will noticeably speed things up. What it may do, however, is give you that warm, fuzzy feeling you get from knowing that you have taken one more small step toward make your computer run as good as it possibly can.
Richard


found about 80 ghost devices, chose them as devices manually by right clicking, it would be better if the software have an option to chose automatically all the ghost devices they found 🙂
thank you for this Mr Richard, i like the feeling already 😀
Hi Arie,
Glad you found it useful,
Warm and fuzzy, you mean? 🙂
Richard
Been using this for a while. Seems safe and useful. I feel it would be useful to be able to order the items’ status by clicking on the column heading to get all the ghosts in one place, rather than have to scroll down to find them, which I suggested to the author’s site some time back. There is always a mystery first entry with a whole load of zeros with no properties and “No device class specified”, which other folk have advised to steer clear of. Any idea what this is?
Hi Dave,
The sorting idea is a good one. I tried clicking the column headers to group the ghosts and was disappointed to see that it didn’t work. I don’t know what programming language he is using but adding that feature should be pretty straightforward.
If you right-click and choose Hide Unfiltered, that may be the solution you are looking for.
I have no idea what that system entry is. To be safe I never remove System devices.
Did you ever get a response from the author? You might ask him about that mystery device, too.
I’d be interested in what he has to say,
Richard
Some sort of update checker would also be useful, as there appears to be no way of doing this from within the program or from the GUI. Still smacks slightly to me of a “work in progress”. A few refinements needed I feel but it certainly does basically what it says on the tin!