
In part one of this series I showed you how to hide the Navigation Pane and how to Show all Folders. In Part 2 I will show you how to remove individual links from the Navigation Pane.
This will involve editing the registry so use caution and create a system restore point and/or backup your registry.
This guide also works with Windows 7.
If it is your intention to hide more than one link then you can apply all the edits to the registry without signing out and back in again every time.
Open up your registry editor by typing regedit on the Start screen of Windows 8 and then press Enter; or by clicking on the Start orb and typing regedit in the search box and press Enter in Windows 7.
What you will need to do is take ownership and give yourself permission to edit each of the keys you wish to edit.
Select the link you want to hide and then navigate to its respective key. Take note that if you are using the 64bit version of Windows 7/8 then you have an extra key to take ownership and edit for each of the links.
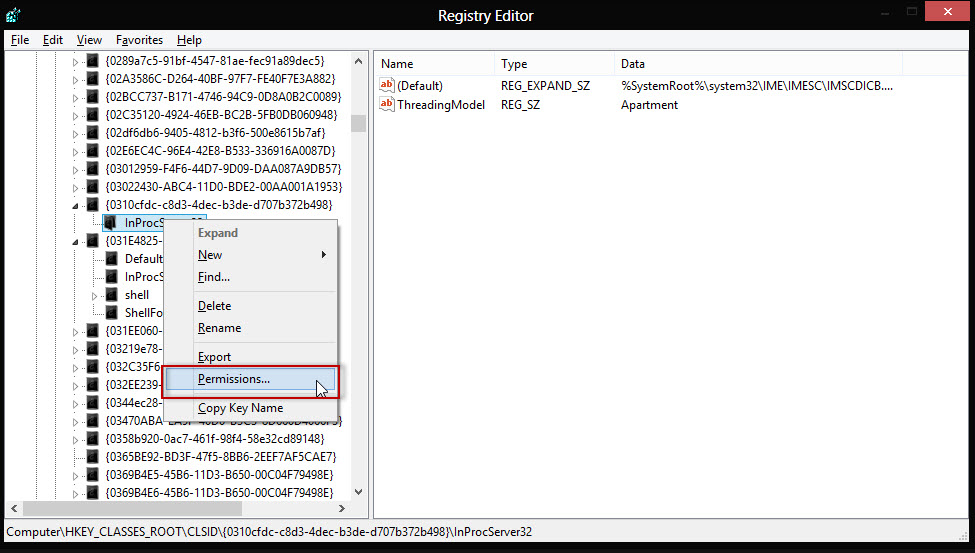
To take ownership the manual way, navigate to the key in question.
Right click on it and select Permissions.
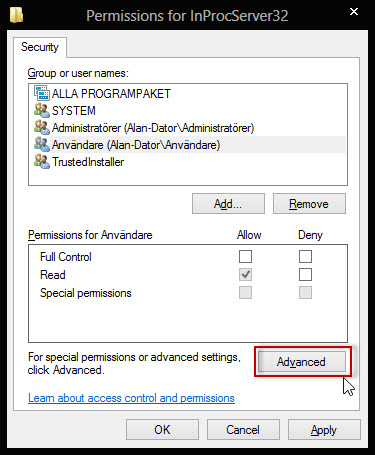
In the window that opens click on Advanced.
At the top of the next Window, you will see Owner, who the owner is and Change. Click on Change.
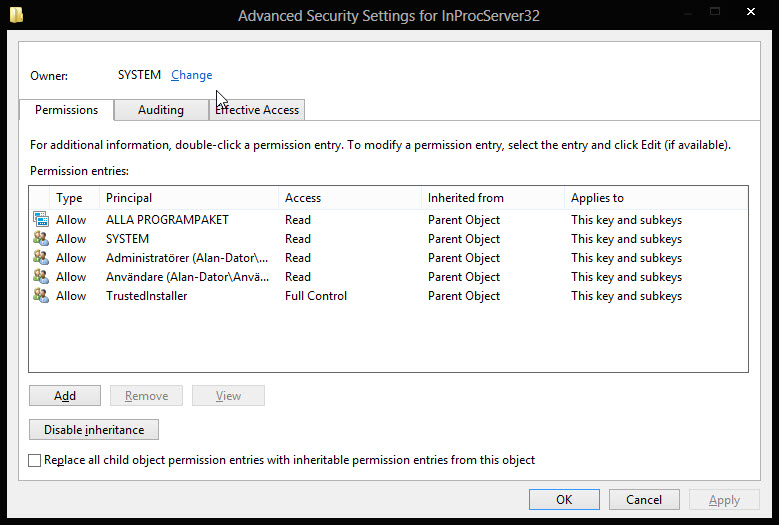
Another window will open, type in your user name and click OK.

You will now find that the owner has changed to you. Check the box under your name to allow all sub-containers, etc to change ownership then click OK.

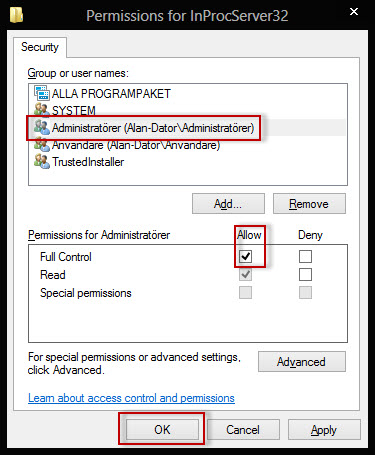
Now you are back at the first window, from here you can now change the permissions.
Click on your user name to highlight it then put a checkmark in the Full Control box and click OK.
You can now edit the key in question.
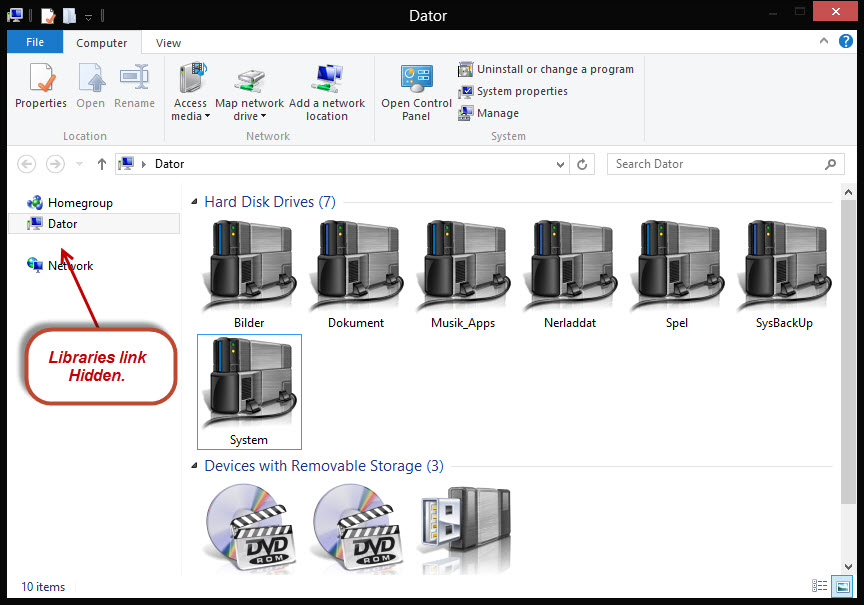
To Remove the Libraries Link
To remove this link, in your registry click on HKEY_CLASSES_ROOT then scroll down and click on CLSID to expand it.
Scroll down and look for this key {031E4825-7B94-4dc3-B131-E946B44C8DD5} make sure you open the right key, check the letters and numbers! Now right click on ShellFolder and take ownership as per instructions above.
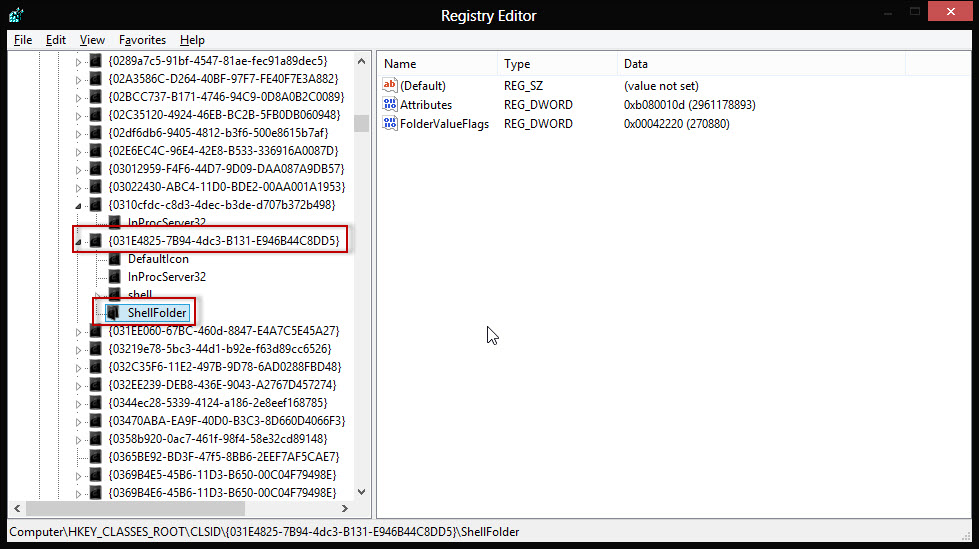
Once you have ownership and set the permissions, in the right hand pane look to see if there is a DWORD called Attributes, if not right click in the right hand pane and select New then DWORD (32bit) and name it Attributes.

Double click on the DWord Attributes and enter or change any data to this: b090010d and then click OK.

If you are using a 64bit version of Windows then click on HKEY_LOCAL_MACHINE then SOFTWARE.
Scroll down and click on WOW6432Node then Classes and then CLSID.
Scroll down to the key: {031E4825-7B94-4dc3-B131-E946B44C8DD5}, right click on ShellFolder and follow the instructions as above.
Close your registry editor and either sign out then back in again or restart your computer and the Libraries Link will be hidden.
If you want to unhide the link again, then navigate to the dword(s) above and change the data to b080010d and reboot.
To Remove the Computer link
Follow the instructions as for the Libraries but navigate to {20D04FE0-3AEA-1069-A2D8-08002B30309D}, and the data to enter in the Attributes dword is b094010c to hide the link and b084010c to show it again. *Don’t forget that with 64bit versions you’ll need to follow the second key path as above substituting the above key number and entering the data as above.
To Remove the Network Link
Follow the instructions as for the Libraries but navigate to {F02C1A0D-BE21-4350-88B0-7367FC96EF3C}, and the data to enter in the Attributes dword is b0940064 to hide the link and b0040064 to show it again. *Don’tforget that with 64bit versions you’ll need to follow the second key path as above substituting the above key number and entering the data as above.
To Remove the Homegroup link
Follow the instructions as for the Libraries but navigate to {B4FB3F98-C1EA-428d-A78A-D1F5659CBA93}, and the data to enter in the Attributes dword is b094010c to hide the link and b084010c to show it again. *Don’t forget that with 64bit versions you’ll need to follow the second key path as above substituting the above key number and entering the data as above.
*With the Homegroup you must reboot the computer to apply.
Coming in Part 3 I’ll show you how to add system shortcuts to the Explorer Pane.