Compact Cassette
I’ve been asked a few times to copy compact cassettes to a music CD. How many people remember those or know what they are?
“The Compact Cassette or Musicassette (MC), also commonly called cassette tape, audio cassette, or simply tape or cassette, is an analog magnetic tape recording format for audio recording and playback.” ~ Wikipedia
What I Use
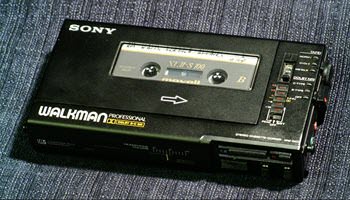
A compact cassette player. I have two. A GE model no. 3-54738, AM/FM stereo radio cassette player and a Sony Walkman. Neither has any output plug-in options except for earphones. This time I’m using the GE model.

I have a white wire with two 3.55 plug-ins, one on each end. One to plug into the headphones jack on my cassette player and the other end goes into the Line In jack on my computer’s sound card.

Once I got the hardware set up, it was just a matter of running Audacity.
Audacity is a free, easy-to-use, multi-track audio editor and recorder for Windows, Mac OS X, GNU/Linux and other operating systems. The interface is translated into many languages.
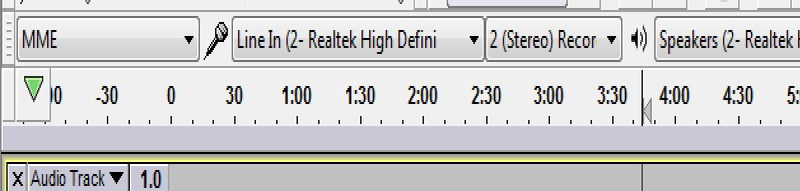
I had to make sure it was set up to record from the Line In option. On this line of settings there is an option that has a small picture of a microphone next to it. I’ve used this before so mine is already set on Line In.
Recording
It was then just a matter of playing the tape, and pressing the round red Record Button towards the top-left in Audacity. I let it play on through before hitting the slightly yellow square Stop Button. Then I had to go through the entire recorded track and separate each song into individual MP3 files to prepare it for burning to a CD.
With the recorded track still open you will need to zoom in or out using the magnifying glass symbols at the top of the program as I have indicated in the picture. The goal here is to adjust it to see where one song ends and the other begins. Depending on sound quality, some might be easier to distinguish than others.
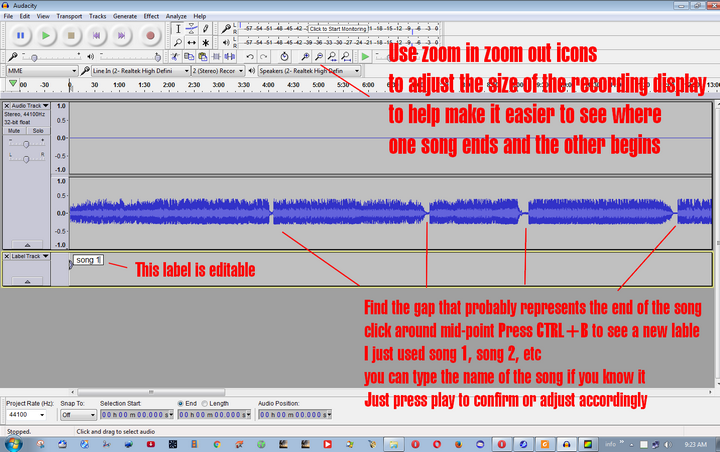
You’re basically looking for what looks like a gap between the songs. You need to isolate each song title into its individual track. If you’re not sure if it’s the end or not, just click slightly before the gap appears and click on the play button. A little bit of trial and error and you should be able to isolate each song.
You of course could just play them all right on through and mark them accordingly, but I had seven cassettes to do and it was all Christian music which I really don’t care for. (I’m not much of a music fan of any type. Each to his/her own.)
Marking Each Song
I started at the beginning of the track and clicked my mouse there. Then, on your keyboard, click on the Ctrl and B buttons and you’ll notice a little square appear in a new track (label track) under your song(s). This little square is editable, so type the name of the song if you know the title. I just used song 1. Then go to the end of the song, click just after the song ends or just before the other begins. Then click on Ctrl and B again and type in a label. This is where I typed song 2. Continue until you have labeled all of the songs.
If I haven’t confused you too much at this point, once done, you need to export your songs into individual files.
Exporting Your Songs
Click on File, and Export Multiple…

You’ll get the Export Multiple window pop-up. Choose your folder. You’ll probably want to keep MP3 Files as the File Type, or set it to that if it’s not. Also, make sure under the section Split files based on: Labels option is checked. Otherwise, I didn’t touch any of the other settings.

Then, just click on the Export button.
Then you’ll get the Edit Metadata Tags box. You can enter any information that you wish. I just left it as is and clicked on OK. Then it came up again! It seems like you have to do this for every song. Metadata is the information about the song that will appear on the screen of your CD player if your player has it.

Then you will get the Exporting prompt.
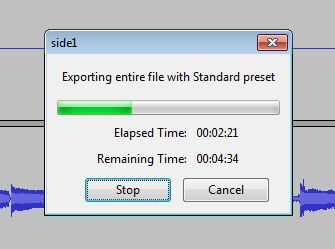
Wait until it finishes. You will finally get a message saying it Successfully exported the following (number of files) files. For this screen shot, in my case, it was 14 files. This will vary depending on your own situation. Just click on OK.

Then it’s just a matter of dropping the MP3 files into your choice of burning software in order to burn a music CD. In my case, I started with seven cassettes. One was broken, one only had a single song on either side, but it still took up six CDs in all.
This is not the first time I’ve recorded with Audacity, but it is the first time I split up a recording.
—
excellent article – didn’t know anyone else even remembered these things
We are multitudes, and you are correct. Great article.
Thanks for the comments.
Hello,
Thank you for your tutorial.
Please make a tutorial for save VHS tape on computer.
Yes. I use a Toshiba DVD Video Cassette Recorder D-VR7 to transfer movies from VHS to DVD. I recently uploaded a not yet published article to Dave’s concerning this. Hopefully it will appear soon.
Excellent explanation.
I agree with Milad. Do you intend to make the tutorial as I have a some important tapes I would love to convert.
Yes. I use a Toshiba DVD Video Cassette Recorder D-VR7 to transfer movies from VHS to DVD. I recently uploaded a not yet published article to Dave’s concerning this. Hopefully it will appear soon.