
Today’s monitors are capable of displaying high DPI screens and the designers of older desktop programs could not have prepared for this. The old default of 96 DPI is what those older programs expect and that is how they were designed to display. Windows makes an effort to scale them on high DPI monitors by stretching them a bit. If it didn’t, then all those programs would be so small as to make them difficult if not impossible to use.
Windows doesn’t always get it exactly right, however, and today’s Quick Tips article will show you how to help it along.
Note: In the Windows version 1903 update a new setting was added where you could change the DPI settings but that doesn’t always work as advertised so we’re going to take a different route — one with more control — which totally suits my fancy.
Getting To The Setting
- Open the offending program
- Right-click the program’s icon in the Taskbar
- In the menu that opens, right-click the program’s name
- In the menu that opens, choose Properties

- In the window that opens, click the Compatability tab
- Click the Change high DPI settings button
- In the window that opens, check the indicated box under Program DPI
- In the drop-down menu, choose I signed in to Windows
- Click OK
- Click OK
You will have to restart your program to see the changes.
Before And After
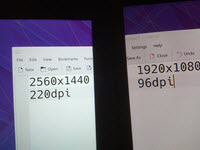
Before
After

These screenshots were taken on a 2560 x 1440p monitor. If you look closely at the indicated text you will plainly see an improvement in the readability of the text in the “After” image. Enlarge these images by clicking on them to really get a good look.
After sitting in front of a computer screen all day it is easy to become inured to blurry text. Give your poor eyes a break and give this a try.
Bonus Tip – New Task Manager Settings
In the Windows 10 version 1903 update, some new headers were added to the Task Manager and one of them was DPI Awareness.
- Use the CTRL Key + SHIFT + ESC to quickly open the Task Manager
- Click on the Details tab
- Right-click any header
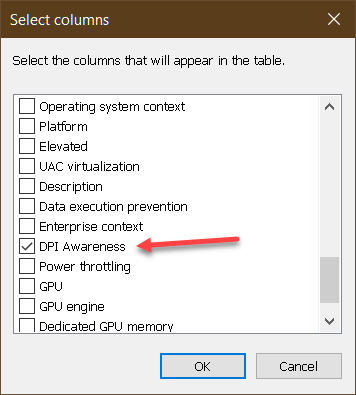
- In the menu that opens, choose Select columns
- In the window that opens, check the box labeled DPI Awareness
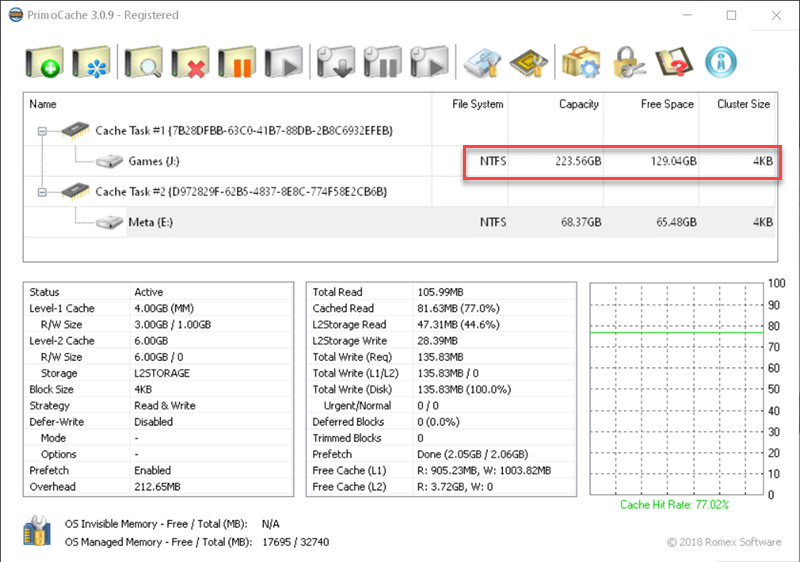
Now your Task Manager window should look something like this:

In this new column there are five states that will be reported:
- Unaware – All Windows versions support this. Windows will stretch these program displays and text might become blurry
- System – Available since Windows Vista, system-aware programs will display correctly on the main monitor but if the program is moved to another monitor with a different DPI setting, or if the DPI settings are changed, then it will revert to the Unaware state mentioned above
- Per-Monitor – Since Windows 8.x this setting will cause these programs to display correctly even if the DPI settings change
- Per-Monitor V2 – Available since Windows version 1703 this newer version offers several additional benefits over the previous version 1
- Unavailable – Pretty much self-explanatory
As always, if you have any helpful suggestions, comments or questions, please share them with us,
Richard
—