 Notifications
Windows 10 provides a Notification Area which, well.. notifies you with App and System information. You also have the option of Enabling/Disabling this feature on a per App basis. What you may not know, however, is that you can also control the Priority and Number of notifications you get. This Windows 10 Quick Tip will walk you through these very simple adjustments.
All the settings discussed in this post are available via the Settings Menu. You will be pleased to hear that no Group Policy or Registry hacks are forthcoming. Oh joy!
How to Change Notification Behavior
Note: The following images can all be clicked to enlarge them if you want.
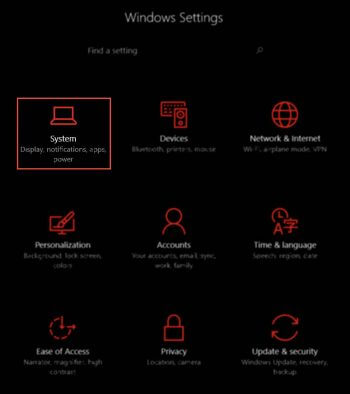
- To open the Settings Menu use the Windows Key + I Hotkey
- Choose System
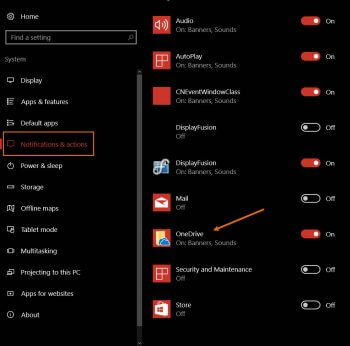
- Choose Notifications & actions
On this menu any of the notifications for a particular App can be Enabled or Disabled by simply using the Toggles in the right panel. You probably already knew that. If you’d like to have finer control over a particular App’s notification settings, read on. I’ll be using OneDrive for this example, but it’s the same for all of them.
- Click on the App you want to modify
The top Toggle once again allows you to either Enable or Disable notifications for this App altogether. In the indicated Drop-Box you can choose some presets for the maximum Number of notifications you want to see from this App (the default value is three). Finally, in the bottom section, you can choose the Priority of the notifications (ie, where in the list they will show up). If you choose Top, a confirmation window will pop open…
Note: On my machine at least, I was not able to choose Top unless I chose High first. Peculiar behavior, indeed.
That’s all there is to it– short and sweet.
As always, if you have any comments or suggestions, please share,
Richard
—


