Managing Parental Controls
Today it is common for children to have their own smartphones, tablets, and laptops. While fun and educational, they also pose risks if not properly monitored. Most devices have some sort of parental control. In addition, using parental control on your home router can enhance them further. Deciding on how much leeway a child has while online of course depends on what the parents feel is acceptable. If you are looking to protect your child from sensitive sites, start with the device itself then consider including your router’s parental controls.
Tablets
Android Tablets: Most Android tablets allow the use of Google Family Link. Install the app on your device then on your child’s device(s), link the accounts, and then you can manage app usage, screen time, and set content restrictions.
Amazon Fire Tablets: A Fire tablet has a different way to access parental controls. Go to Settings > Parental Controls. Turn on parental controls, set a password, and then adjust the options you wish to restrict and what usage you wish to monitor.
Phones
iPhone/iPad: Use Screen Time. Got to Settings > Screen Time. Choose “This is my child’s iPhone/iPad”, and set up content restrictions, screen time limits, and privacy settings.
Android: Use Google Family Link: Install the Family Link App, link accounts, and manage app usage, screen time, and content restrictions.
PC (Windows) Use Microsoft Family Safety. Create a child account linked to the parent account. Manage screen time, content filters, and even set spending controls.
Software
Third-party applications can increase the controls a parent has. Some are invasive, and their use depends on how protective you want to be. For example “Bark” software uses AI to scan your child’s emails, social media profiles, texts, and media for harmful content.
Router Parental Controls
Parental controls on your router protect only devices that use your router. If your child takes their device to a friend’s house your router restrictions do not apply. If your child’s friend does not have parental controls in place, then they have unfiltered access to the internet.
A major benefit of using the parental controls on your router is that they can be applied to all devices that use your router. This allows monitoring not only your children’s devices but also the MAC addresses of devices belonging to babysitters, visiting relatives, and other visitors. Their restrictions can be different than your children but what is accessed on the internet can be monitored. Ensuring that even visiting adults cannot use their PCs to access sensitive sites while in your home is not invasive – it protects you and your family.
How To Set Your Router’s Parental Controls
I have used four different routers as examples: Arris, NetGear, Verizon, and Zyxel. Your router should have very similar methods.
The first step regardless of the router is to access the router’s software. To do so:
- Open any browser and enter the router’s IP address in the address bar. Usually “192.168.0.1” and “192.168.1.1”.

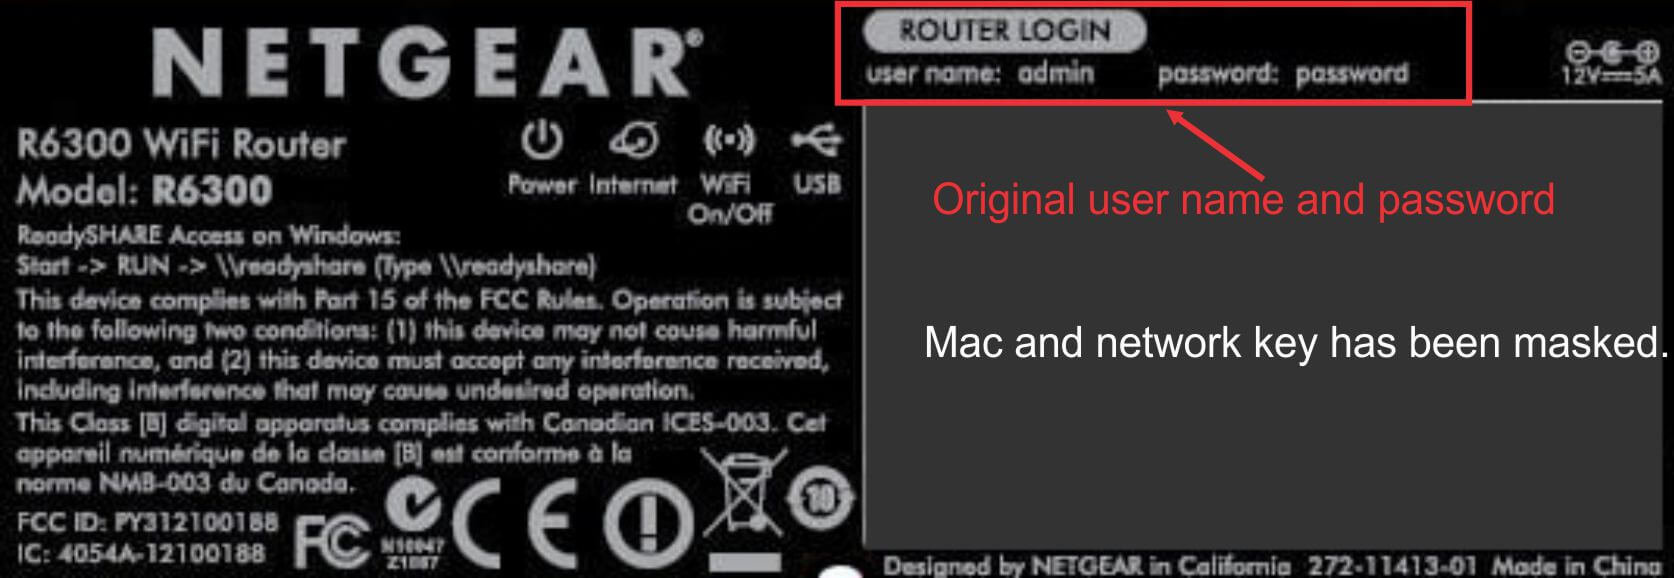
- Enter the username and password. These are often displayed on the router. This site will give you the most probable combinations.
- The screen below is an example of a username and password attached to a router.

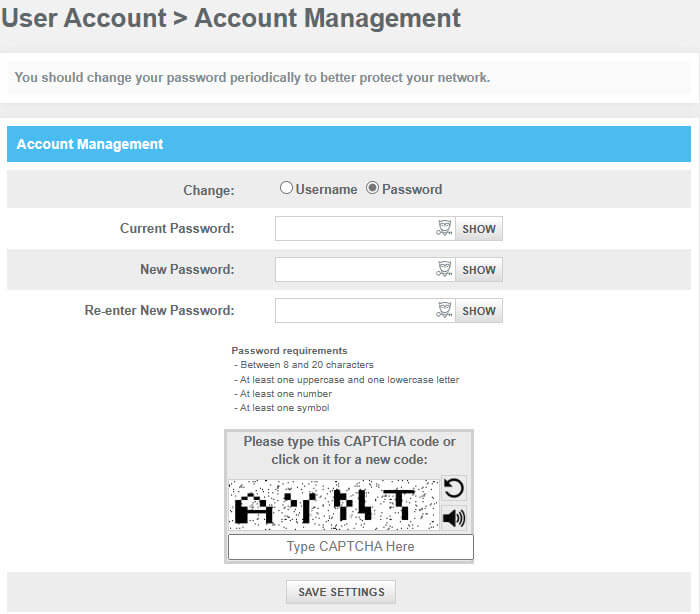
- One of the first things you should do is change them. Every hacker is aware of and has access to these simple sign-ins. Change them in the user account. Your router should have a similar screen.

- Once the router is accessed, navigate to:
- Zyxel – Go the “Security” > “Parental Controls”.
- Verizon, Netgear: Go directly to the Parental Controls section.
- Arris: See instructions after Step 9.
- Create a Profile: Click on “Add Profile’ to create a new parental control profile. Give it a descriptive name.
- Select Devices. Choose each device you wish to have parental controls.
- Set Schedule: Define the periods and days when internet access should be blocked.
- Save Settings: Click “Apply” to Save your settings. Note: On Zyxel Routers, click on “Next” and then “Finish” to save your settings.

Arris Routers have a greater array of choices when setting parental controls. Click on Parental Controls and select the categories you wish to set.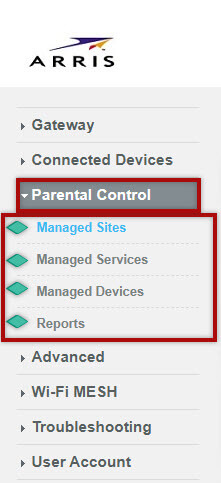
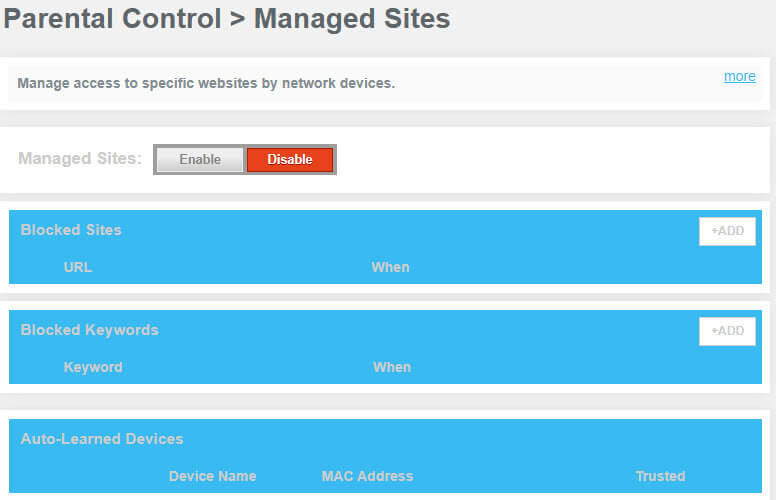
Managed Sites
- Select enable and add any Website’s address (URL) to block it. You may set specific times of the week or day.
- Add any Keywords you wish to block and any specific times.
- Add any auto-learned devices that you wish to block. Some routers will automatically see and register a device. Add the MAC address to block it.

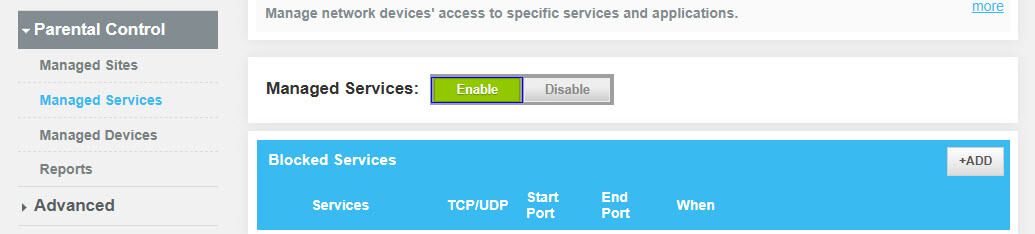
Managed Services
- Select Enable.
- Add services or applications. This will prevent them from using the internet.
- Every device not marked “Yes” will have these restrictions.

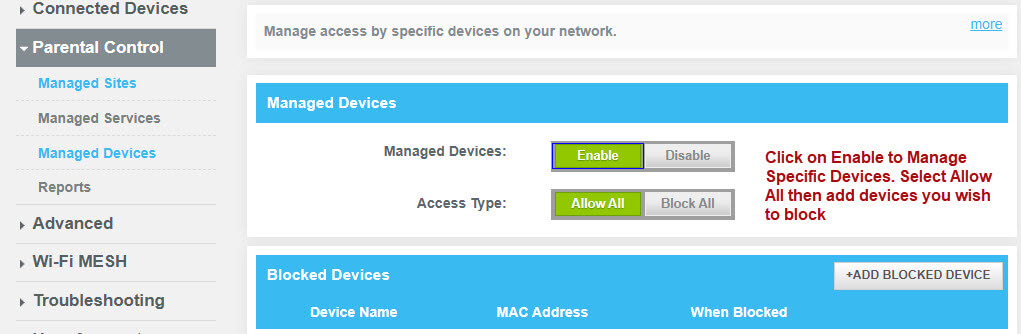
Managed Devices
- Select Enable.
- Select “Allow All” then if you wish to block a device add its Name and MAC address. You may set a time frame when the device is to be blocked.

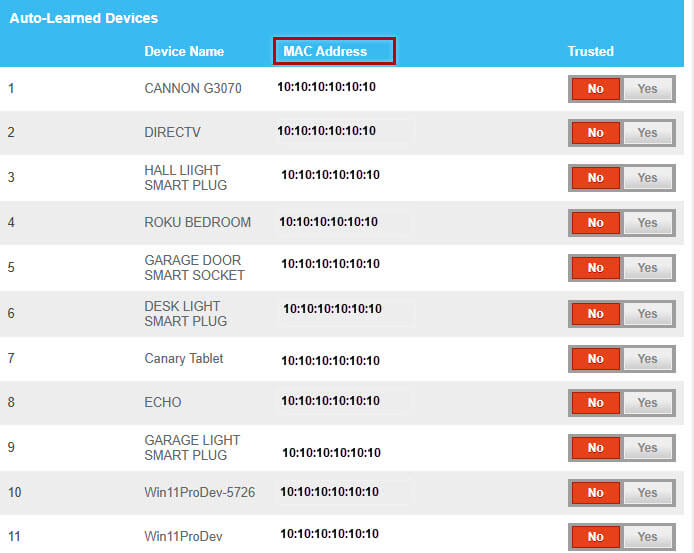
- The list of devices may be quite long. I recommend you locate and name every device on your router. This ensures that any unknown device is accounted for. Below is an example of devices. The MAC addresses have been changed. Notice each device is named.

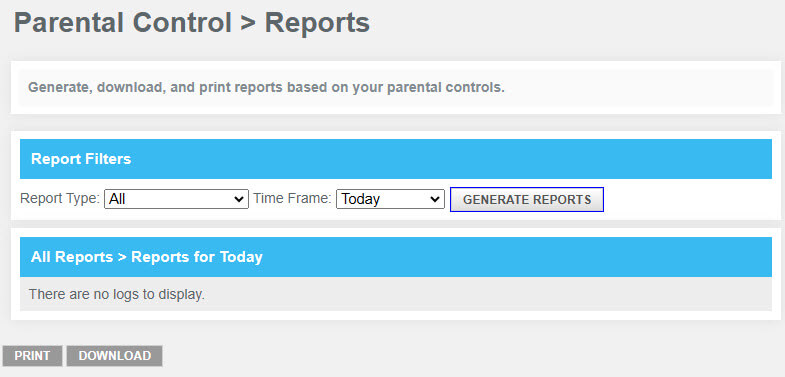
Reports
- Clicking on Reports will allow you to generate, download, and print reports based on the parental controls you have set.

- Enter the CAPTCHA and then “Save” to save your new settings.
- Clicking on Reports will allow you to generate, download, and print reports based on the parental controls you have set.
Summary
The functions above may be unfamiliar to many of you but are easy to perform as long as you have the correct username and password. In most cases, clicking on the displayed device shown in the router is all you must do. If you need to manually add a MAC address, a 12-digit number associated with the “Physical Address, you will have to get it from the device.
- PC. Go to Settings > Network & Internet > Ethernet or Wi-Fi Scroll down and look for Physical Address or (MAC)/.
- iPhone/iPad. Settings > General > About.
- Android Phone. About Phone > Status Information > Phone Wi-Fi MAC address.
- Android Tablets. About Tablet > Status Information > Tablet Wi-Fi MAC address.
- Fire Tablets. (12th Gen). Internet >Wi-Fi Preferences >Connection Assistant > ADVANCED > Advanced Status of (your router’s name) > BSSID. Use the 12-digit number after BSSID.
- Fire Tablets. (8th Gen). Settings > Wi-Fi Preferences > MAC Address.
—