 Did you know that Windows 8.x includes an automatic system for easily backing up your personal data? It’s called “File History”, but it’s not very obvious and consequently not terribly well known either.
We are always urging DCT readers to backup their precious personal files and there couldn’t be a simpler method for Windows 8.x users than utilizing the “File History” feature. It’s right there, built into the operating system all ready to go… that is, once you know how to find and enable it.
File History – Enabling and Usage
Number #1 requirement: a connected USB flash drive or external hard drive.
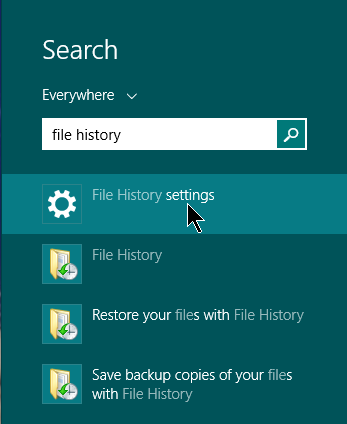
Not sure why Microsoft chose to leave File History disabled by default and not include some kind of clue to its existence. Thankfully, it’s quite easy to locate and enable File History: In the Start Screen, simply type File History, and then click Settings in the list of results:
You’ll then be taken to the settings window which allows you to enable the feature and start backing up your files:
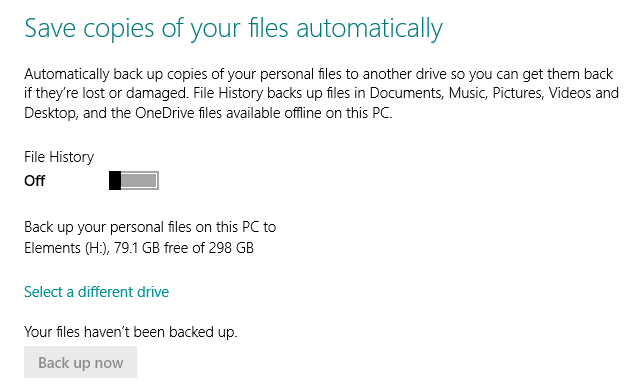 Simply drag the slider to the right to turn the feature on, wait a few seconds while Windows configures, then you’ll be able to click on the Back up now button to begin your backup.
What Does File History Back Up
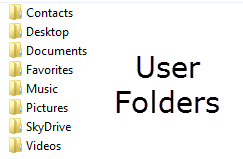
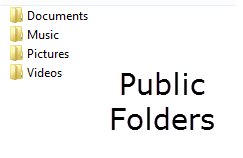
File History backs up all files and subsequent modifications in the following folders by default:
File History Advanced Settings
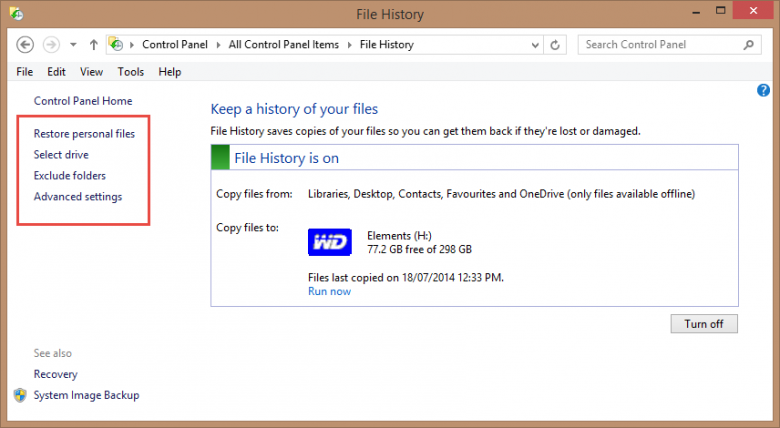
For those who want more control over their backups, you can access advanced File History settings via Control Panel>File History:
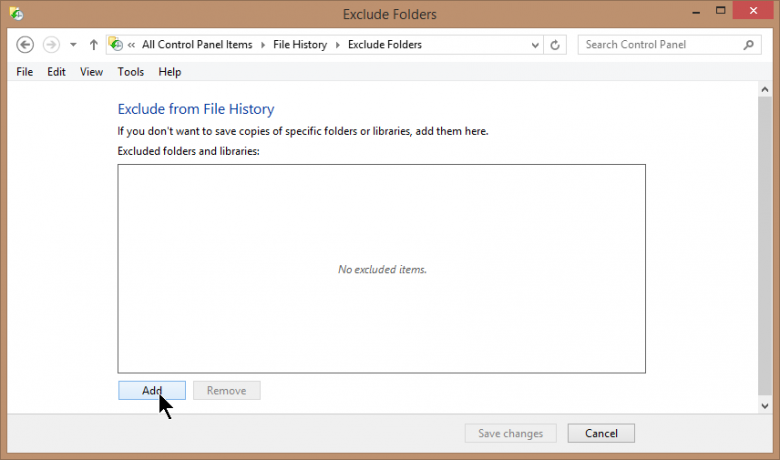
Exclude Folders: add any folders that you don’t want to be part of the back up into an exclusions list:
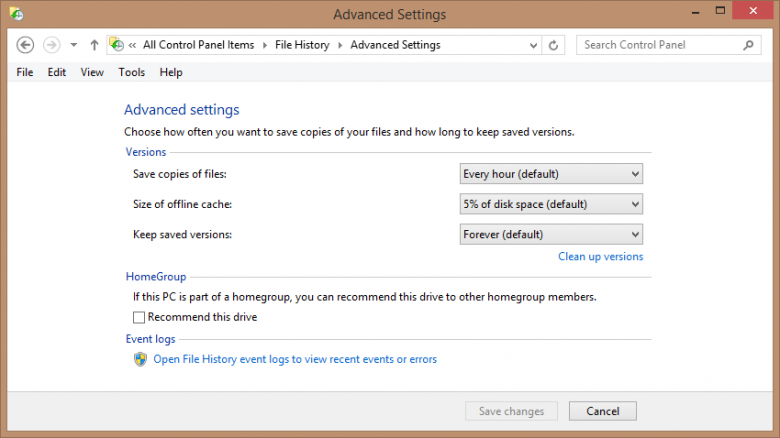
Advanced Settings: By default modified files are saved every hour, stored forever, and the cache takes up 5% of the disk space of the selected drive. These settings can all be configured to suit user preferences via the associated drop down menus:
For example; the default keep saved versions “forever” can be changed to delete after 1 month, 3 months, 6 months, 9 months, 1 year, or 2 years.
Notes:
- Using Network Drives: if the network drive you want isn’t in the list of available drives, tap or click Show all network locations. If the drive you want isn’t listed there either, open File History in Control Panel, tap or click Add a network location, and follow the instructions on the screen.
- Flash Drive vs External Hard Drive: In terms of available space and reliability, external hard drives would be the preferred storage option for your backups.
- Disconnecting the External Hard Drive: Of course, the backups will only continue as long as the external hard drive remains connected. However, disconnecting will do no harm as long as the hard drive is not in use. Next time the drive is connected, File History will spring to life once again.
Bottom Line
File History provides users with a free, simple, method to easily and automatically backup their data, nothing to download or install, just set it up and sit back and relax… what’s not to like. For all those users who tend to put off backing up photos, documents, and other important data, if you’re running Windows 8.x, you no longer have any excuse. 🙂
Creating a desktop shortcut to make that function easily accessible only takes a few seconds.
Oh, OK…that really is brilliant then.