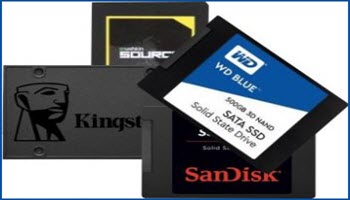
Installing An SSD Into A Desktop
In Part 3 of this series, we will cover how to install an SSD into a Desktop computer. We will also cover how to create the ISO file you will need to install a new copy of Windows on the SSD without cloning. I recommend reading Part 2 of this series because if you decide to use the cloning method, the process is almost identical to the laptop method. Any differences are covered in this section.
(Ed note: Links to other parts of this series have been added at the bottom of this article.)
Desktop Cloning
- Desktops always have additional bays so if you are using the cloning method, just follow the instructions that cover laptops with a second HDD bay.
- Open your computer to access the drive bays.
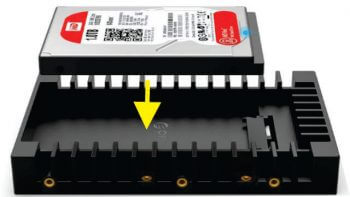
- If your computer is not already equipped with a 2.5-inch drive slot, you will need to purchase an adapter so you can install your new drive into a standard 3.5-inch bay. Failure to do this will not secure your new drive to the computer and could cause damage.

- Place the new SSD in the 3.5” to 2.5” adapter and physically install it in your system.
- Connect the SATA and power cables to the new drive.
- Run the cloning software by following the instructions in the software.
- If the new drive has a smaller capacity than the original drive, follow the instructions in Part 2.
- You can either move the new SSD to the primary position or change the BIOS to boot from the new drive.
Using Windows Media Creation Tool
This is an entirely different method than cloning your drive. It will install a “new” copy of Windows on the SSD. None of your personal data or programs will be installed using this method. In some cases, this method is the only option. For example, if you have a damaged HDD, corrupted data or unremovable malware like “Ransomware” this is the best method. It can be used in any instance –one drive bay or multiple– on laptops or desktops. It is easier to install and has additional benefits but also has some limitations. Continue reading to see if it is the right method for you.
Requirements
- Internet Access, hopefully with good bandwidth.
- You’d rather not or cannot clone your current HDD.
- You must have the ability to boot from a USB drive or a CD/DVD. The USB must be at least 8GB and the CD/DVD blank.
- Before proceeding, you must create the required ISO file using the Windows Media Creation Tool (WMCT). All the instructions are located at this Microsoft link– Windows Media Creation Tool
- One beneficial aspect of this method is that you do not have to do this on your computer. You can download the Media Creation Tool and then create the file on any other computer regardless of the Windows version it is running.
- Because you can create this on another computer, you might find it helpful to go to an area with faster and unlimited bandwidth. A friend’s house, your local library or even a coffee shop are possible alternatives.
- Download the Media Creation Tool and run it. It will create the standalone ISO file.
- If you are going to use the USB method, you will need free open source software to make a bootable USB. Programs like UNetbootin, Rufus, Yumi, Etcher or Universal USB Installer are all good programs but I find UNetbootin easy to use. Follow the instructions in the software to create the bootable drive.
- If you are going to use a CD/DVD, after placing a blank disk in the drive, locate and click on the ISO file that was created. Select “Burn Disk Image”
- Desktops must have a 3.5″ to 2.5″ adapter.
- You should install the correct 32-bit or 64-bit version for your computer. You may only install the same version of Windows on the SSD. Installing the “pro” version on a system that was a “home” version will not be recognized, nor will Windows 10 on a Windows 8.1 or Windows 7.
- If you meet all these requirements, you are good to go.
Additional Information
When working on the inside of your computer, there is always the chance you could have a static discharge that may damage components. You should make it a practice to follow some simple steps to prevent accidental damage caused by a static discharge:
- Always work on a hard surface that does not promote static electricity. Do not place your computer on a towel, blanket or carpet that might hold static.
- Use a grounding strap if available, or ground yourself every couple of minutes by touching and discharging any static build-up in you to the metal frame of your computer.
- If you live in a very dry climate, you could use a humidifier to reduce static.
Summary
Using the Windows Media Creation Tool might prove to be the only way for you. If you have slow internet service and only 4GB of memory, then yes, it will be a slow process. It is not the preferred choice if your original HDD is intact and contains a lot of software that needs to be reinstalled. It is also not a good choice if you no longer have installation disks for your software.
However, it is great for creating a “virgin” installation with nothing on the system that you did not put there. You can be pretty sure that after a clean installation, combined with a new SSD, your system will be the fastest it will ever be.
I would appreciate any feedback that might help others make the transition. If you have any questions not covered here or need clarification of anything I have written, please leave a comment so I may help.
Contents
- Is It Time To Upgrade To An SSD? – Part 1
- Is It Time To Upgrade To An SSD? – Part 2
- Is It Time To Upgrade To An SSD? – Part 3 ← You are here
—


Thank you. Your writing is infused with clarity and instructions that will create results.
Thanks for you comment Henry, It is appreciated.