
All antivirus solutions will occasionally flag a harmless file as being malicious, and these instances are generally known as false positives. The problem with antivirus software is that it is unable to distinguish between the potential for malicious use and actual malicious use, so it errs on the side of caution… which is a good thing.
A typical example is password extraction software, such as Nir Sofer’s MailPassView, which can be used to extract email passwords. Antivirus software has no idea whether this type of software is being used by the legitimate user to extract his/her forgotten passwords or for some nefarious purpose, so it’s flagged as malicious.
Now, Microsoft Defender does a very good job of protecting users, but it does include an annoyance. Well, an annoyance to me anyway. That is, it will flag a file as malicious, but instead of allowing the user to decide whether the file is malicious or not, it will automatically and instantly remove the file from its original location and quarantine it.
Now, admittedly, you can then take steps to restore that file back to its original location, but that involves a somewhat convoluted process; it’s much simpler to whitelist the file in the first place.
- Please read: How To Recover Microsoft Defender Quarantines
Add Files To Defender’s Exclusions
The initial process of navigating to the appropriate setting differs slightly between Windows 10 and Windows 11:
- Windows 10: Navigate to Settings > Update & Security > Windows Security > Virus & threat protection > Manage settings. Scroll down to “Exclusions” and click Add or remove exclusions, then click Add an exclusion
- Windows 11: Navigate to Settings > Privacy & security > Windows Security > Virus & threat protection > Manage settings. Scroll down to “Exclusions” and click Add or remove exclusions, then click Add an exclusion
Alternatively, in both Windows 10 and Windows 11, open Windows Security (click the icon in the notification area of the Taskbar) and click Virus & threat protection, then follow the steps as above.
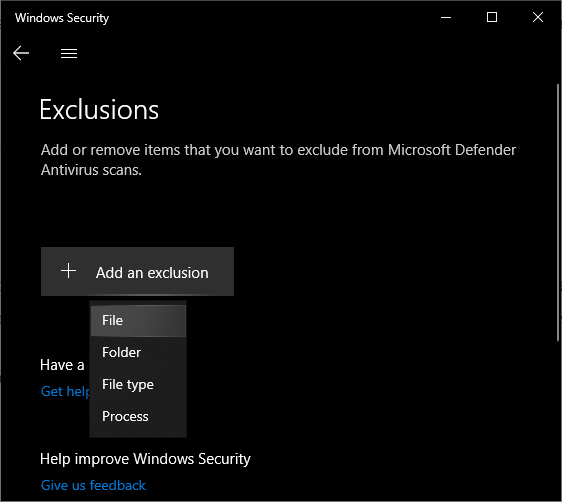
Clicking the Add an exclusion button will initiate a dropdown menu, select File, and then browse to and choose the file you want to exclude from Defender’s scans:
That’s it, all done.
Defender Exclusion Options Explained
- File: Excludes a single file from future scans
- Folder: Excludes a folder and its contents, including subfolders
- File type: Excludes all files with a particular extension. For example, “.png” would exclude all files ending with the .png extension
- Process: Excludes a process by name. For example, “CPix.exe” would exclude files opened by c:\CPix\CPix.exe
BOTTOM LINE:
Of course, this all depends on the user knowing that a safe file will be flagged by Microsoft Defender in the first place. However, if Defender flags and quarantines a file that you want to keep, you can follow our guide To Recover Microsoft Quarantines and then go through the above process to exclude that file from future scans.
—