The information in this article may sound like a difficult undertaking but it is a very easy step-by-step process used to correct several different types of Windows errors without doing a full reinstallation of Windows. The following paragraphs contain abbreviations for information, but you really don’t have to learn any of them. Just follow the step-by-step method as listed. You may skip directly to the step-by-step paragraph and begin.
DISM is an abbreviation for Deployment Image Servicing and Management which is a Command-line or PowerShell tool that is used by administrators for troubleshooting system errors caused by a corrupt system image.
Windows mounts a DISM.exe file that can be used to service a Windows image from a (.wim) file(Windows Imaging Format), .ffu file(Full Flash Update), .vhd file (Virtual Hard Disk Image) or it can also be used to update a running operating system. Basically, this file is used to fix corrupted Windows files instead of doing a complete re-install of Windows.
SFC And DISM
There are several common problems that DISM can fix. While recently trying to connect two computers over a Workgroup, I could not get it to work. There were no error codes displayed to help me understand what was happening; it just stubbornly refused to happen. Believing it to be a permission setting or perhaps a Firewall issue I kept trying to solve the problem myself.
Then I remembered the commonly used SFC /SCANNOW tool I normally use in the CMD Prompt or PowerShell. I figured that might be the answer. SFC /SCANNOW often fixes problems all by itself but they are best used in tandem with DISM being run first then SFC. DISM has the capability of fixing the Component Store Corruption that is known to prevent an SFC Scan from working properly so it is best to run it first.
Remember this is really an easy process and can fix several problems you might be experiencing from upgrade problems, administrative rights issues, and problems similar to the one I experienced. I recommend a Full backup be performed prior.
Step-By-Step CMD Prompt Method
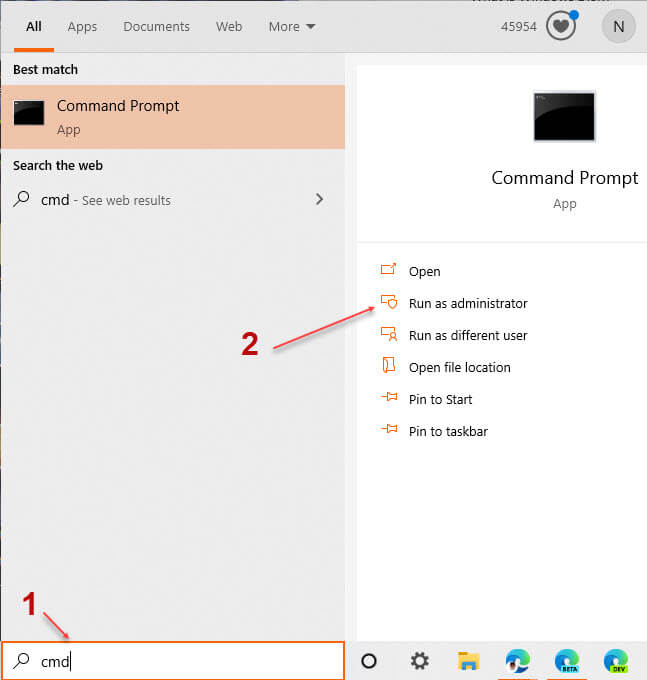
The first step is to open the CMD Prompt in Windows:
Enter CMD in the search area of the taskbar
Click on “Run as Administrator”
At the CMD Prompt, type DISM/Online/Cleanup-image/CheckHealth and Press Enter
This will check the Windows image for any corruption
When it is finished, complete Step 4 below
At the CMD Prompt type DISM/Online/cleanup-image/ScanHealth > and Press Enter
This is a more in-depth look at the Windows image file
Once you hit enter, it may take a while to complete the scan; a percentage of the completed scan will be displayed below
Any problems encountered should be fixed by the next step.
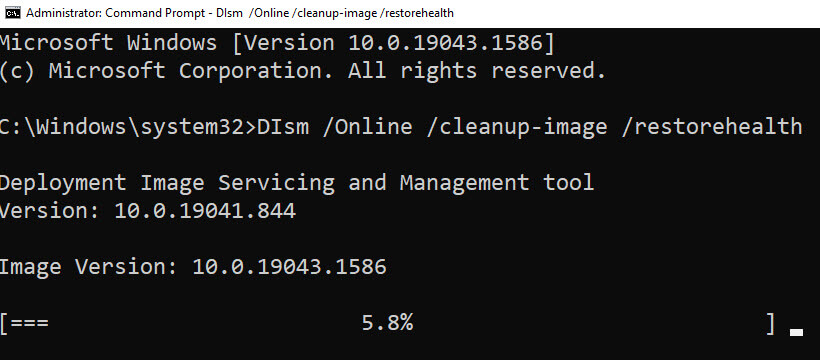
At the CMD Prompt enter DISM/Online/Cleanup-Image /Restorehealth and hit Enter
Do not be concerned if the process appears stuck, it will resume after a few minutes and show a percentage of completion
Once the above steps are complete, Windows Update will go online and download and replace any damaged files
Following DISM, you will be using the System File Checker (SFC) to complete the process:
At the CMD Prompt, enter SFC /SCANNOW (Note: there must be a space after SFC >and press Enter
This process can take quite a while. There is no need to sit there and wait. It normally takes 10 to 20 min for a complete scan to finish and can take longer if several errors are found
Once completed, you will be presented with one of the following display results
Windows Resource Protection did not find any integrity violations. This is the display of a normal system check
Windows Resource Protection found corrupt files and repaired them. This is an even better result meaning that your problems are probably corrected
Windows Resource Protection found corrupt files but was unable to fix some (or all) of them. If you have this display, the issues are not corrected and you must take additional measures to repair your system
( Ed note: The System File Checker takes less than a minute on my system. I have seen it take over an hour on some computers. Your mileage will vary…)
In most cases, Steps 1 through 6 will correct any underlying system error and will rebuild corrupt system files. In some cases, not even this process will fix the problem. In that case, I recommend that you download a Windows ISO File that matches your current system.
Additional Options
Clone Reinstallation
The best solution is if you were fortunate enough to make a Clone of Your Windows Image. You will need to reinstall that clone using the instructions that came with the software used in making the clone. Once completed, you are back in business. Good work on your part!
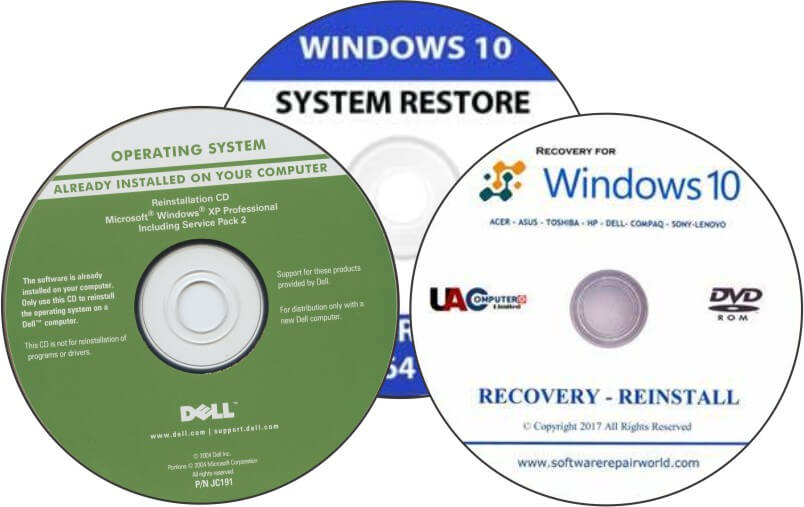
Windows 10 ISO
A Windows 10 ISO file Is a brand new Win 10 system that can be installed on your drive. It has both good and bad aspects. The Bad is that you will need to install a new Windows Image. While the process is not difficult it will delete all files on your system drive. It is therefore recommended to completely back up any file(s) you wish saved. In addition, you must have the original installation disks or registration codes if your software can be downloaded. Using Microsoft’s File Creation Tool will make it easy to create an ISO.
The Good part is once completed, you will have a brand new system installed on your computer and it won’t contain any of the vendor’s “extra” software with it.
Manufacturer’s Reinstallation
Another option is to use the manufacturer-provided, “factory-built” installation disk. This process will require you to have the necessary disks or a way to download the system files. This method will install the original drivers and manufacturer’s software that came with the original purchase. The following links are for System Resets by the stated Manufacturer:
When your computer has a serious problem, the first thing people think of is to go and get a tech support person and have them fix it for you. Hopefully, this article will show you that is not always the case.
Using the DISM tools and the SFC /SCANNOW feature in the CMD Prompt is straightforward and normally does the trick. Probably the only way the three methods will not get you running as well as new is if the HDD on your computer is damaged and not able to accept a new image. Isolating the HDDs bad sectors is an option but with SSDs and HDDs at very low prices it might be time to just install a new disk and then reinstall a new image using one of the three steps above.
If you prefer to work in PowerShell, the command structure is similar and a reference chart for the needed cmdlet can be found on this Microsoft page.
My interest in computers was a natural transition from all things electronics. I was hooked after building my first Heathkit computer around 1976, which evolved into a TSR80 and a long list of Windows computers. My first full blown program was a graphics program which started my career path in graphic design and IT work for 40 years. I now run a small computer repair and service company focused on helping veterans and retirees in our area with computer and software training classes.
11 thoughts on “How To Use DISM”
Corky
Excellent article, Jim. You must be in communication with the machine elves. Don’t let them enslave you!
Jim Canfield
Thanks for the kind words Corky.
Scott Ogea
ALWAYS love your easy to follow step-by-step presentations, thanks for sharing.
Jim Canfield
My pleasure Scott.
bromberg
Can you tell me how DISM and SFC work behind the scenes? i.e., if SFC or DISM reports back that there is something wrong with my system do these utilities actually go out to a Microsoft server and refresh any bad files it finds with a good copy?
Thanks for a well-written article.
Dan
Jim Canfield
Great question Bromberg. SFC uses files that are cached and stored in a compressed folder at %WinDir%\System32\dllcache. It uses the files there to replace any damaged files in your Windows image. These are the small partitions you see on your drive. If corrupted files are found, they will be replaced if possible and a CBS.log will be created which you can see in the %WinDir%\Logs\cbs\cbs.log However, if SFC cannot fix the files from the image files that are cached. DISM can repair the image files online if you are connected online. Also you can use the Source function and point DISM to an external media that contains the image file.
You must however make sure that the image file matches the image you are trying to repair. So a Win10 home version will not repair a Win10 Professional version. Same with 32vs64bit. etc. Hope this helps.
dan
Jim,
I’ve never seen the distinction between SFC and DISM in the detail you went through. This cleared up my vague understanding between the two so thanks very much for the lesson!
Dan
Older Geeks has a handy GUI called DISM-GUI that automates the various DISM and SFC commands by clicking buttons in the interface. Been using this for a couple years, and has helped a lot.
Jim Canfield
Geeks don’t get much older than me Dave. I have not tried it yet but I will check it out. Thanks


Excellent article, Jim. You must be in communication with the machine elves. Don’t let them enslave you!
Thanks for the kind words Corky.
ALWAYS love your easy to follow step-by-step presentations, thanks for sharing.
My pleasure Scott.
Can you tell me how DISM and SFC work behind the scenes? i.e., if SFC or DISM reports back that there is something wrong with my system do these utilities actually go out to a Microsoft server and refresh any bad files it finds with a good copy?
Thanks for a well-written article.
Dan
Great question Bromberg. SFC uses files that are cached and stored in a compressed folder at %WinDir%\System32\dllcache. It uses the files there to replace any damaged files in your Windows image. These are the small partitions you see on your drive. If corrupted files are found, they will be replaced if possible and a CBS.log will be created which you can see in the %WinDir%\Logs\cbs\cbs.log However, if SFC cannot fix the files from the image files that are cached. DISM can repair the image files online if you are connected online. Also you can use the Source function and point DISM to an external media that contains the image file.
You must however make sure that the image file matches the image you are trying to repair. So a Win10 home version will not repair a Win10 Professional version. Same with 32vs64bit. etc. Hope this helps.
Jim,
I’ve never seen the distinction between SFC and DISM in the detail you went through. This cleared up my vague understanding between the two so thanks very much for the lesson!
Dan
Thanks for the kind comment Dan. I appreciate it.
You certainly earned it!
Dan
Older Geeks has a handy GUI called DISM-GUI that automates the various DISM and SFC commands by clicking buttons in the interface. Been using this for a couple years, and has helped a lot.
Geeks don’t get much older than me Dave. I have not tried it yet but I will check it out. Thanks