
You get a new version of Microsoft Word and boom! Nothing is the same as it was before! You cannot find your ruler! Try as you might, it seems to have disappeared. Or, you never had your ruler showing in your older version of Word! I cannot tell you how important I feel it is to have the mighty ruler in view. Suffice it to say that I would not dream of not having my ruler available to me all the time.
Having said that, in the newer versions of Word the Ruler is by default, hidden. Please do not ask me why! It is a mystery to me why anyone would have made this silly decision. Sometimes I think the powers that be sit there and think, “Hah, I bet this will drive them crazy!” But the Ruler is so useful for formatting, etc., that I always have it on and suggest that you do the same.
So let’s get to it, shall we?
Follow the steps below to learn how:
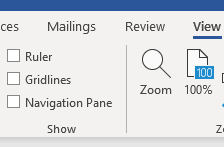
- Go to the View tab on your Ribbon.
- In the Show group, check Ruler.
Now that your Ruler has been enabled, you should see two rulers along the top and left-hand side of your document. In the upper left corner, you should also see a box where you can click through a variety of different tab and indent options that you can place on your ruler to set different tab and indent marks.
I hope this has been helpful to you!
—