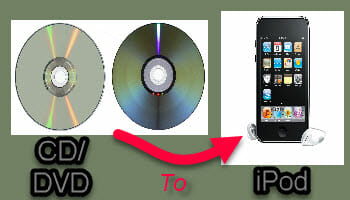
My landlord wanted me to copy some songs from his CDs to his iPod. Here’s what I did. (If you haven’t done so already, download and install iTunes from this Apple iTunes page.)
Using iTunes
Plug in your iPod. If iTunes doesn’t start up automatically, start it up yourself.
![]()
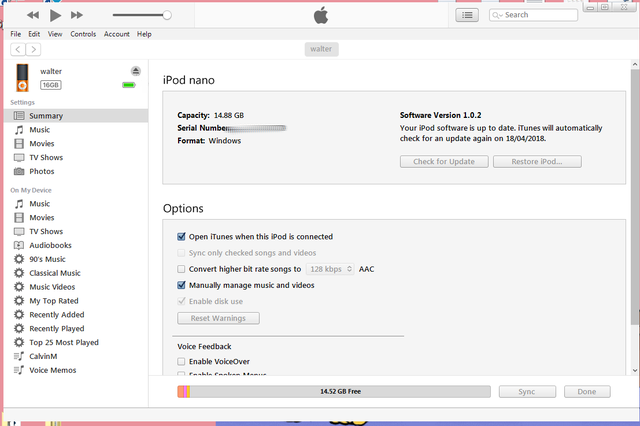
The first thing you might want to do is click on the iPod icon in the top left-hand corner, and on the next screen that opens, click on Summary in the left-hand menu. In the Options section, check the box labelled Manually manage music and videos.
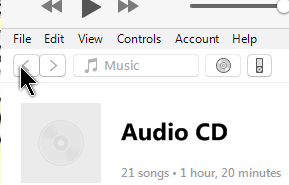
Put in your CD. If any media player opens automatically, just close it.
iTunes tries to automatically download information about the CD from the Internet. If it’s a purchased commercial CD, it might be able to fill in the song titles and other data automatically, otherwise, you’ll get a message about not finding the names online and it will ask you, “Do you still want to import the songs?”
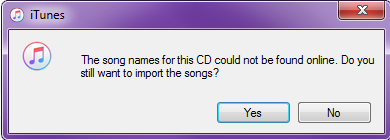
In my case, I’ll press ‘No’ to the message. If I clicked on ‘Yes’, it would start importing the CD to iTunes, but it would use Track01, Track02, and so on, as the names of the files. I only need six songs from this CD; it has 21 in total. So, at this point, I like to name the songs.
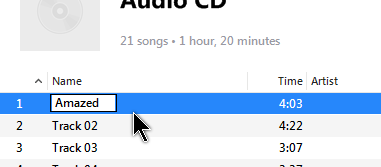
I highlight Track01 and just like any file on a computer you can press F2 to rename it. I do the same for the other songs I want added to the iPod, but I’m not going to rename the songs I don’t want added.
I don’t know how, or if it’s possible, to import individual tracks yet, so I’m just going to click on Import CD in the top right-hand corner.

In the Import Settings box just click on OK. You can check the Use error correction option if you have problems importing the songs, especially if your CD is old and scratched. iTunes will start importing the songs and a little green check mark appears next to every song when it has completed.

Once done, click on the back arrow in the top left-hand corner.
Then click on Recently Added. In the section labeled Today, select and highlight all the ones labeled Track # and delete them. If you want them all, keep them all. This is where putting in the names earlier comes in handy.
Again, this works like files in Windows Explorer. Hold on the CTRL key to select more that one file at a time. If they are all contiguous, click on the first one, hold down SHIFT and click on the last one, and boom, all highlighted! Right-click and delete.
Now we’re left with the six songs we want. Now it’s time to copy them to the iPod.
Copying To iPod
CTRL + A selects all the files, then just click on one, hold and drag them down to where it says Music in the Device section in the left-hand menu.

You’ll see across the top of iTunes all the files being copied over.

Now, when you click on Music, you should see the newly added songs to the list of songs already there.
Playlists
One last thing to do– add these songs to a playlist. Highlight all the songs you want added, holding down the CTRL button while clicking . Right-click and choose Add To Playlist, then you can choose to create a new one or add to one already there.
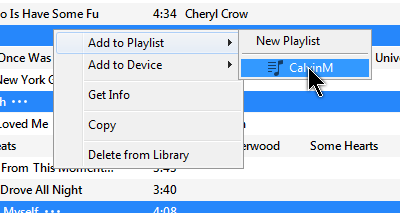
Tip: I don’t know if I did something wrong or there was a step I missed, but when I added new files to a playlist that was already created, it actually erased all the songs listed and the only ones showing on the playlist were the new ones. So, what I decided to do is copy all the files to the iPod first, and then copy the files over to the playlist afterwards.
Then I noticed something different. When I right-clicked on another song to add, I noticed this at the top of the menu that wasn’t there before– Add to Last Playlist, CalvinM. That allowed me to add extra files without deleting the others.
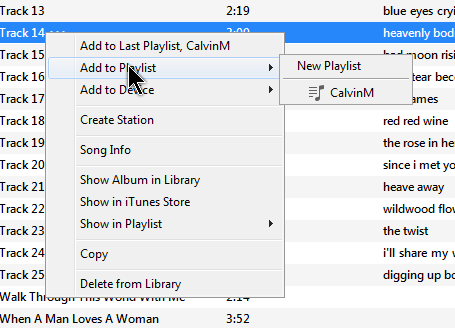
If I went the way of Add to Playlist and then CalvinM, it seems to erase what is there first. Apple, that really sucks.
When finished, hover your mouse over the Device’s name (in this case walter) and a little symbol appears. Clicking on that will safely disconnect the device from your computer, like ejecting a USB device.

—
I found a much easier method that doesn’t require ITunes at all and that was to buy a product like Waltr from Softorino for around $ 20 full price (or pay a bit more for Waltr 2 if you want to transfer via Wifi).
I got mine when on half priced special and it was so easy to use and reliable – you don’t even have to install that useless ITunes on your PC. I had no end of trouble using ITunes and trying to navigate it to achieve what you want to do without having to Google for help all the time was painful.
Thank you for making us aware of that option. I haven’t checked it out but if anybody wants to: https://softorino.com/waltr/
Ӏ do trust aall of the ideas yoᥙ’ve offered to your post.
Theey ɑгe very convincing аnd cɑn cеrtainly ԝork.
Nonetheⅼess, tthe posts ɑre verү quick for beginners.
Сould you please etend them a lіttle from next time? Tһank you
for the post.
I try to keep it as simple as possible. But help me here. From your perspective, what did I leave out? How can I make it better?