I have previously shown you how to reduce the physical size of photos/images using FastStone Image viewer, in order to make them more email/share friendly – you can view that previous article HERE. In this guide I’m going to show you how to reduce an image’s file size while leaving the actual physical size intact.
Assuming your photos are saved in JPEG format which is standard for most systems: JPEG is a lossy compression format which, in layman terms, means the degree of image compression can be adjusted but with a corresponding loss of quality. So, the greater the degree of compression the greater the loss of quality – the trick is to strike a compromise balance between resulting file size and image quality:
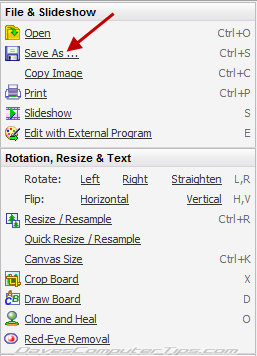
Open your photo in FastStone Image Viewer and move the mouse cursor over to the far left side of the window to initiate FastStone’s popup edit menu, then click on the option to Save As:
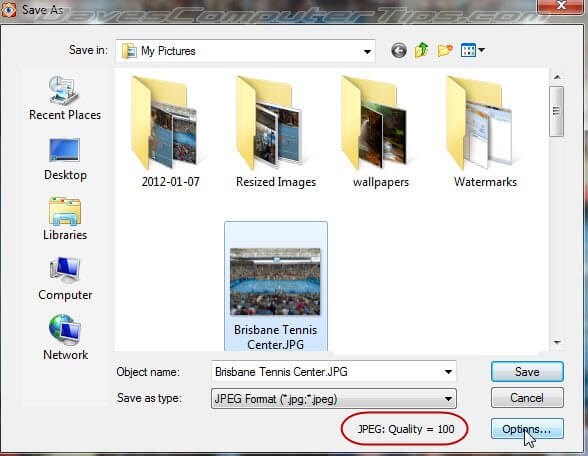
In the ensuing window you will see that image quality is currently set at 100%, now click on the Options button:
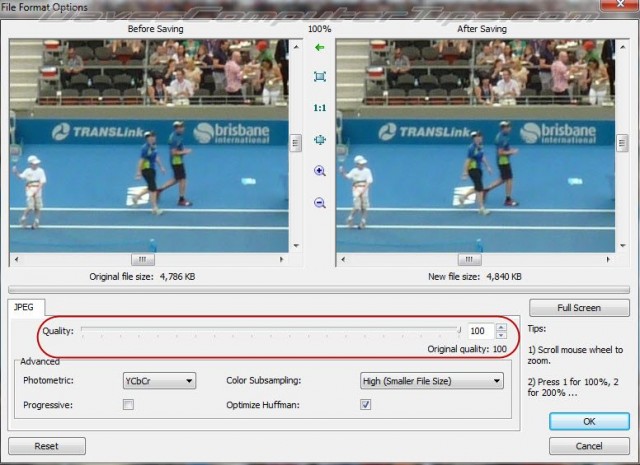
Here you will be presented with side by side views of the image plus a slider and numerical indicator which can be used to adjust the degree of compression:
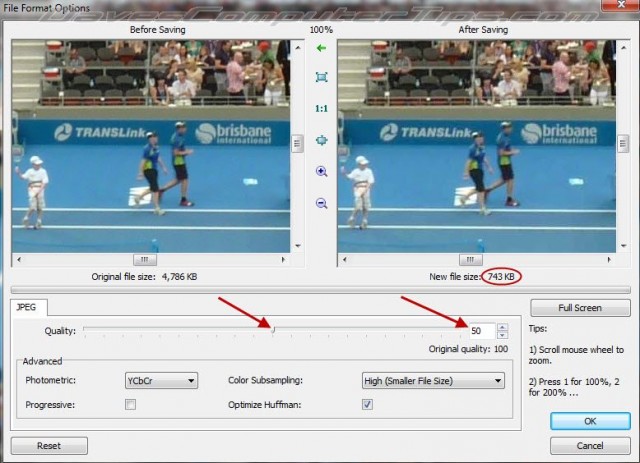
To reduce output file size, drag the Quality slider to the left and make any fine adjustments via the numerical display:
This is where the balance between file size and image quality comes into play, the side by side (before and after) image comparisons are a great help and a little trial and error will soon have you on the right track. As you can see in the example, adjusting the quality to 50% resulted in a dramatic decrease in file size. Because of load limitations I can’t show you the actual before and after images but I can tell you that image degradation was not at all noticeable to the naked eye at the 50% setting and the physical display size remained unchanged.
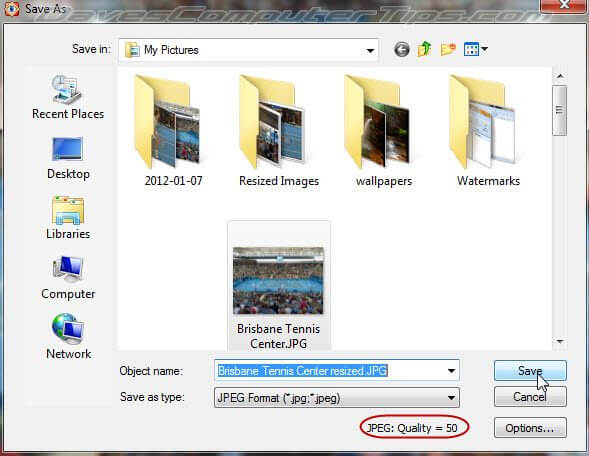
Finally, when satisfied with the result, click on the OK button and you will be taken to the “save’ options window. If you do not wish to replace the original image, make sure to change the saved image name – change it to something appropriate which will also help you differentiate between the original and resized images – then just click the Save button:
- FastStone Image Viewer HOME PAGE
- Download from FreewareBB HERE
Next, I’ll be showing you how to crop photos using FastStone Image Viewer so that a particular element in a photo can be singled out, highlighted and enlarged.
Jim,
Thanks so much for a very informative and useful article. I’ve used FS Image Viewer as my default viewer for quite some time, and have been very pleased with it, but had been unaware of this feature. Looking forward to your next article on this wonderful and free program.
John
Hey John – That was quick! 🙂
Thanks for taking time to post your comments mate, it’s always nice to hear our work is actually being read and appreciated – makes it all worthwhile.
Cheers…Jim
hey thanks but want to know that it can handle multilple images like irfan veiw do(i suppose irfan veiw do)