Have you bought a nice new computer with a whopping hard drive but it has not been partitioned? Would you like to be able to create a new partition without messing up existing data? Gone are the days when you needed to go looking for 3rd party partition manager software, Windows own Disk Management utility now includes the ability to non-destructively create a new partition. The feature was actually first introduced in Vista and, of course, carries over to Windows 7.
Partitioning has several benefits, not the least of which is maintaining data on a secondary partition to help minimize accidental deletion, better organize and manage personal data, and better protect both your system files and your data. Here’s how:
NOTE: Partitioning involves an element of risk. No matter how low that risk, I advise creating a full disk image prior to initiating the process.
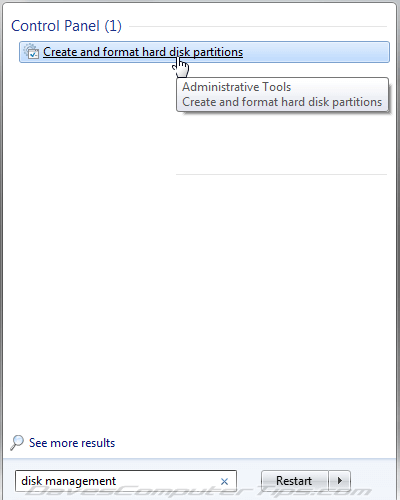
Open Disk Management; click Start and type “disk management” in the bottom search bar. Select Create and Format Hard Disk Partitions:
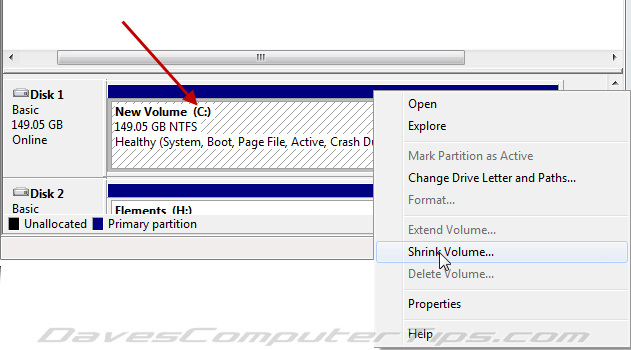
Locate the system partition, almost always “C”. Right click the system partition and select Shrink Volume. You will now receive a “Querying Shrink Space” message, just let that complete, it doesn’t take very long:
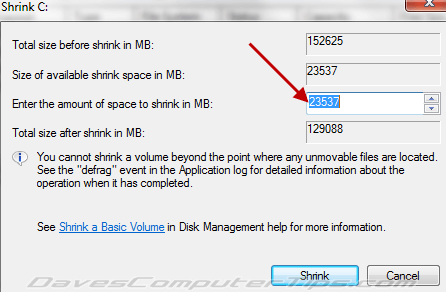
Now you will be able to enter the size, in megabytes, for the new partition. The size already displayed (indicated by the red arrow in the screenshot) is the maximum size you can enter. If you want to decrease the amount of space available for the new partition or retain more space on the system partition, adjust the amount [downward] accordingly. Then click the Shrink button:
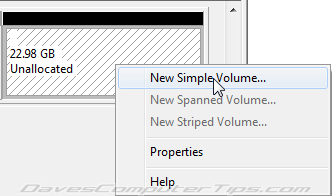
Let it do it’s thing. When completed you should then see a new partition marked Unallocated next to the system partition. Right click the new partition and select “New Simple Volume”:
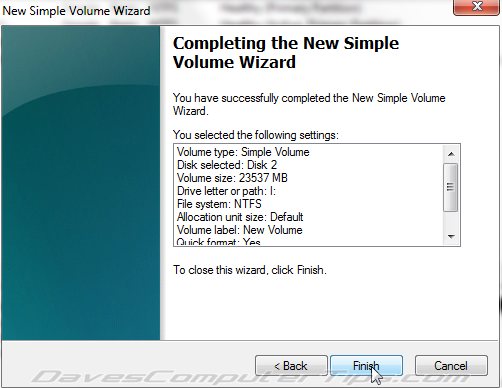
Click Next, leave the size exactly as displayed, just click Next again and follow the rest of the steps presented by the wizard:
- Assign a drive letter (any letter which is not being used).
- Format in NTFS and apply a suitable name (under Volume label).
- Leave “Allocation unit size” at default.
- Leave Quick format enabled (unless you’d prefer a thorough format – in which case remove the checkmark from the Quick format option).
- Enable file and folder compression, if you wish – I generally don’t.
- Click Next, review the details and when satisfied click Finish

That’s all there is to it. Once the formatting has completed you will have a new clean partition to store all your important personal files. install a secondary OS, whatever.
